Customize the Login Pop-up / Disable the login alert box
The default of the Authany Mobile SDKs is to launch AuthUI in ASWebAuthenticationSession in iOS and Custom Tabs in Android. ASWebAuthentication is an API provided by Apple for login purpose. It will store the session cookie and share with Safari, which makes Single Sign-on (SSO) between mobile apps and web apps possible.
However, it requires user consent, and will display a login alert box:
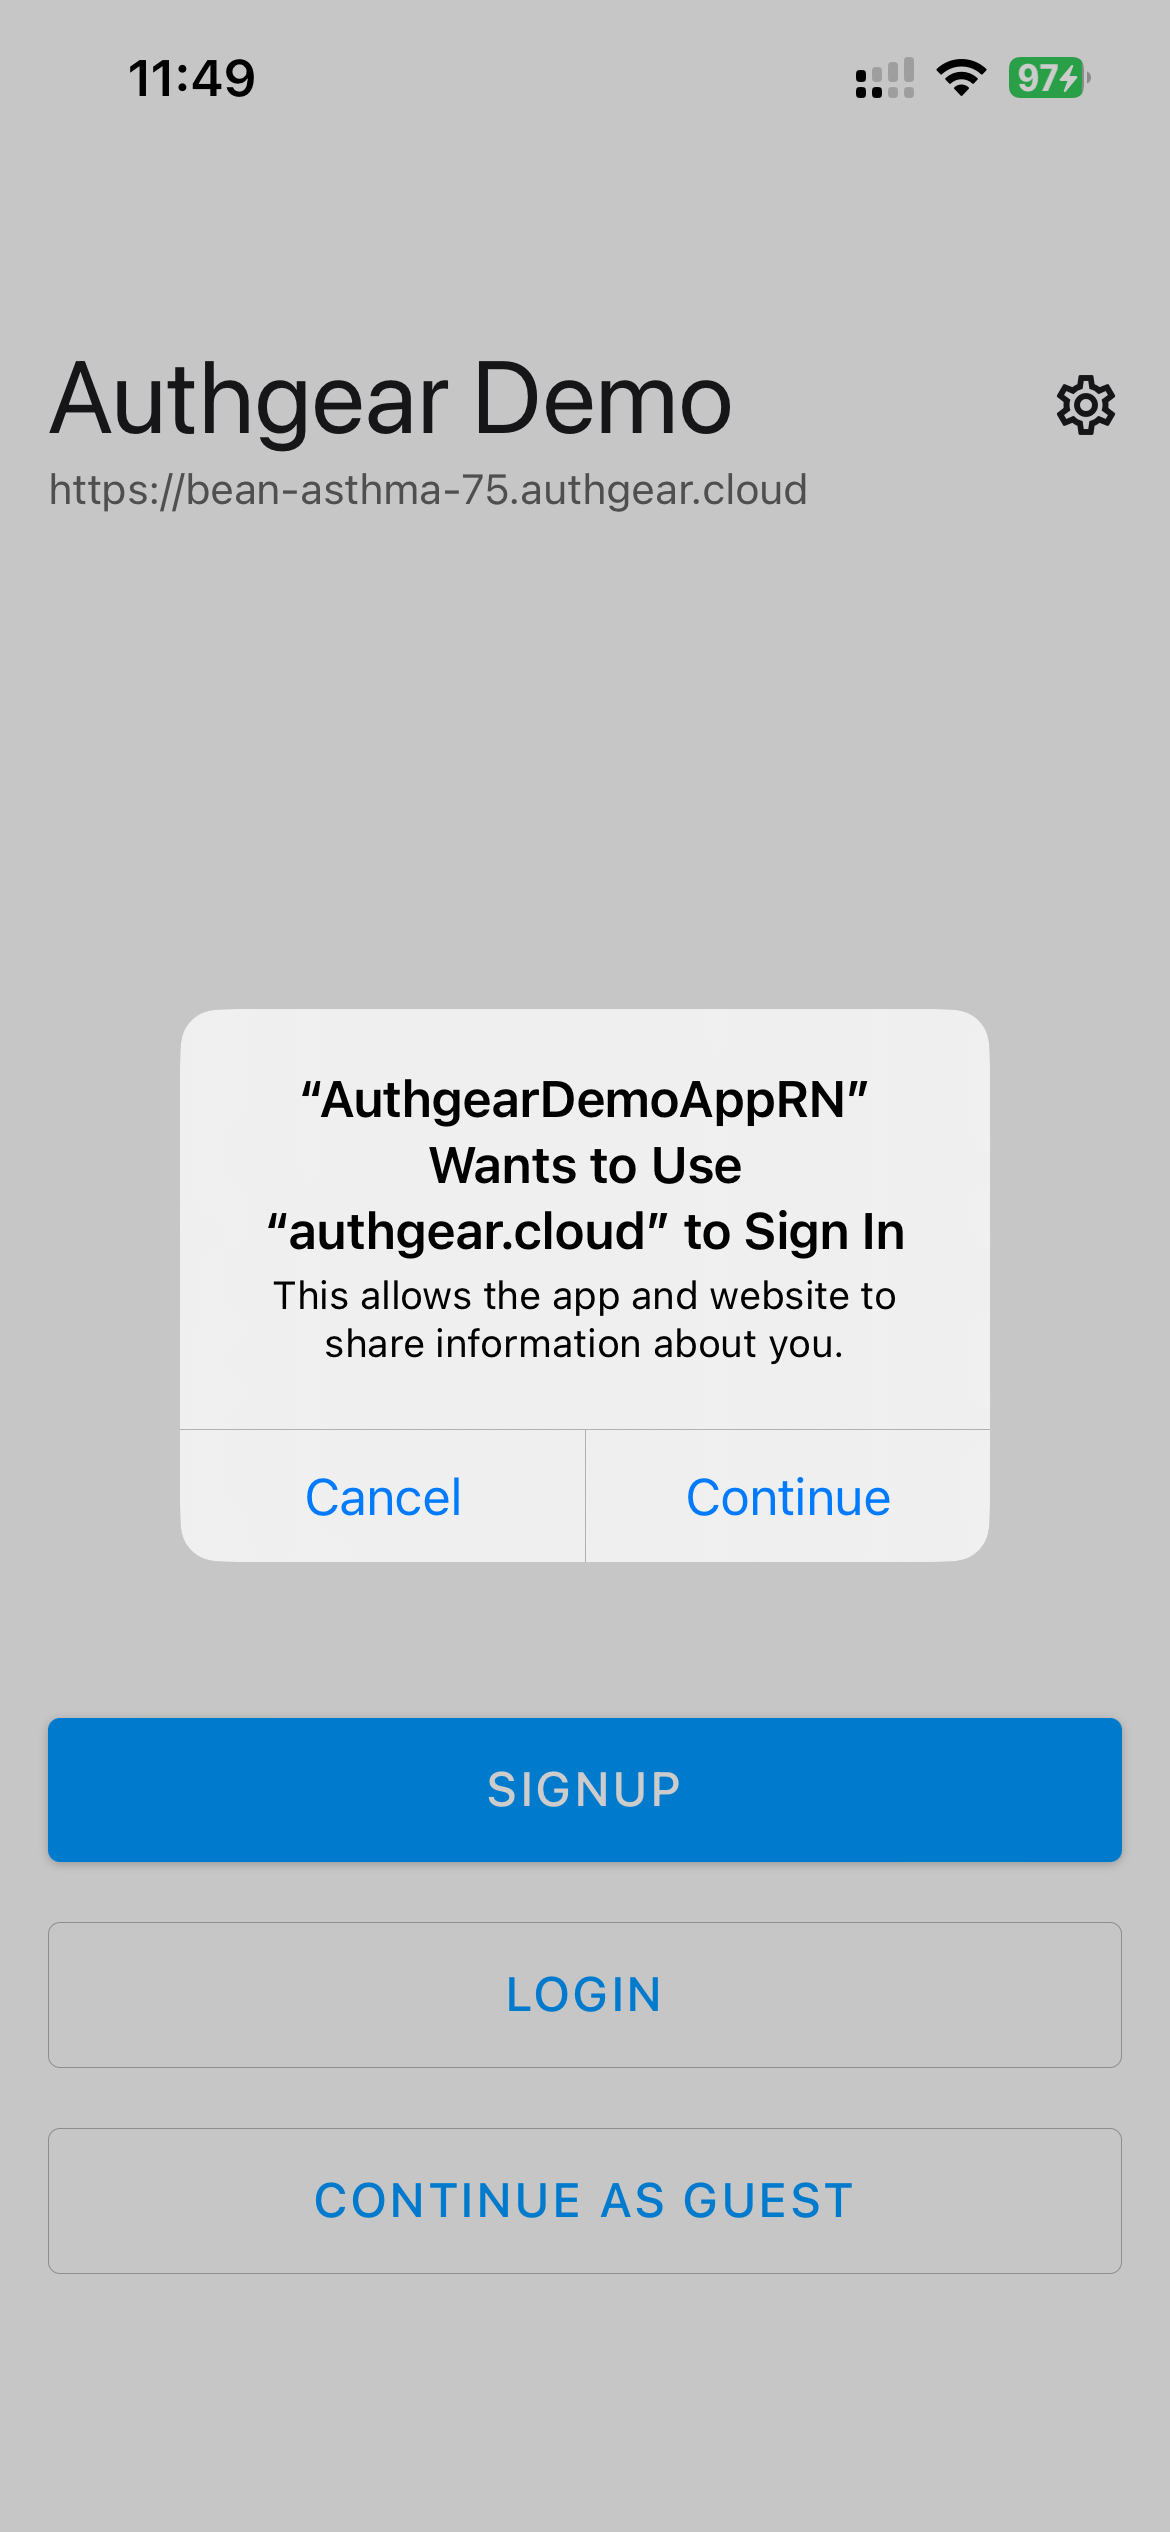
There are multiple ways you can avoid the login alert box:
1. Use ephemeral sessions
If you do not need SSO between mobile and web apps, you can disable it by setting isSSOEnabled = false.
It will not share the session cookies between your app and Safari. And the login alert box will not show to prompt user consent.
2. Use WebKitUIImplementation
The mobile SDKs include WebKitWebViewUIImplementation, a UIImplementation which makes it possible to customize more UI.
Depending on the platforms, there are various alternatives:
- iOS: WKWebViewUIImplementation
- Other platforms / Android: WebKitWebViewUIImplementation
Setting the uiImplementation attribute in the configure() method of the Authany SDK to WebKitWebViewUIImplementation() will open AuthUI using WKWebView on iOS and android.webkit.WebView on Android.
Omitting the uiImplementation attribute in the configure() method will fall back to the default behavior (launching AuthUI in ASWebAuthenticationSession/Custom Tabs, which is DeviceBrowserUIImplementation).
Example Code
The following examples show how to set the uiImplementation attribute.
Setting uiImplementation to WebKitWebViewUIImplementation in the above example will change the behavior of your application from using ASWebAuthenticationSession on iOS and Custom Tabs on Android to using WKWebView and android.webkit.WebView respectively.
To set uiImplementation to WKWebView in the native iOS SDK, use WKWebViewUIImplementation .
Customizing the WebKitWebView UI
WebKitWebViewUIImplementation allows you to customize some parts of the UI. You can do this by passing your customization options as parameters in WebKitWebViewUIImplementation(). You can customize the following parts of the UI:
Android
actionBarBackgroundColor: Use this option to customize the color of the action bar on the WebView Activity screen. The value should be of type integer according to this encoding: https://developer.android.com/reference/android/graphics/Color#encodingactionBarButtonTintColor: This option can be used to set the color of the icons and texts on the action bar. The value should also be of type integer and use the encoding here: https://developer.android.com/reference/android/graphics/Color#encoding.
iOS
navigationBarBackgroundColor: This option can be used to customize the color of the navigation bar on iOS. The value should be of type UIColor or an integer (React Native or Ionic SDKs) using the following encoding: https://developer.android.com/reference/android/graphics/Color#encoding.navigationBarButtonTintColor: This option sets the color of icons and texts on the navigation bar. The value should also be UIColor or an integer (React Native or Ionic SDKs) using the same encoding asnavigationBarBackgroundColor.modalPresentationStyle: Sets the type of modal to be shown. The value can be any of the following: "automatic", "fullScreen", "pageSheet".
The following examples show how to set custom background color, tint color, and modal presentation style.
authgearCapacitor.configure({
  clientID: "<CLIENT_ID>",
  endpoint: "<AUTHGEAR_ENDPOINT>",
  uiImplementation: new WebKitWebViewUIImplementation({
    ios: {
      modalPresentationStyle: "fullScreen"
    },
    android: {
      actionBarBackgroundColor: 0xffffff00,
      actionBarButtonTintColor: 0xff000000
    }
  }),
  tokenStorage: new TransientTokenStorage()
});
private int actionBarBackgroundColor = 0xffffff00;
private int actionBarButtonTintColor = 0xff000000;
private Authgear authgear = new Authgear(
                                getApplication(),
                                "<CLIENT_ID>",
                                "<AUTHGEAR_ENDPOINT>",
                                tokenStorage,
                                new WebKitWebViewUIImplementation(actionBarBackgroundColor, actionBarButtonTintColor),
                                isSsoEnabled,
                                null,
                                app2appOptions
                                );
Authgear(
            clientId: "<CLIENT_ID>",
            endpoint: "<AUTHGEAR_ENDPOINT>",
            tokenStorage: TransientTokenStorage(),
            uiImplementation: WKWebViewUIImplementation(
               modalPresentationStyle: UIModalPresentationStyle.fullScreen,
               navigationBarBackgroundColor: UIColor.yellow,
               navigationBarButtonTintColor: UIColor.black
            ),
            isSSOEnabled: true
        )
3. Implement Custom UIImplementation
You can implement your own custom UIImplementation when the WebKitWebViewUIImplementation does not meet the requirements of your use case.
The WebKitWebViewUIImplementation class itself is basically a class that implements UIImplementation and overrides the openAuthorizationURL()method. Hence your custom implementation may look like this:
class MyUIImplementation implements UIImplementation {
 async openAuthorizationURL(options: OpenAuthorizationURLOptions):
Promise<string> {
 // Call your own plugin code to implement this.
 }
}
Then, you can use your custom implementation like this:
authgear.configure({
 clientID: "my_client_id",
 endpoint: "my_endpoint",
 isSSOEnabled: true,
 uiImplementation: new MyUIImplementation(),
})
To get a deeper understanding of how to implement your UIImplementation, see the code for the WebKitWebViewUIImplementation implementation.
Unsupported Features
When you drop the default DeviceBrowserUIImplementation to use your own custom UI implementation that uses WebView, it is important to note that you'll be losing the following features, due to iOS or other security limitations.
- Login with Google: Google prohibits the use of
WebKitWebViewwith the Google SSO. Learn more here: https://developers.googleblog.com/2021/06/upcoming-security-changes-to-googles-oauth-2.0-authorization-endpoint.html. As a resultWebKitWebViewUIImplementationand Google SSO cannot be used together. - Passkey: Passkey is not supported in WebKitWebView.