Skip Login Screen and Direct Users to Enterprise Login
You can use Authany's x_oauth_provider_alias parameter to add social/enterprise login to your application without showing any AuthUI pages. To do this, you must enable the Social/Enterprise only login method for your project in Authany Portal.
In this post, you'll learn how to use the x_oauth_provider_alias parameter to skip AuthUI and take users directly to a social/enterprise login provider's authorization page.
Pre-requisite
- An Authany account. Create one for free here.
What We Will Build
- In this post, we'll walk through the steps for adding only the social/enterprise login method to an Authany application.
- We'll use the Authany SDK for React Native to set the
x_oauth_provider_aliasparameter and show how to usex_oauth_provider_aliaswithout the SDK in an example Express app.
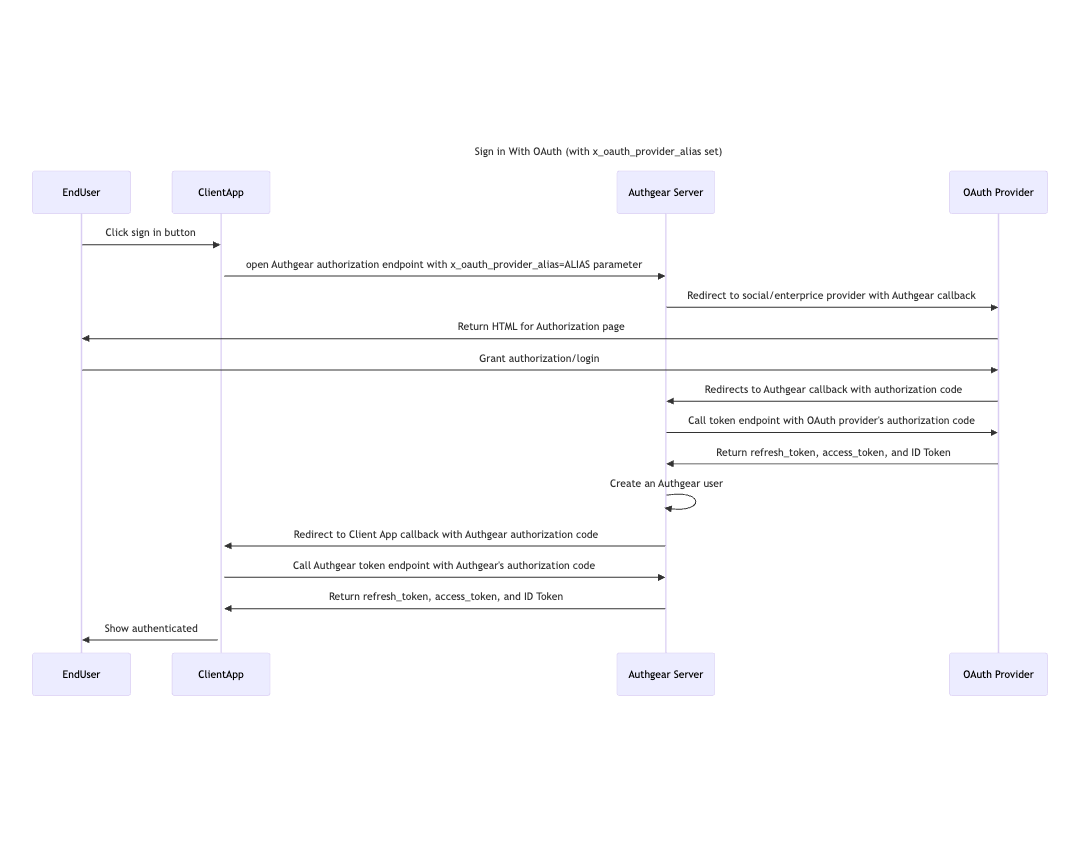
The sequence diagram above demonstrates the flow for using x_oauth_provider_alias to skip AuthUI.
First, when the user clicks on the sign-in button, your application will call your Authany project's authorize endpoint with the x_oauth_provider_alias parameter appended.
Next, when Authany server receives the call, it redirects to the third-party OAuth (Social/EnterpriseLogin) provider's authorization server. The user is then shown the OAuth provider's login/authorization page for them to grant authorization. Once that is done, the OAuth provider returns an authorization code to Authany.
In the next step, Authany exchanges the authorization code for an access token, refresh token, and ID token and then starts creating a new user or logging the existing user in.
The rest of the flow from there involves the usual sending of the authorization code to the client application and the client application exchanging the authorization code for an access token, refresh token, and ID token.
Step 1: Configure a Social/Enterprise Login Provider
The first step is to add the Social/Enterprise login provider you wish to use to your Authany project. For our example, we'll be adding Facebook.
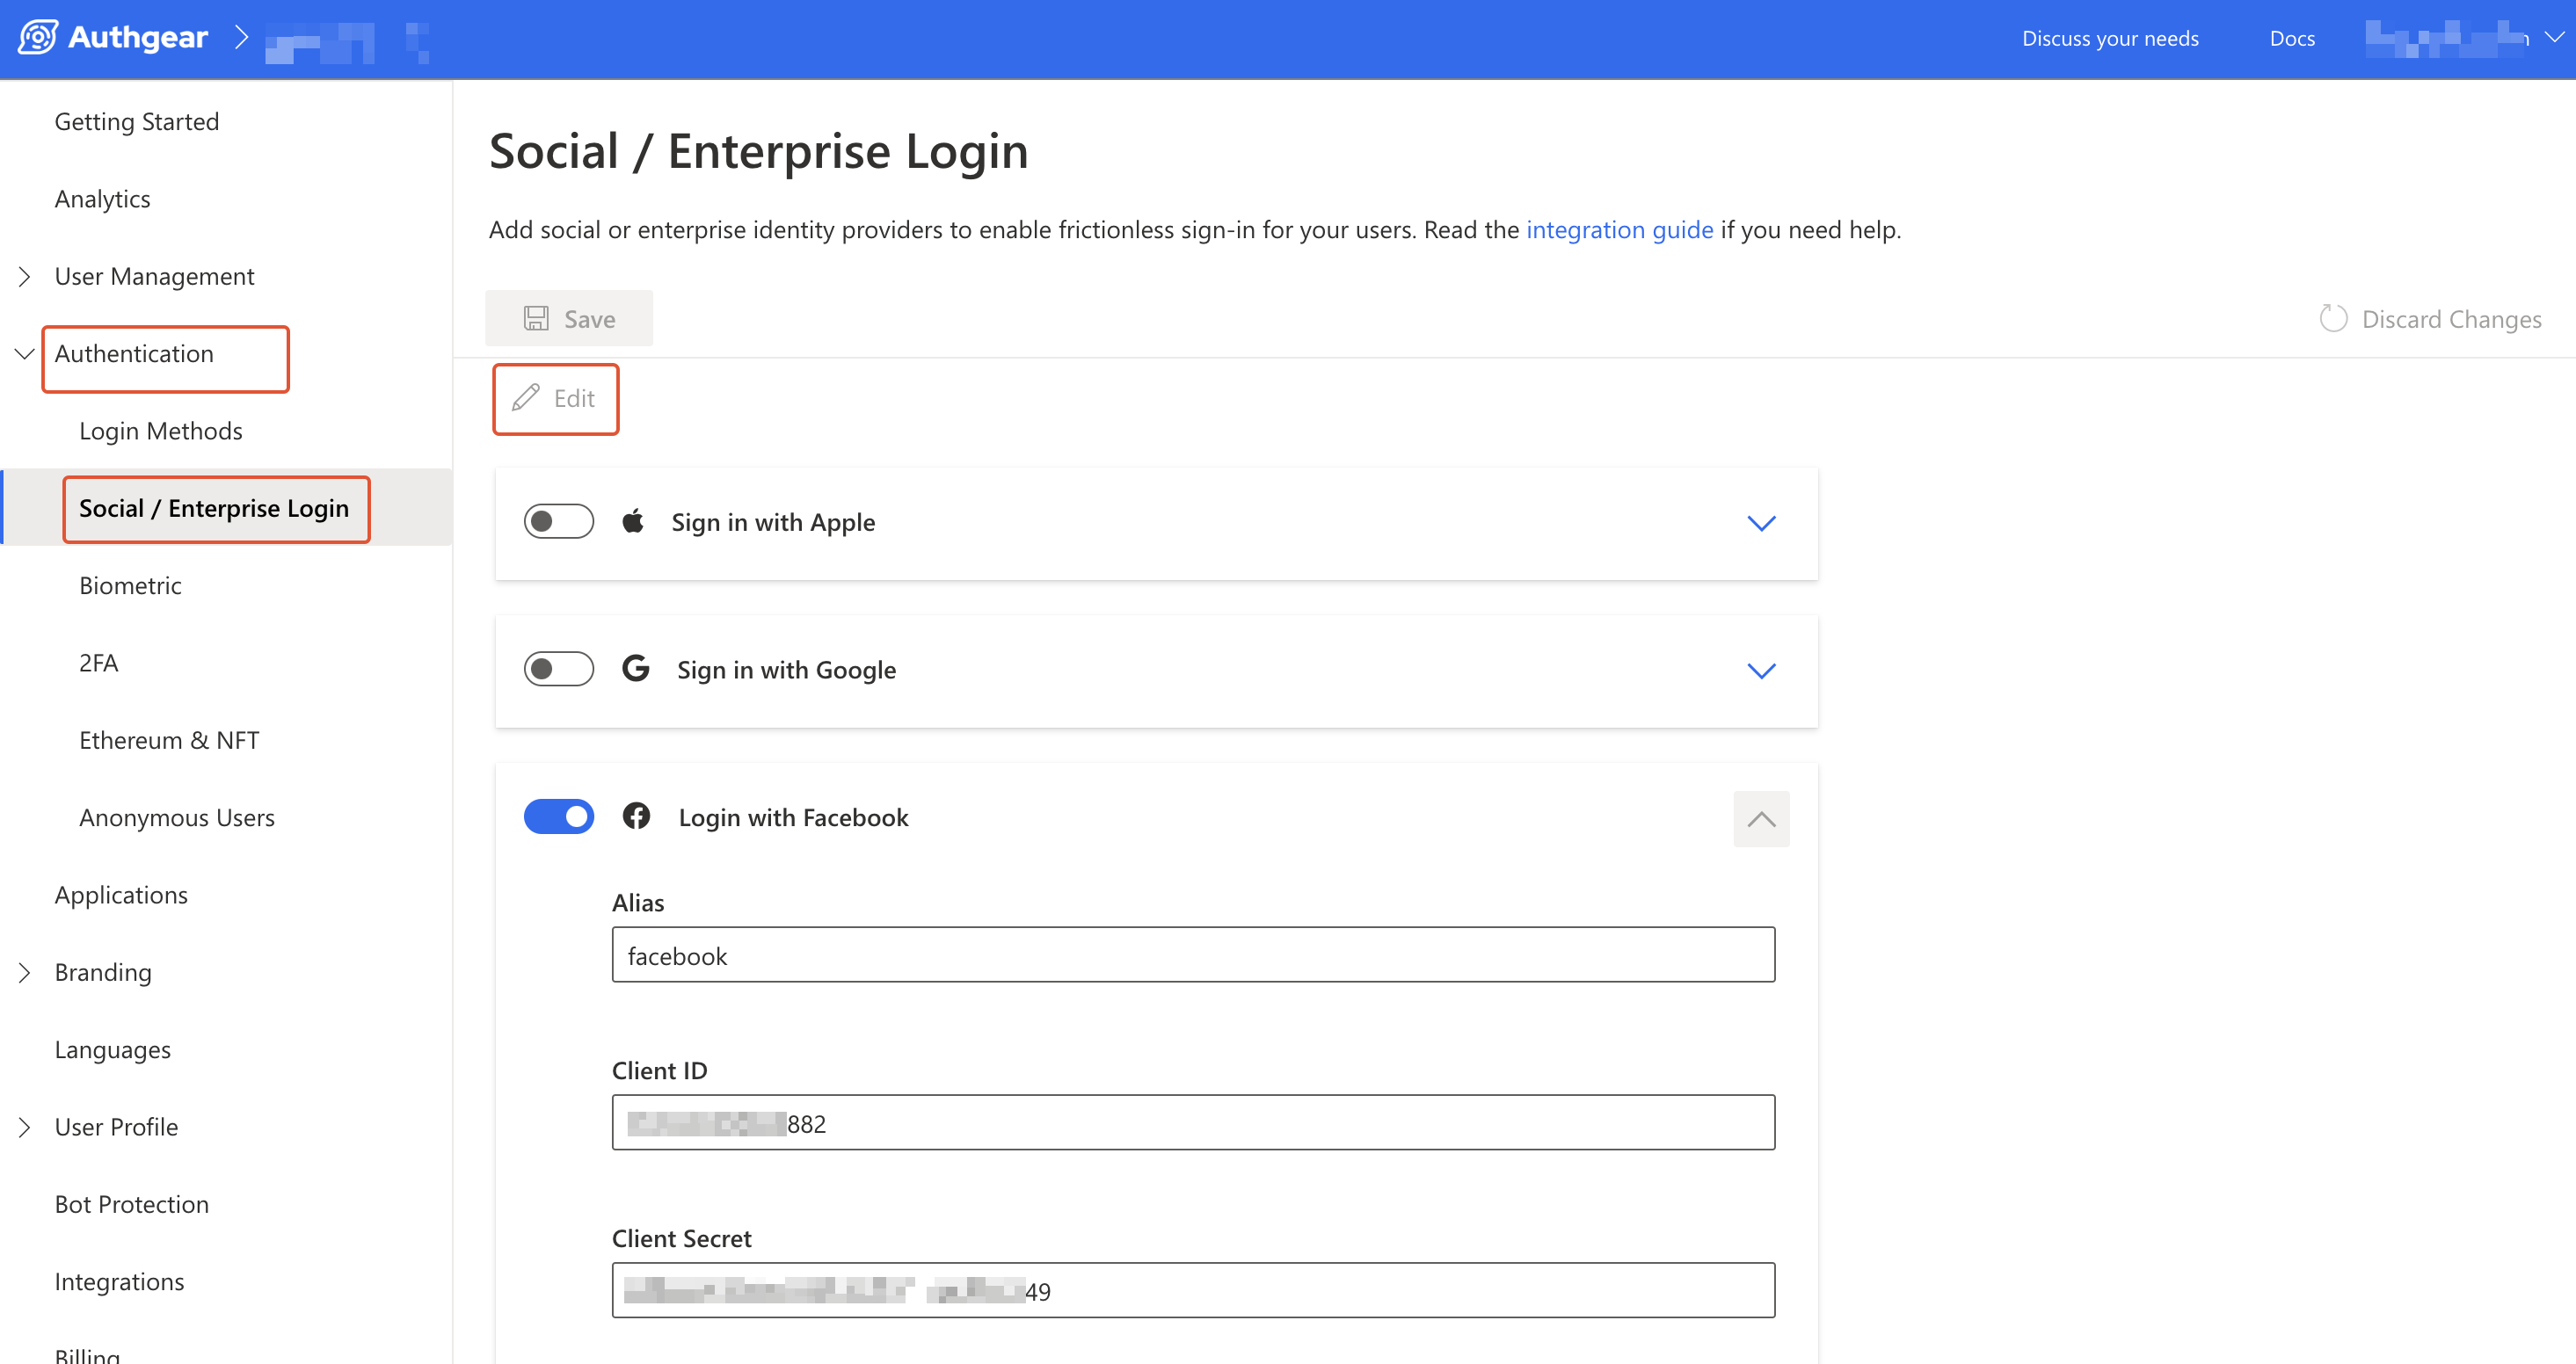
To add a new provider, log in to Authany Portal, select your project, then navigate to Authentication > Social/Enterprise Login.
Next, click on the Edit button, then enter the Client ID and Client Secret for the Social/Entreprise login provider then click Save. Also, note the value for Alias as you'll use it in a later step.
See our guide here for instructions on how to get a Client ID and Client Secret for Facebook Login.
Step 2: Enable Social/Enterprise Only Login Method
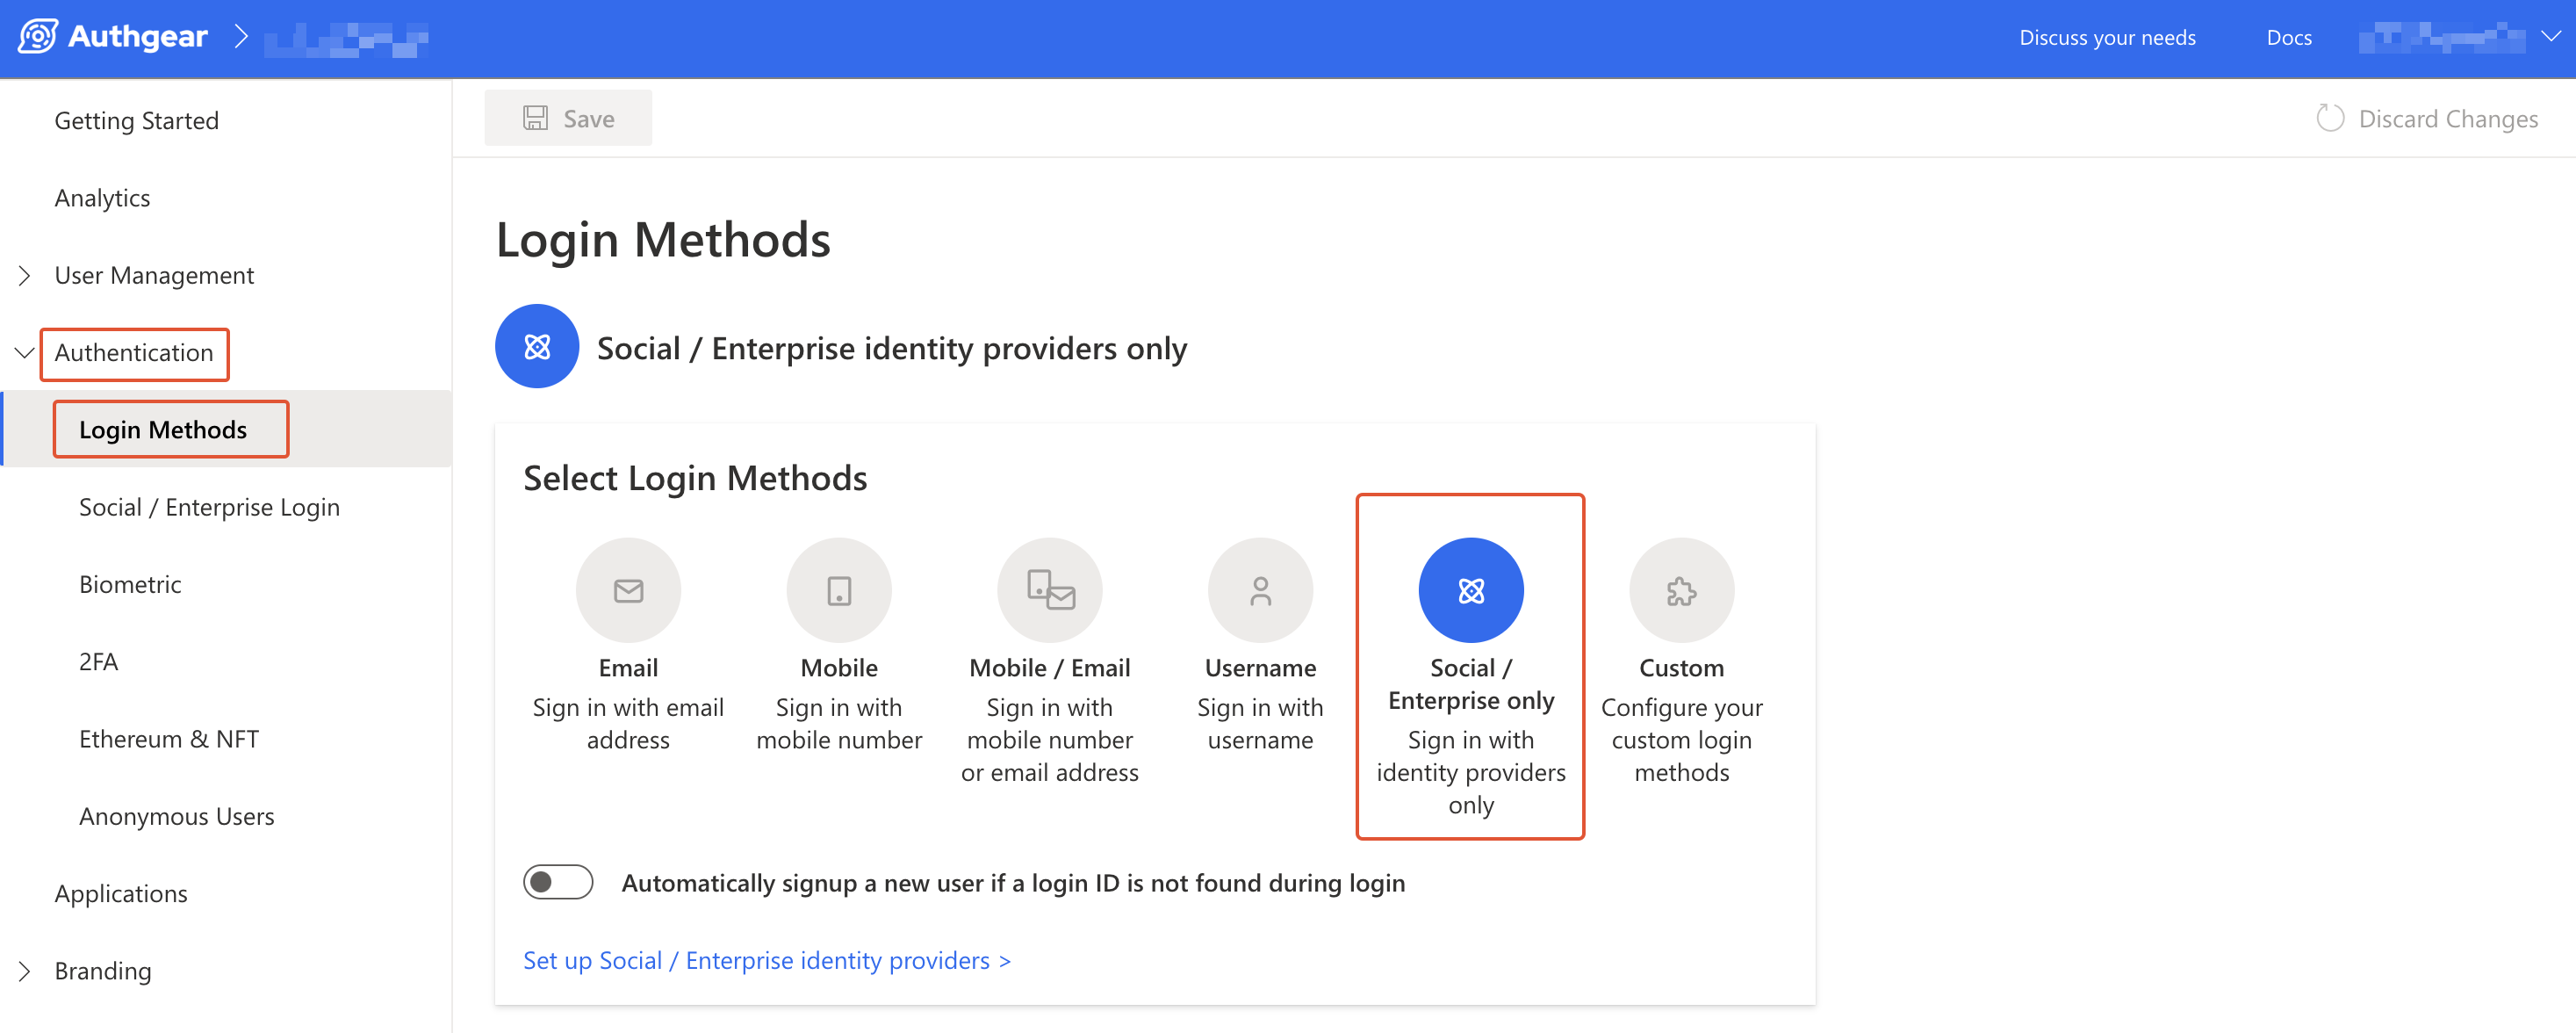
An important step for making Authany to skip AuthUI is to enable the Social/Enterprise only login method. By doing this, Authany will understand that the only login method your app will use is from a third-party OAuth provider. As a result, it's ok to skip showing AuthUI for login, registration, or login method selection and go to the OAuth provider's authorization page directly.
To enable Social/Enterprise only, navigate to Authentication > Login Methods. Next, select the Social/Enterprise only Login Method and click Save.
Step 3: Set x_oauth_provider_alias Parameter
Now that you've set up everything to allow your application to use only Social/Enterprise Login, you can open Authany's authorize endpoint with the x_oauth_provider_alias parameter to start an authorization request that will skip AuthUI.
We will show 2 ways to do this. The first is using the SDK and the second is by passing x_oauth_provider_alias as a URL query parameter.
1. Adding x_oauth_provider_alias using Authany SDK
The following example shows how to add x_oauth_provider_alias using the Authany React Native SDK:
authgear
  .configure({
    clientID: '<YOUR_CLIENT_ID>',
    endpoint: '<YOUR_AUTHGEAR_PROJECT_ENDPOINT>',
  })
  .then(() => {
    authgear
      .authenticate({
        redirectURI: 'com.reactnativeauth://host/path',
        oauthProviderAlias: 'facebook',
      })
      .then(({userInfo}) => {
        Alert.alert('Login successful, welcome ' + userInfo.email);
      });
  });
The key thing about using the above option is the presence of oauthProviderAlias: 'facebook' in the authenticate() method of the Authany SDK. This parameter tells Authany to redirect directly to an OAuth provider, given that the Social/Enterprise provider is configured properly as shown in step 1. Also, the Social/Enterprise only Login method is enabled.
Note that the value for oauthProviderAlias must be the Alias for the social/enterprise provider you configured in step 1.
2. Add x_oauth_provider_alias to the Authorization URL
You can manually add x_oauth_provider_alias parameter to the Authany authorization endpoint when you're not using the Authany SDK.
The following example shows how to add x_oauth_provider_alias to the Authany authorization endpoint:
app.get("/login", (req, res) => {
  const url = new URL("<YOUR_AUTHGEAR_PROJECT_ENDPOINT>/oauth2/authorize");
  url.searchParams.set('client_id', config.client.id);
  url.searchParams.set('redirect_uri', "http://localhost:3000");
  url.searchParams.set('scope', "openid offline_access");
  url.searchParams.set('x_oauth_provider_alias', 'facebook')

  res.redirect(url);

});
The above code will append &x_oauth_provider_alias=facebook to the authorization URL.