User Settings
The User Settings page provides a prebuilt user interface for logged-in users of an Authany project to view and edit their account settings.
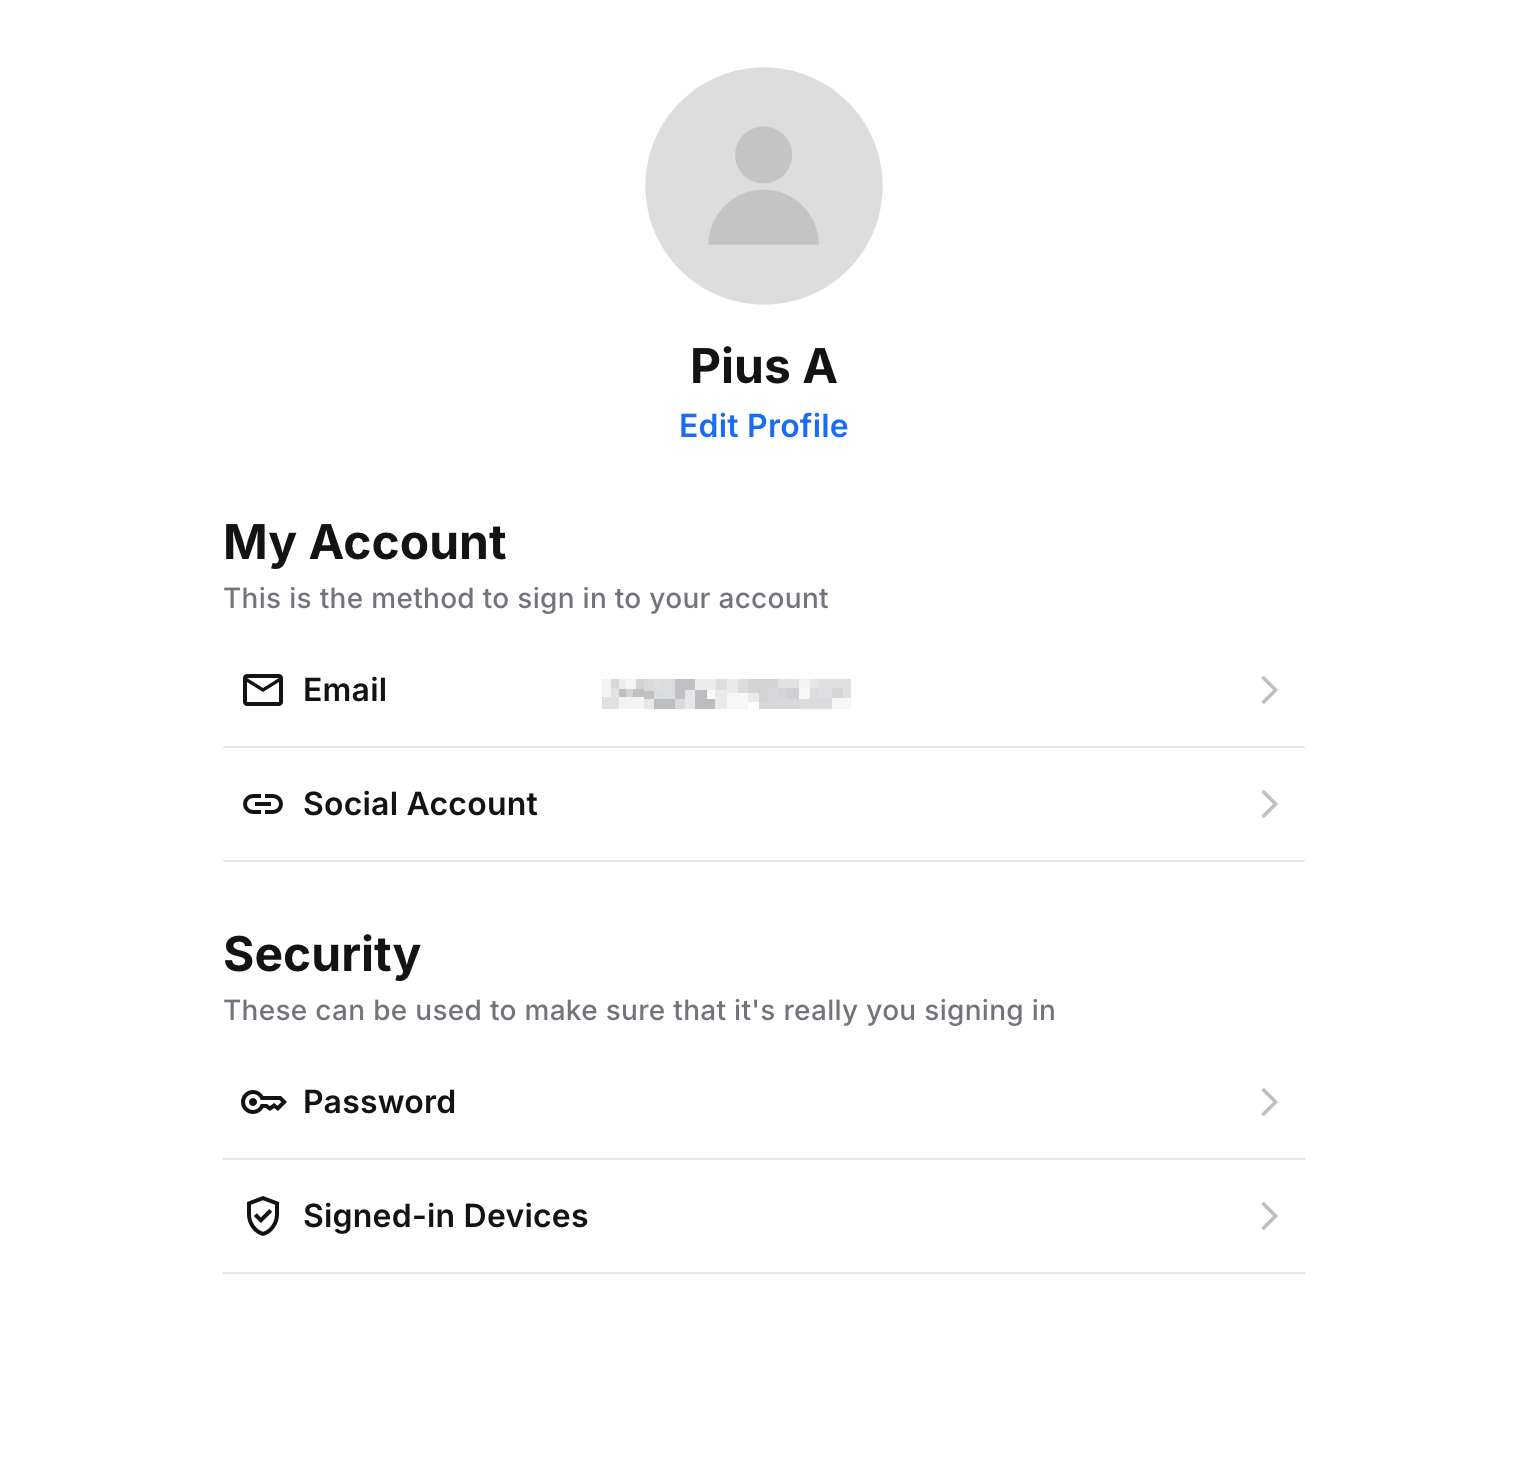
user settings ui
Actions in the settings page
The end-user can perform the following actions on the setting page:
- Change their password.
- Add or change their email, phone number, or username.
- Connect or disconnect to identity providers.
- Manage their signed-in sessions.
- Enable or disable 2-step verification.
- and many more.
Open the settings page in websites
Use the <UserSettingsButton> component from @authgear/nextjs/client. It exchanges the user's session for a short-lived token and opens the pre-authenticated Settings page in a new tab — no Server Action required.
import { UserSettingsButton } from "@authgear/nextjs/client";

export default function Dashboard() {
  return (
    <UserSettingsButton>Account Settings</UserSettingsButton>
  );
}
The button must be rendered inside <AuthgearProvider>. Guard it with an authentication check to avoid errors when the user is not signed in:
const { isAuthenticated } = useAuthgear();

<UserSettingsButton disabled={!isAuthenticated}>
  Account Settings
</UserSettingsButton>
See the Next.js guide for more options such as styling and customising the route path.
Open the settings page with the SDK in mobile apps
If you are working on a mobile app, you can open the settings page using any of our mobile SDKs. When the end-user has signed in, the SDK provides a method to open the settings page in a Webview.
import React, { useCallback } from "react";
import authgear, { Page } from "@authgear/react-native";
import { View, Button } from "react-native";

function SettingsScreen() {
  const onPressOpenSettingsPage = useCallback(() => {
    authgear.open(Page.Settings).then(() => {
      // When the promise resolves, the webview have been closed.
    });
  }, []);
  return (
    <View>
      <Button
        title="Open Settings Page"
        onPress={onPressOpenSettingsPage}
      />
    </View>
  );
}
Back to my app button
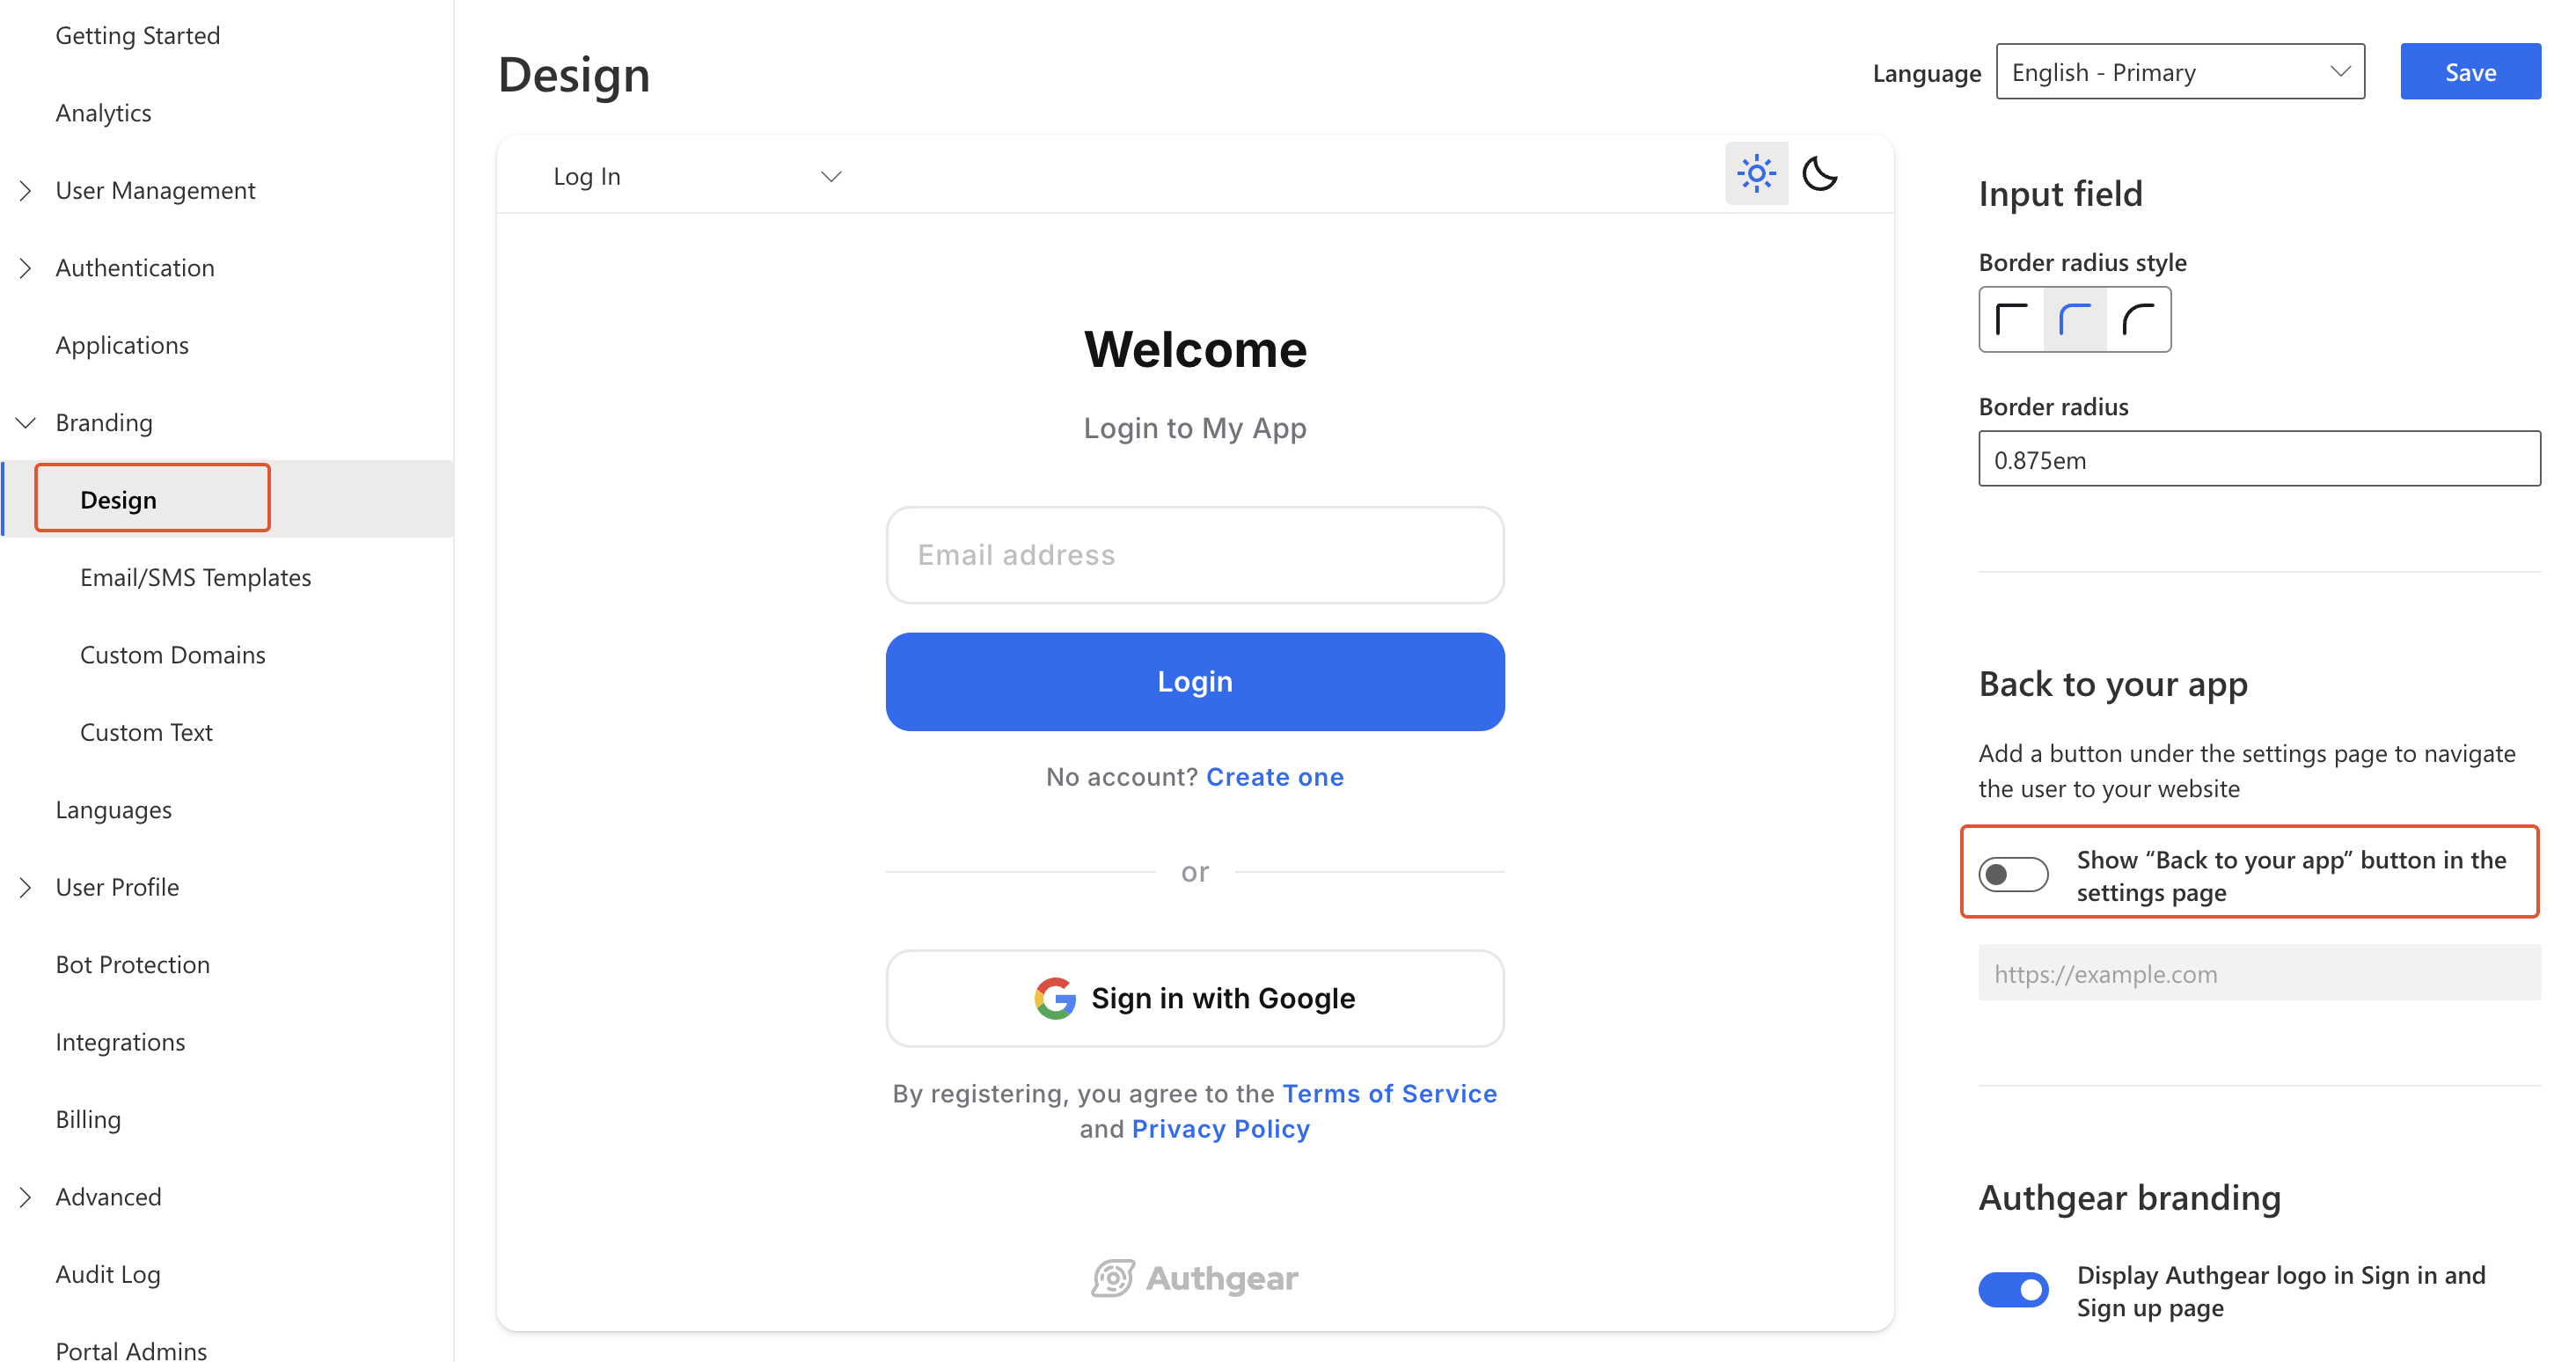
In a web-based application, you may want to add the "Back to my app" button to the settings page so the user can navigate back to your website after changing the settings.
To enable the back button, navigate to Branding > Design in Authany Portal.
Toggle the Show “Back to your app” button in the settings page switch on. Enter the destination URL for the 'Back to my app' button below the switch.
Click Save to apply your new settings.
Customize User Settings Page
You can customize the look and feel of the User Settings page using the UI design tool in Authany Portal.
Navigate to Branding > Design in Authany Portal to customize the User Settings page.
The theme (dark, light, or auto), logo, colors, border, etc. you set for AuthUI will also apply to the User Settings page.