Vue
Authany helps you add user logins to your Vue apps. It provides a prebuilt login page and user settings page that accelerate the development.
Follow this  15-minute tutorial to create a simple app using Vue with Authany SDK.
Note
Check out and clone the Sample Project on GitHub.
Setup Application in Authany
You need an Authany account and a project to use Authany. Sign up for a free account at https://manage.authany.com/ and create a Project.
After that, we will need to create an Application in the Project Portal.
Create an application in the Portal
In this step, we'll create an Authany client application in the Authany Portal. We'll use the configuration for this application in later steps to connect our Vue application to Authany.
To create a client application navigate to Applications on the left menu bar in Authany Portal.
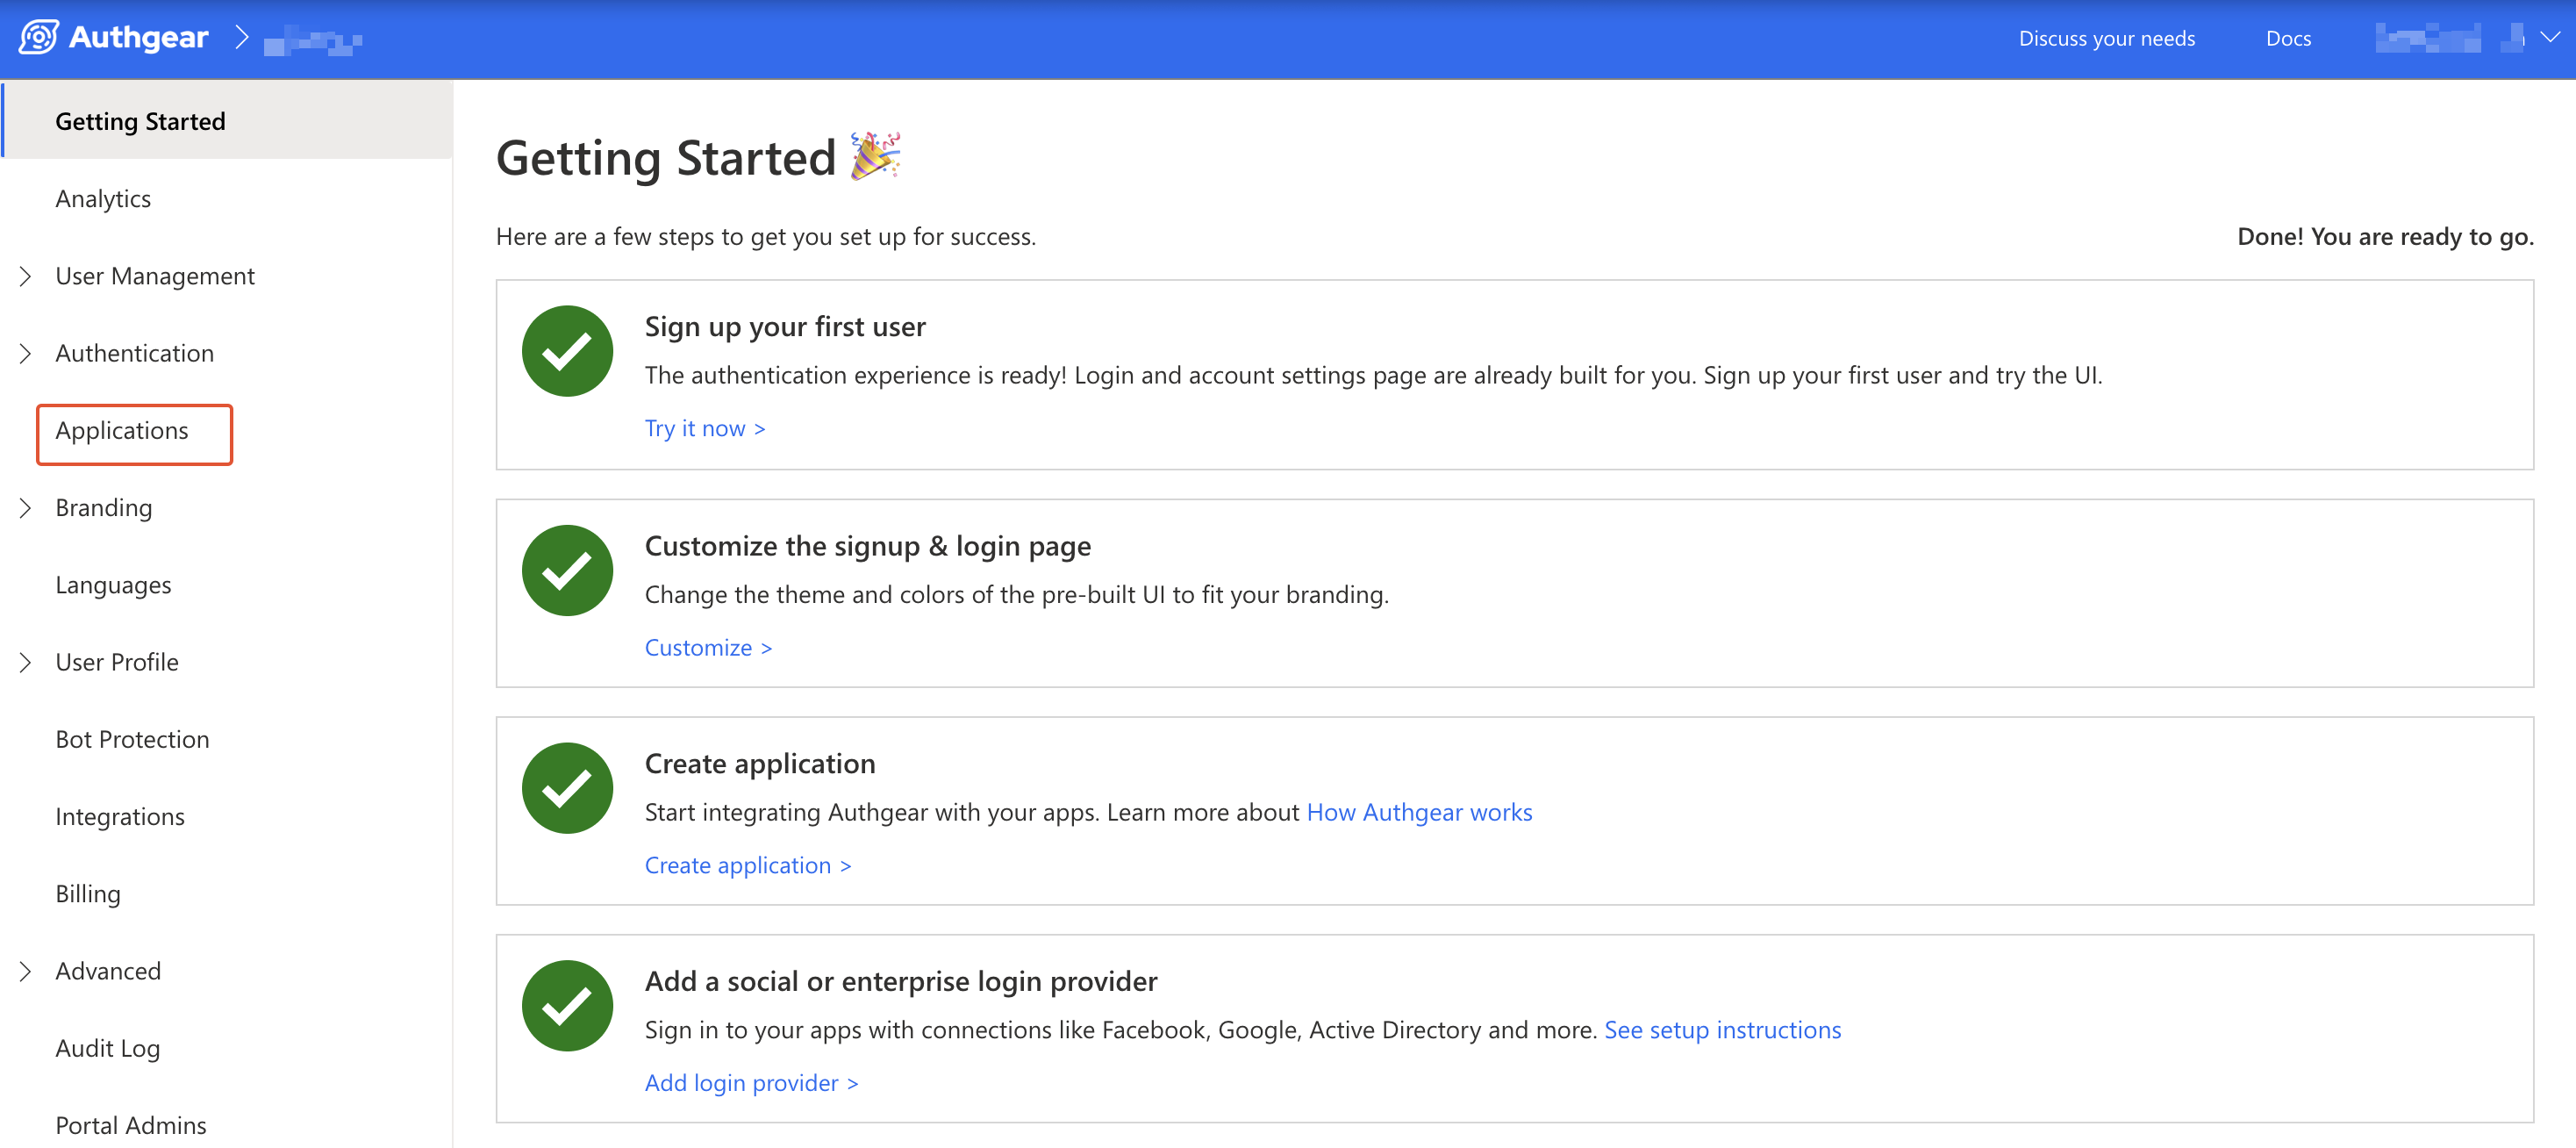
portal navigate to applications
Next, click ⊕Add Application in the top toolbar to open the New Application page.
Input the name of your application, e.g. "MyAwesomeApp" then select Single Page Application as the Application Type.
Click Save to create the application.
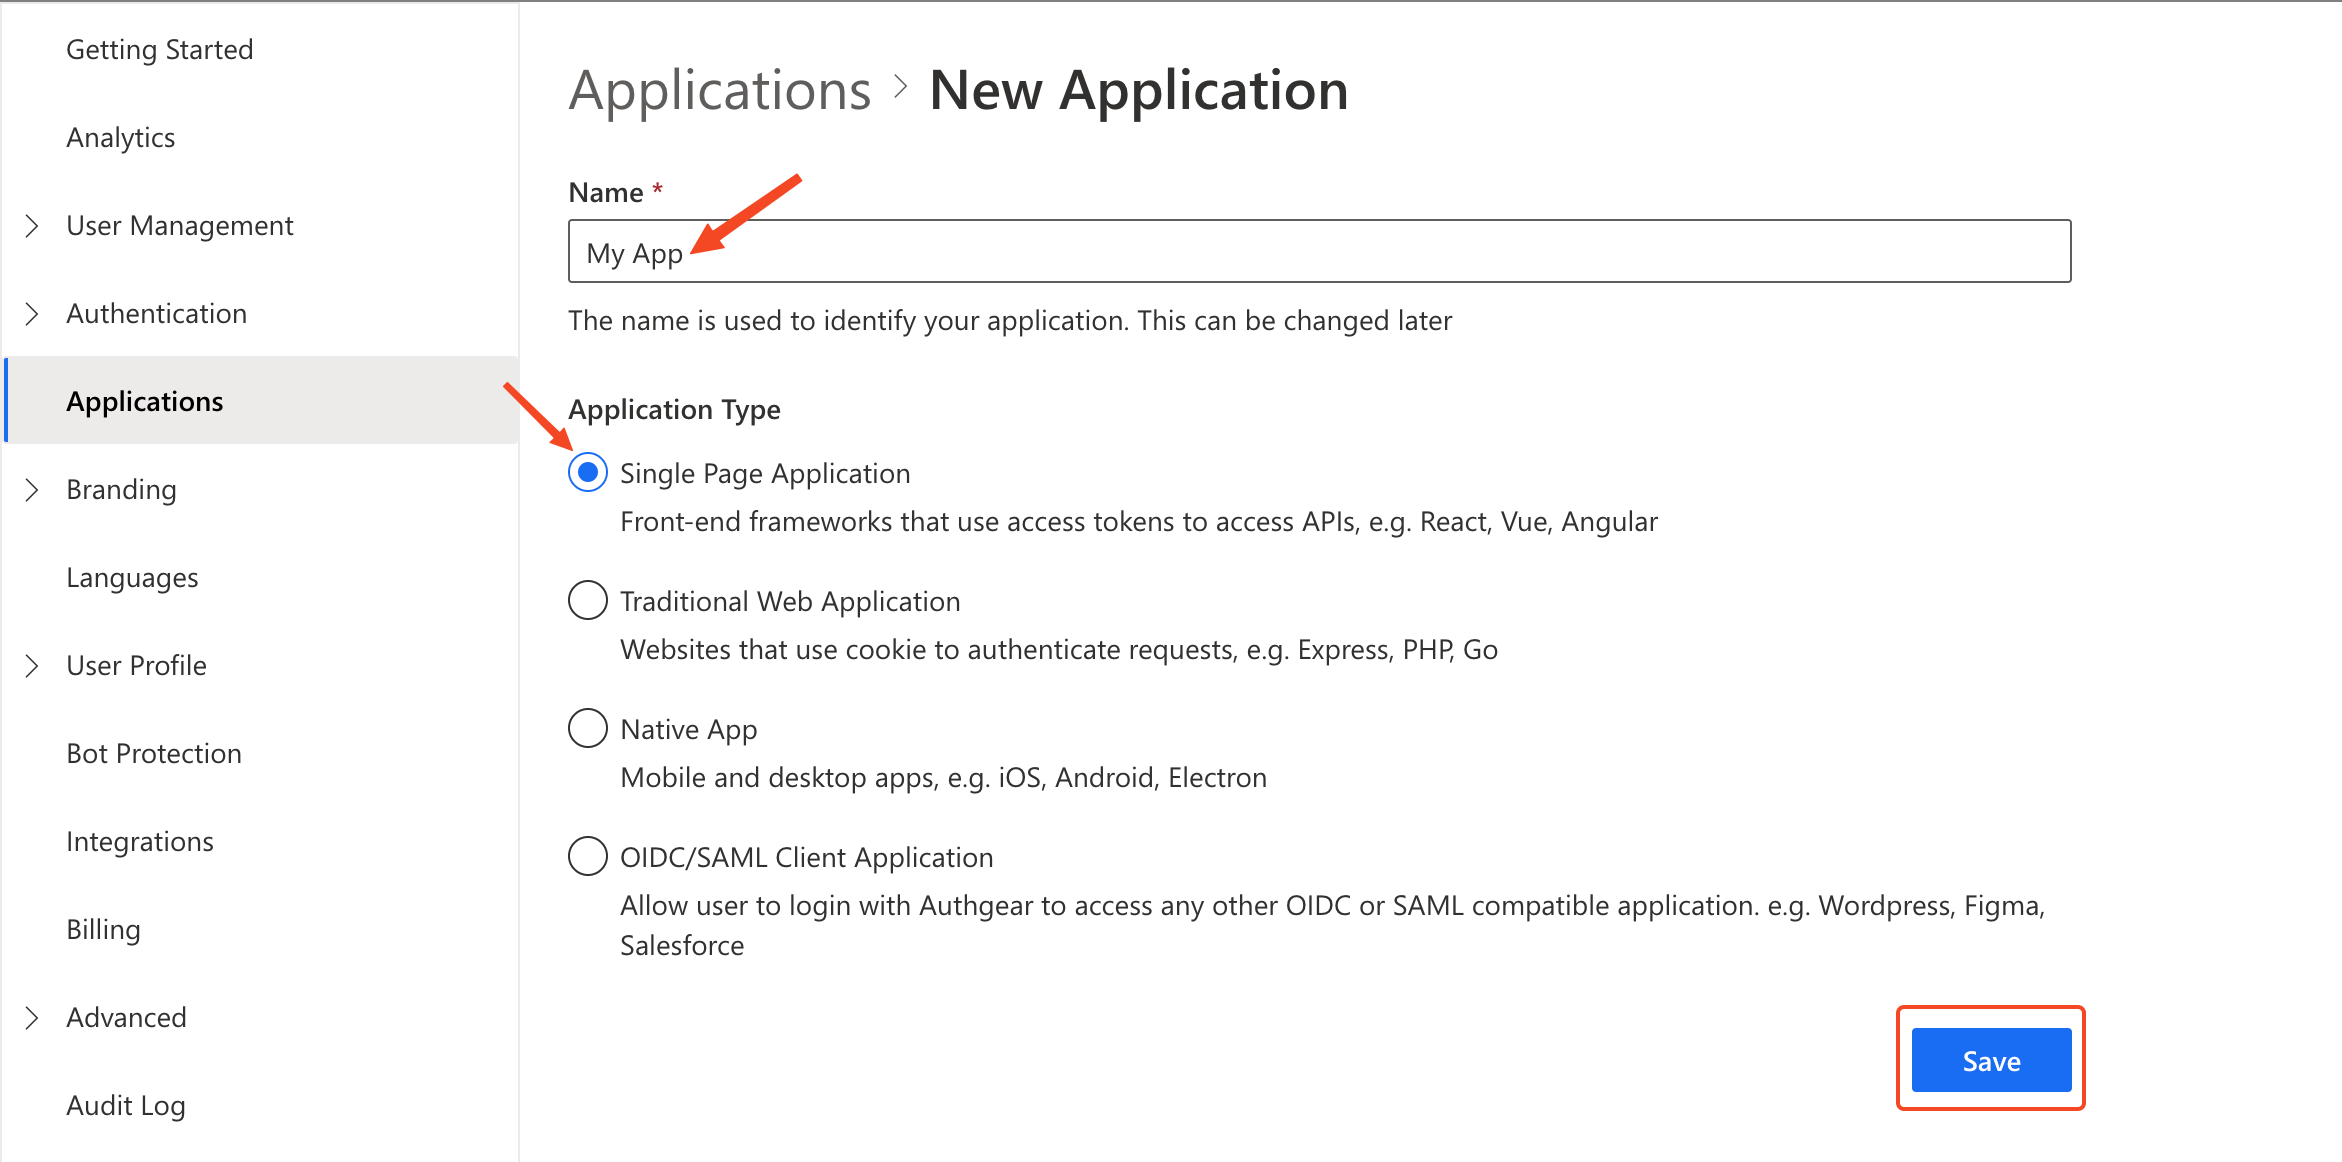
create new client application
On the next screen, you'll see links to tutorials for different frameworks. Click Next to skip to the application configuration page
Configure Authorize Redirect URI
The Redirect URI is a URL in your application where the user will be redirected to after login with Authany. In this path, make a finish authentication call to complete the login process.
Scroll to the URI section of the configuration page for the client application you created in the last step. For this tutorial, add http://localhost:4000/auth-redirect to Authorize Redirect URIs.
Click the Save button to save your changes before you proceed.
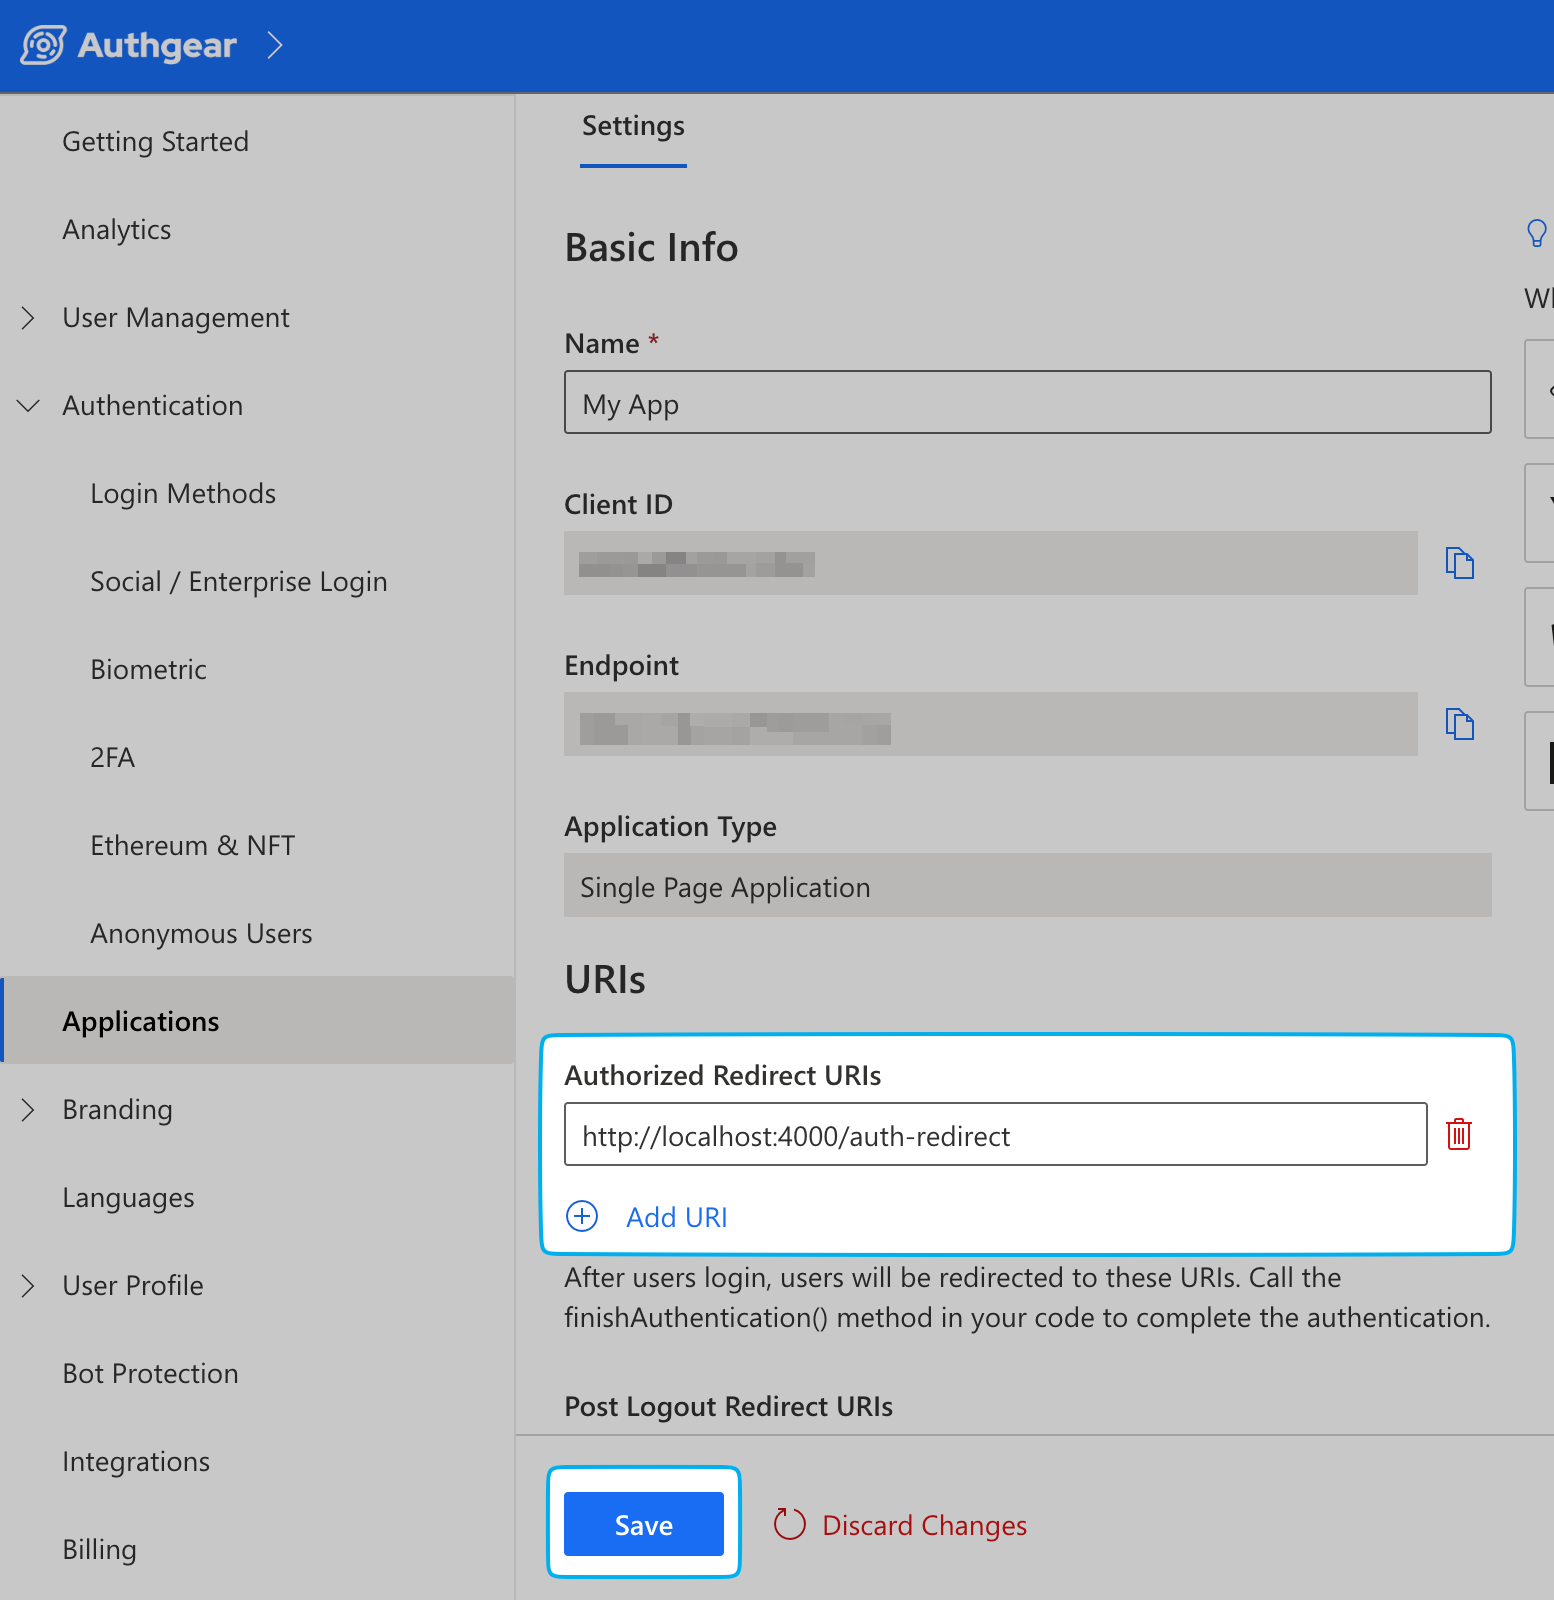
Configure Authorized Redirect URIs
Add Authany to Vue App
In this section, we'll add Authany to a Vue application and use the Authany JavaScript SDK to implement the following features:
- User Login/Sign-up
- Read logged-in user's info
- Open User Settings page
- End user session using a Logout button
Step 1: Create a simple Vue project
Here are some recommended steps to scaffold a Vue project. You can skip this part if you are adding Authany to an existing project. See Step 3: Install Authany SDK to the project in the next section.
Install basic project dependencies
Create the project folder and install the dependencies. We will use Vite as the build tool and the vue-router package. Also, we will use TypeScript in this tutorial.
Run the following commands to create a new project:
Create project and move into the project directory:
Install dependencies:
Install Vue router:
Add port configuration for development mode
As we are using port 4000 for this tutorial, we need to add the port information to the config. In the vite.config.ts file, modify the file with the following lines:
// vite.config.ts
import { defineConfig } from "vite";
import vue from "@vitejs/plugin-vue";

// https://vitejs.dev/config/
export default defineConfig({
  plugins: [vue()],
  server: {
    port: 4000,
  },
});
After doing so, when you run npm run dev , the server will be running on port 4000.
Create the Home.vue file
Create a new file called Home.vue in the src/components folder with simply showing Hello World on the screen. Add the follow code to Home.vue:
// src/components/Home.vue
<script setup lang="ts"></script>

<template><div>Hello World</div></template>
Edit the App.vue file
The App.vue file is generated by Vite already but some sections of it might not be needed for this tutorial. Edit the content of App.vue to the following:
// src/components/App.vue
<script setup lang="ts">
import Home from "./components/Home.vue";
</script>

<template>
  <Home />
</template>
Delete unnecessary files
Some of the files might not be used and thus can be deleted. You can perform the following script to delete these files:
File structure
The file structure in your project is now:
my-app
├── node_modules
│   └── (...)
├── package-lock.json
├── package.json
├── vite.config.ts
├── (...)
└── src
    ├── components
    │   └── Home.vue
    ├── App.vue
    ├── main.ts
    └── (...)
Run npm run dev now to run the project and you will see the default page with the title Vite + Vue and a "Hello World" message on http://localhost:4000.
Step 2: Create routes for the project
Create a AuthRedirect.vue file in the src/components folder with the same content as src/components/Home.vue at this moment.
Create a file called router.ts in the src/ folder. We will import Home and AuthRedirect component as the route and we will implement these components later. The content of this file will look like this:
// src/router.ts
import { createRouter, createWebHistory } from "vue-router";

export const history = createWebHistory();
export const router = createRouter({
  history,
  routes: [
    {
      path: "/",
      // We will implement this component later
      component: () => import("./components/Home.vue"),
    },
    {
      path: "/auth-redirect",
      // We will implement this component later
      component: () => import("./components/AuthRedirect.vue"),
    },
  ],
});
Step 3: Install Authany SDK to the project
Run the following command within your Vue project directory to install the Authany Web SDK
In src/main.ts , import authgear and call the configure function to initialize an Authany instance on application loads. We will also import router and use it to build routes for us. Your main.ts file should look like this:
// src/main.ts
import { createApp } from "vue";
import './style.css'
import App from "./App.vue";
import { router } from "./router";
import authgear from "@authgear/web";

const app = createApp(App);

async function init() {
  try {
    // configure Authgear container instance
    await authgear.configure({
      endpoint: import.meta.env.VITE_AUTHGEAR_ENDPOINT,
      clientID: import.meta.env.VITE_AUTHGEAR_CLIENT_ID,
      sessionType: "refresh_token",
    });
  } finally {
    app.use(router);
    app.mount("#app");
  }
}

init().catch((e) => {
  // Error handling
  console.error(e)
});
The Authany container instance takes endpoint and clientID as parameters. They can be obtained from the application page created in Setup Application in Authany.
Create a .env file in the root directory of your project and add your Authany client application configuration using the following fields:
VITE_AUTHGEAR_CLIENT_ID=<CLIENT_ID>
VITE_AUTHGEAR_ENDPOINT=<AUTHGEAR_ENDPOINT>
VITE_AUTHGEAR_REDIRECT_URL=http://localhost:4000/auth-redirect
It is recommended to render the app after configure() resolves. So by the time the app is rendered, Authany is ready to use.
Note
Run npm run dev now and you should see the same page and no error message in the console if Authany SDK is configured successfully
Step 4: Implement the Context Provider
Since we want to reference the logged-in state everywhere in the app, let's put the state in a context provider with UserProvider.vue in the /src/contexts folder.
In UserProvider.vue, will have a isLoggedIn boolean value. The isLoggedIn boolean state can be auto-updated using the onSessionStateChange callback. This callback can be stored in delegate which is in the local SDK container.
// src/contexts/UserProvider.vue
<script lang="ts">
import {
  defineComponent,
  InjectionKey,
  provide,
  readonly,
  ref,
  Ref,
  toRefs,
} from "vue";
import authgear from "@authgear/web";

export interface UserContextValue {
  isLoggedIn: Ref<boolean>;
}

export const UserStateSymbol: InjectionKey<UserContextValue> =
  Symbol("UserState");

export default defineComponent({
  setup() {
    const isLoggedIn = ref(false);

    const state: UserContextValue = {
      isLoggedIn,
    };

    authgear.delegate = {
      onSessionStateChange: (container) => {
        const sessionState = container.sessionState;
        if (sessionState === "AUTHENTICATED") {
          isLoggedIn.value = true;
        } else {
          isLoggedIn.value = false;
        }
      },
    };

    provide<UserContextValue>(UserStateSymbol, toRefs(readonly(state)));

    return { state };
  },
});
</script>

<template>
  <slot />
</template>
Step 5: Implement the Auth Redirect
Next, we will add an "AuthRedirect" page for handling the authentication result after the user has been authenticated by Authany.
Create the AuthRedirect.vue component file in the src/components/ folder.
Call the Authany finishAuthentication() function in the Auth Redirect component to send a token back to Authany server in exchange for access token and refresh token. Don't worry about the technical jargons, finishAuthentication() will do all the hard work for you and and save the authentication data.
When the authentication is finished, the isLoggedIn state from the UserContextProvider will automatically be set to true. Finally, navigate back to root (/) which is our Home page.
The final AuthRedirect.vue will look like this
// src/components/AuthRedirect.vue
<script setup lang="ts">
import { onMounted } from "vue";
import authgear from "@authgear/web";
import { router } from "../router";

onMounted(() => {
  async function updateToken() {
    try {
      await authgear.finishAuthentication();
    } finally {
      router.replace({ path: "/" });
    }
  }
  updateToken().catch((e) => console.error(e));
});
</script>

<template></template>
Step 6: Apply Routes and Context Provider to the App
As we have already configured the routes in the previous section, we can simply add <router-view /> tag to the App.vue. We can then Import UserProvider and wrap the router-view with it.
Your final App.vue should look like this:
// src/App.vue
<script setup lang="ts">
import UserProvider from "./contexts/UserProvider.vue";
</script>

<template>
  <UserProvider>
    <router-view />
  </UserProvider>
</template>
The file structure should now look like
src
├── App.vue
├── main.ts
├── router.ts
├── vite-env.d.ts
├── contexts
│   └── UserProvider.vue
└── components
    ├── AuthRedirect.vue
    └── Home.vue
Step 7: Add a Login button
First, we will import the Authany dependency. Then add the login button which will call startAuthentication(ConfigureOptions) through startLogin callback on click. This will redirect the user to the login page.
// src/components/Home.vue
<script setup lang="ts">
import authgear, { PromptOption } from "@authgear/web";

const startLogin = () => {
  authgear
    .startAuthentication({
      redirectURI: import.meta.env.VITE_AUTHGEAR_REDIRECT_URL,
      prompt: PromptOption.Login,
    })
    .then(
      () => {
        // started authorization, user should be redirected to Authgear
      },
      (err) => {
        // failed to start authorization
        console.error(err);
      }
    );
};
</script>

<template>
  <h1>Home Page</h1>
  <button @click="startLogin">Login</button>
</template>
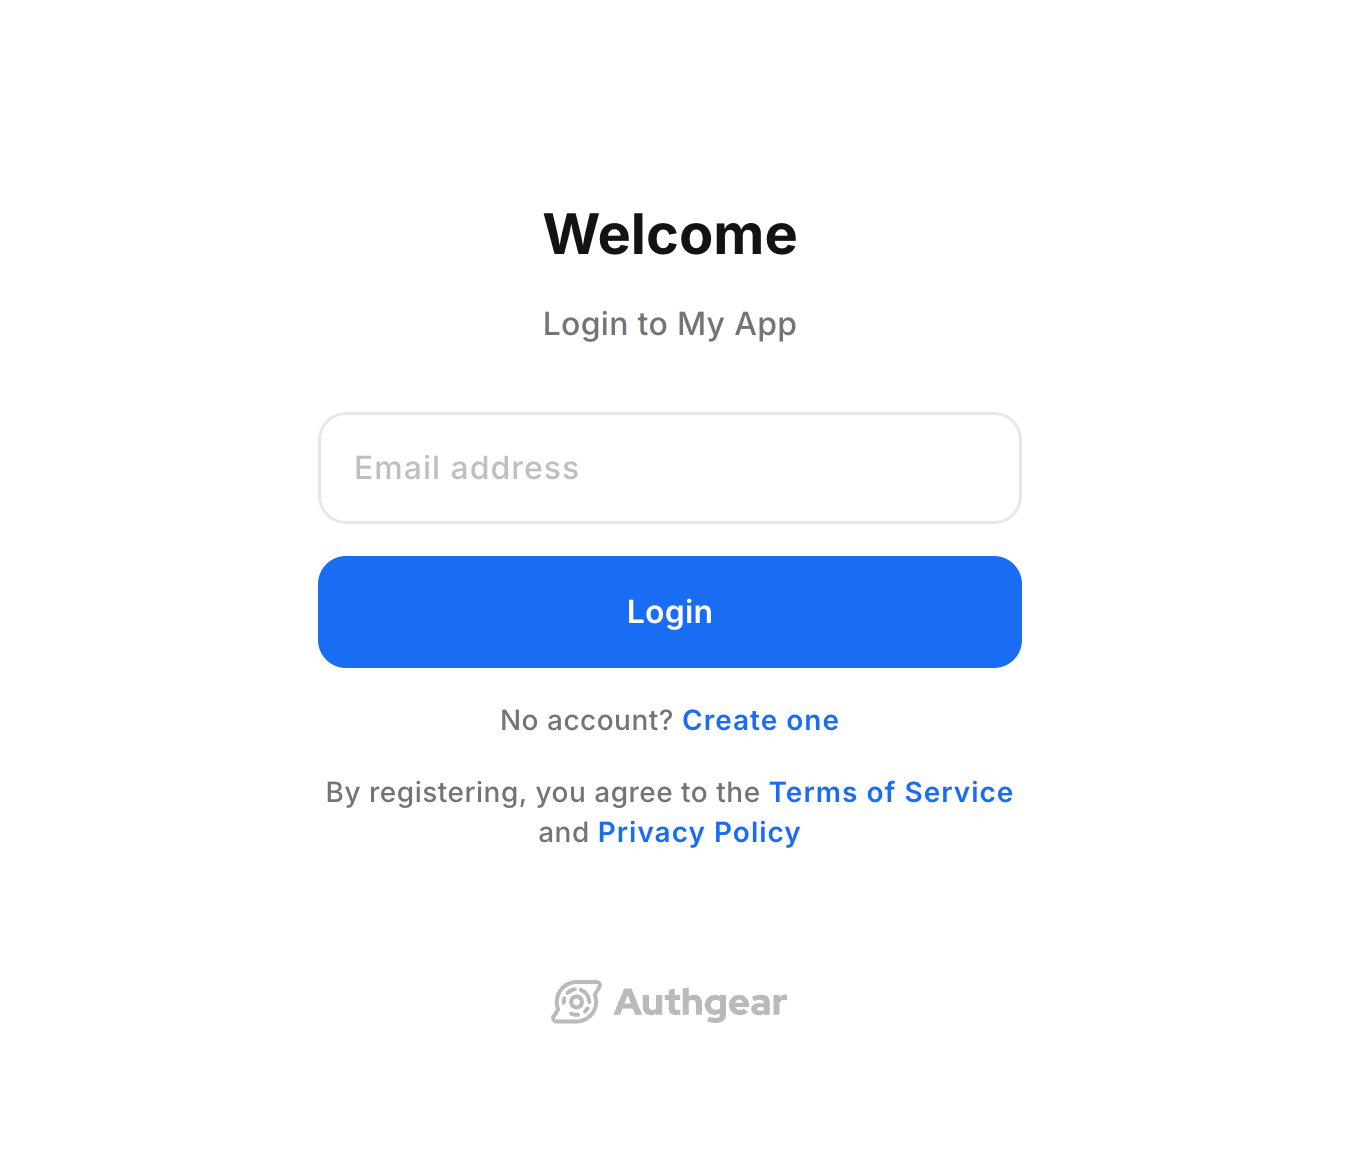
You can now run npm run dev and you will be redirected to the Authany Login page when you click the Login button.
Step 8: Show the user information
The Authany SDK helps you get the information of the logged-in users easily.
In the last step, the user is successfully logged in so let's try to print the user ID (sub) of the user in the Home page.
In Home.vue, we will add a simple Loading splash and a greeting message printing the Sub ID. We will add two conditional elements such that they are only shown when user is logged in. We can also change the login button to show only if the user is not logged in.
Make use of isLoggedIn from the UserProvider to control the components on the page. Fetch the user info by fetchUserInfo() and access its sub property.
The Login button can be also rendered conditionally which only visible if the user is not logged in.
// src/components/Home.vue
<script setup lang="ts">
import authgear, { PromptOption } from "@authgear/web";
import { inject, onMounted, ref } from "vue";
import { UserStateSymbol } from "../contexts/UserProvider.vue";

const { isLoggedIn } = inject(UserStateSymbol)!;
const isLoading = ref(false);
const greetingMessage = ref("");

onMounted(() => {
  async function updateGreetingMessage() {
    isLoading.value = true;
    try {
      if (isLoggedIn.value) {
        const userInfo = await authgear.fetchUserInfo();
        greetingMessage.value = "The current User sub: " + userInfo.sub;
      }
    } finally {
      isLoading.value = false;
    }
  }

  updateGreetingMessage().catch((e) => {
    console.error(e);
  });
});

const startLogin = () => {
  authgear
    .startAuthentication({
      redirectURI: import.meta.env.VITE_AUTHGEAR_REDIRECT_URL,
      prompt: PromptOption.Login,
    })
    .then(
      () => {
        // started authorization, user should be redirected to Authgear
      },
      (err) => {
        // failed to start authorization
        console.error(err);
      }
    );
};
</script>

<template>
  <h1>Home Page</h1>
  <span v-if="isLoading">Loading...</span>
  <span v-if="greetingMessage">{{ greetingMessage }}</span>
  <div v-if="!isLoggedIn">
    <button @click="startLogin">Login</button>
  </div>
</template>
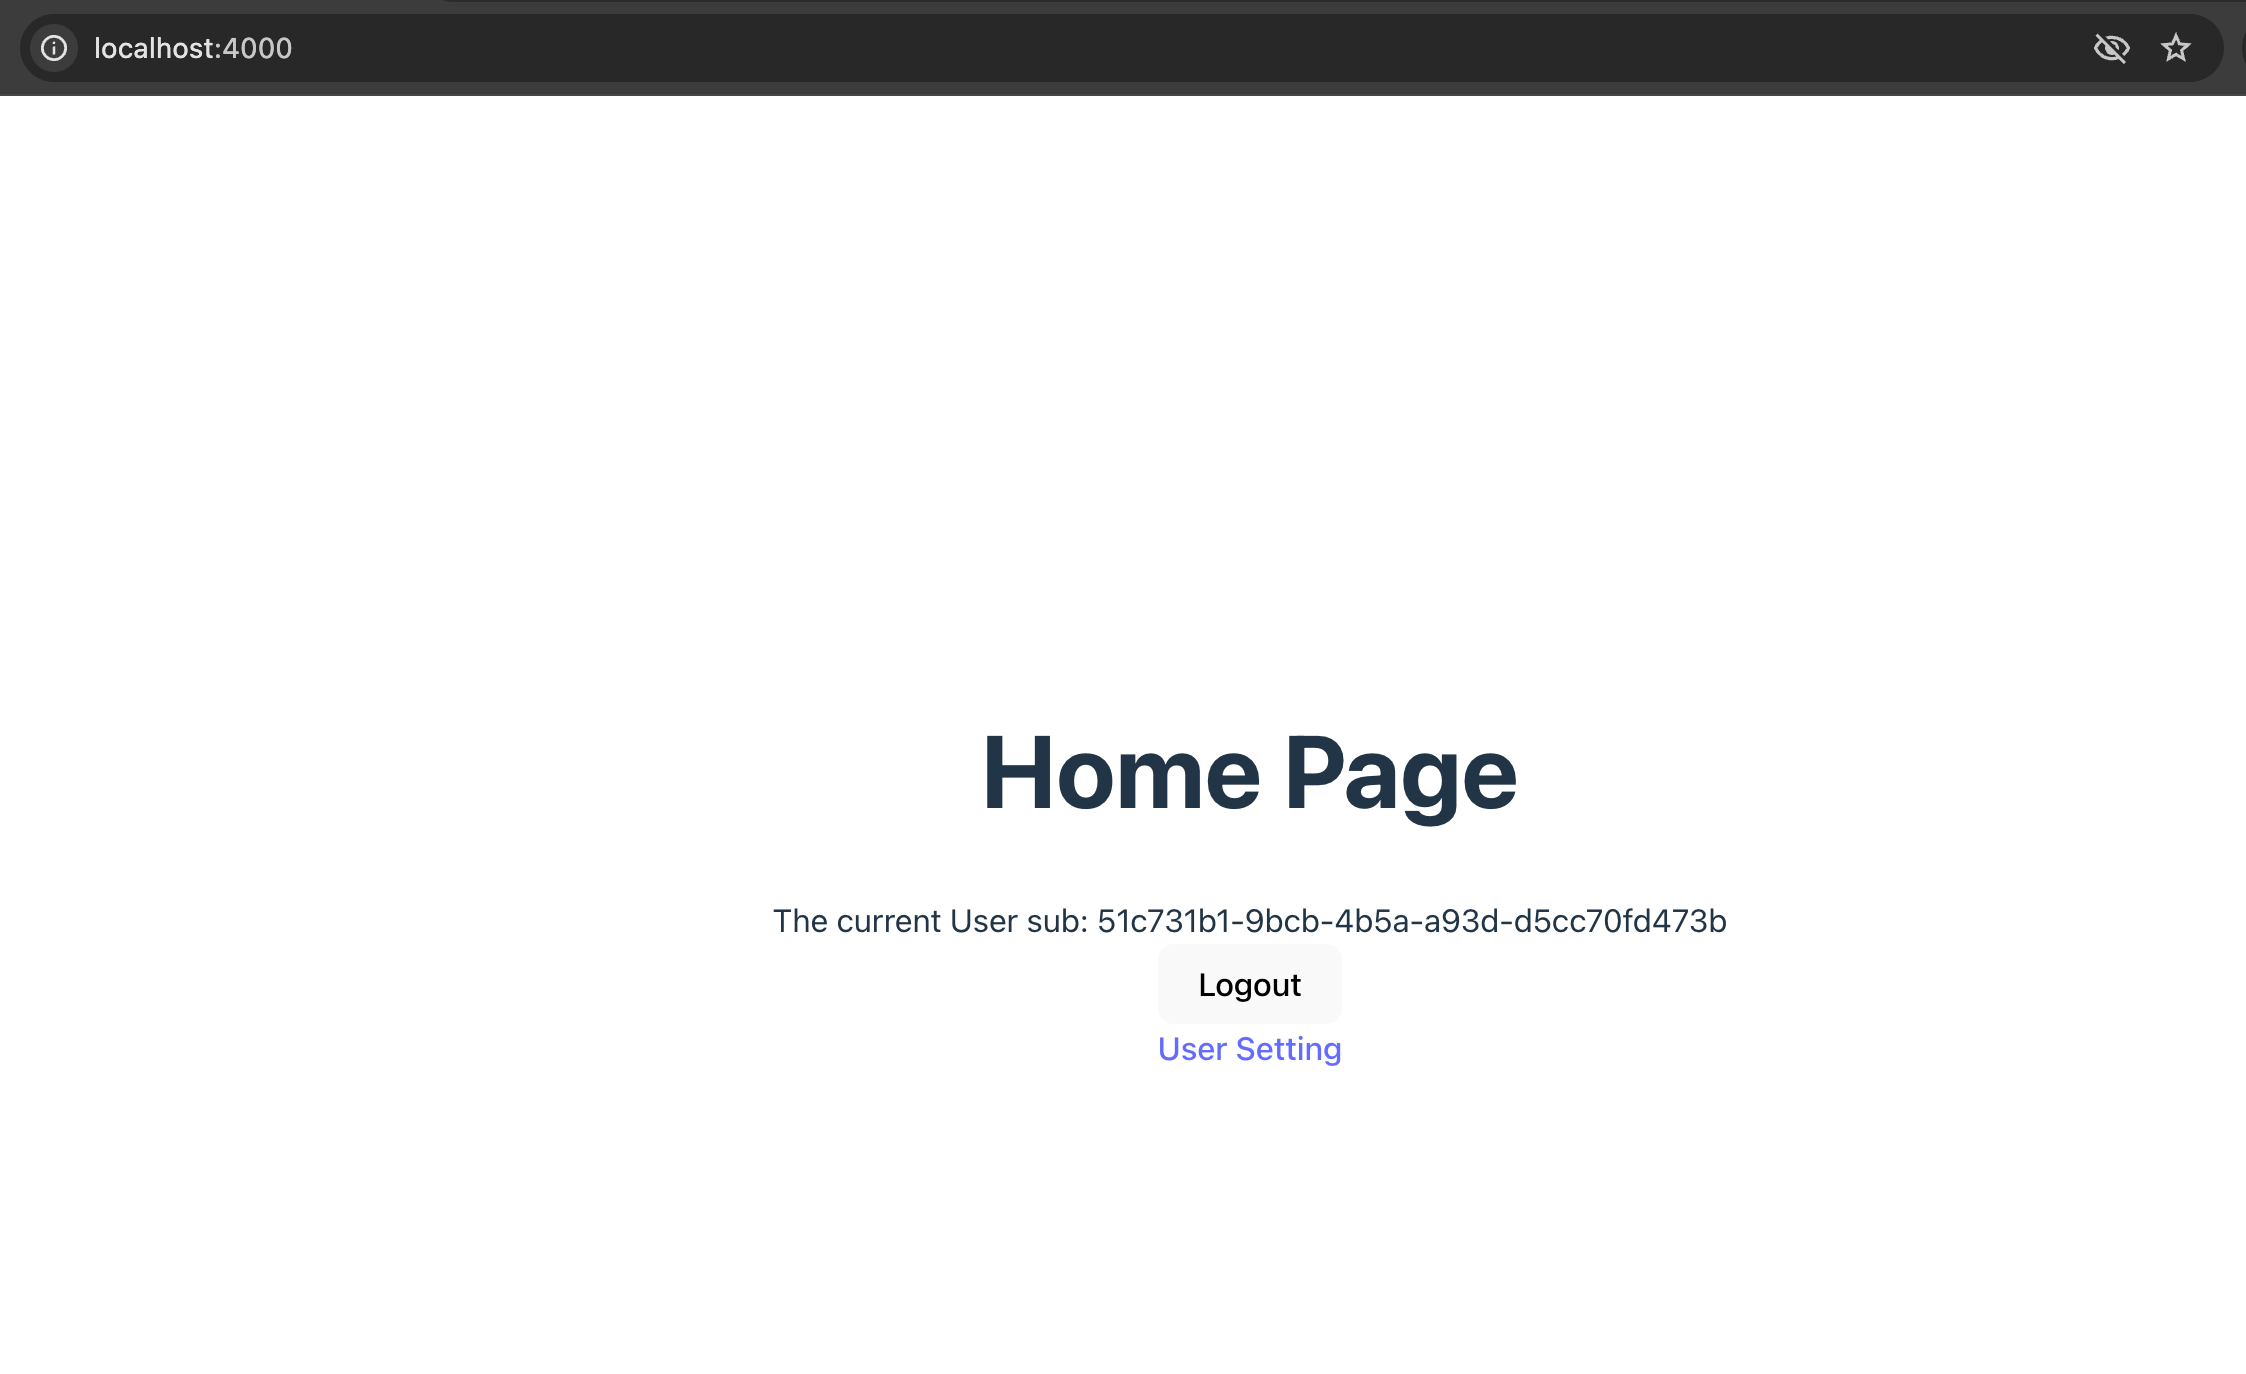
Run the app again, the User ID (sub) of the user should be printed on the Home page.
Step 9: Add a Logout button
Finally, let's add a Logout button when a user is logged in.
In Home.vue, we will add the following conditional elements in the template:
And add the logout callback:
const logout = () => {
  authgear
    .logout({
      redirectURI: "http://localhost:4000/",
    })
    .then(
      () => {
        greetingMessage.value = "";
      },
      (err) => {
        console.error(err);
      }
    );
};
Run the app again, we can now log out by clicking the Logout button.
Step 10: Open User Settings
Authany provides a built-in UI for the users to set their attributes and change security settings.
Use the open function to open the settings page at <your_app_endpoint>/settings
In Home.vue append a conditional link to the logout button section like this:
<div v-if="isLoggedIn">
  <button @click="logout()">Logout</button>
  <br />
  <a
    target="_blank"
    rel="noreferrer"
    @click.stop.prevent="userSetting"
    href="#"
  >
    User Setting
  </a>
</div>
And add the userSetting callback:
import authgear, { PromptOption, Page } from "@authgear/web";

const userSetting = async () => {
  await authgear.open(Page.Settings);
};
This is the resulting Home.vue:
// src/components/Home.vue
<script setup lang="ts">
import authgear, { PromptOption, Page } from "@authgear/web";
import { inject, onMounted, ref } from "vue";
import { UserStateSymbol } from "../contexts/UserProvider.vue";

const { isLoggedIn } = inject(UserStateSymbol)!;
const isLoading = ref(false);
const greetingMessage = ref("");

onMounted(() => {
  async function updateGreetingMessage() {
    isLoading.value = true;
    try {
      if (isLoggedIn.value) {
        const userInfo = await authgear.fetchUserInfo();
        greetingMessage.value = "The current User sub: " + userInfo.sub;
      }
    } finally {
      isLoading.value = false;
    }
  }

  updateGreetingMessage().catch((e) => {
    console.error(e);
  });
});

const startLogin = () => {
  authgear
    .startAuthentication({
      redirectURI: import.meta.env.VITE_AUTHGEAR_REDIRECT_URL,
      prompt: PromptOption.Login,
    })
    .then(
      () => {
        // started authorization, user should be redirected to Authgear
      },
      (err) => {
        // failed to start authorization
        console.error(err);
      }
    );
};

const logout = () => {
  authgear
    .logout({
      redirectURI: "http://localhost:4000/",
    })
    .then(
      () => {
        greetingMessage.value = "";
      },
      (err) => {
        console.error(err);
      }
    );
};

const userSetting = async () => {
  await authgear.open(Page.Settings);
};
</script>

<template>
  <h1>Home Page</h1>
  <span v-if="isLoading">Loading...</span>
  <span v-if="greetingMessage">{{ greetingMessage }}</span>
  <div v-if="!isLoggedIn">
    <button @click="startLogin">Login</button>
  </div>
  <div v-if="isLoggedIn">
    <button @click="logout">Logout</button>
    <br />
    <a
      target="_blank"
      rel="noreferrer"
      @click.stop.prevent="userSetting"
      href="#"
    >
      User Setting
    </a>
  </div>
</template>
Next steps, Calling an API
To access restricted resources on your backend application server, the HTTP requests should include the access token in their Authorization headers. The Web SDK provides a fetch function which automatically handles this, or you can get the token with authgear.accessToken.
Option 1: Using fetch function provided by Authany SDK
Authany SDK provides the fetch function for you to call your application server. This fetch function will include the Authorization header in your application request, and handle the refresh access token automatically. The authgear.fetch implements fetch.
authgear
    .fetch("YOUR_SERVER_URL")
    .then(response => response.json())
    .then(data => console.log(data));
Option 2: Add the access token to the HTTP request header
You can get the access token through authgear.accessToken. Call refreshAccessTokenIfNeeded every time before using the access token, the function will check and make the network call only if the access token has expired. Include the access token into the Authorization header of the application request.
authgear
    .refreshAccessTokenIfNeeded()
    .then(() => {
        // access token is ready to use
        // accessToken can be string or undefined
        // it will be empty if user is not logged in or session is invalid
        const accessToken = authgear.accessToken;

        // include Authorization header in your application request
        const headers = {
            Authorization: `Bearer ${accessToken}`
        };
    });