PHP
Using OAuth, you can use Authany to add user authentication in a vanilla PHP application.
In this guide, we'll cover how to implement OAuth 2.0 login in a regular PHP web application with Authany as the Identity Provider.
What You Will Learn
At the end of this post, you'll learn the following:
- How to create an Authany Application
- How to enable email and password sign-in
- How to sign in with Authany from a PHP app
- How to request user info from Authany
- How to use a refresh token
- And finally how to log users out and revoke access tokens.
Prerequisites
To follow along, you'll need the following:
- PHP runtime (E.g XAMPP for testing offline on Windows devices)
- An Authany account. Sign up for free if you don't have an account yet.
- Composer (PHP package manager) installation
- Your preferred code editor (e.g VS Code).
What We Will Build
In this guide, we'll build a basic PHP application that lets a user sign in with their registered email and password.
The application will welcome the user with their email address after they sign in successfully. If the user is not signed in, the application will display links to Register or Login.
The following screenshot shows what the User Interface for the app will look like:
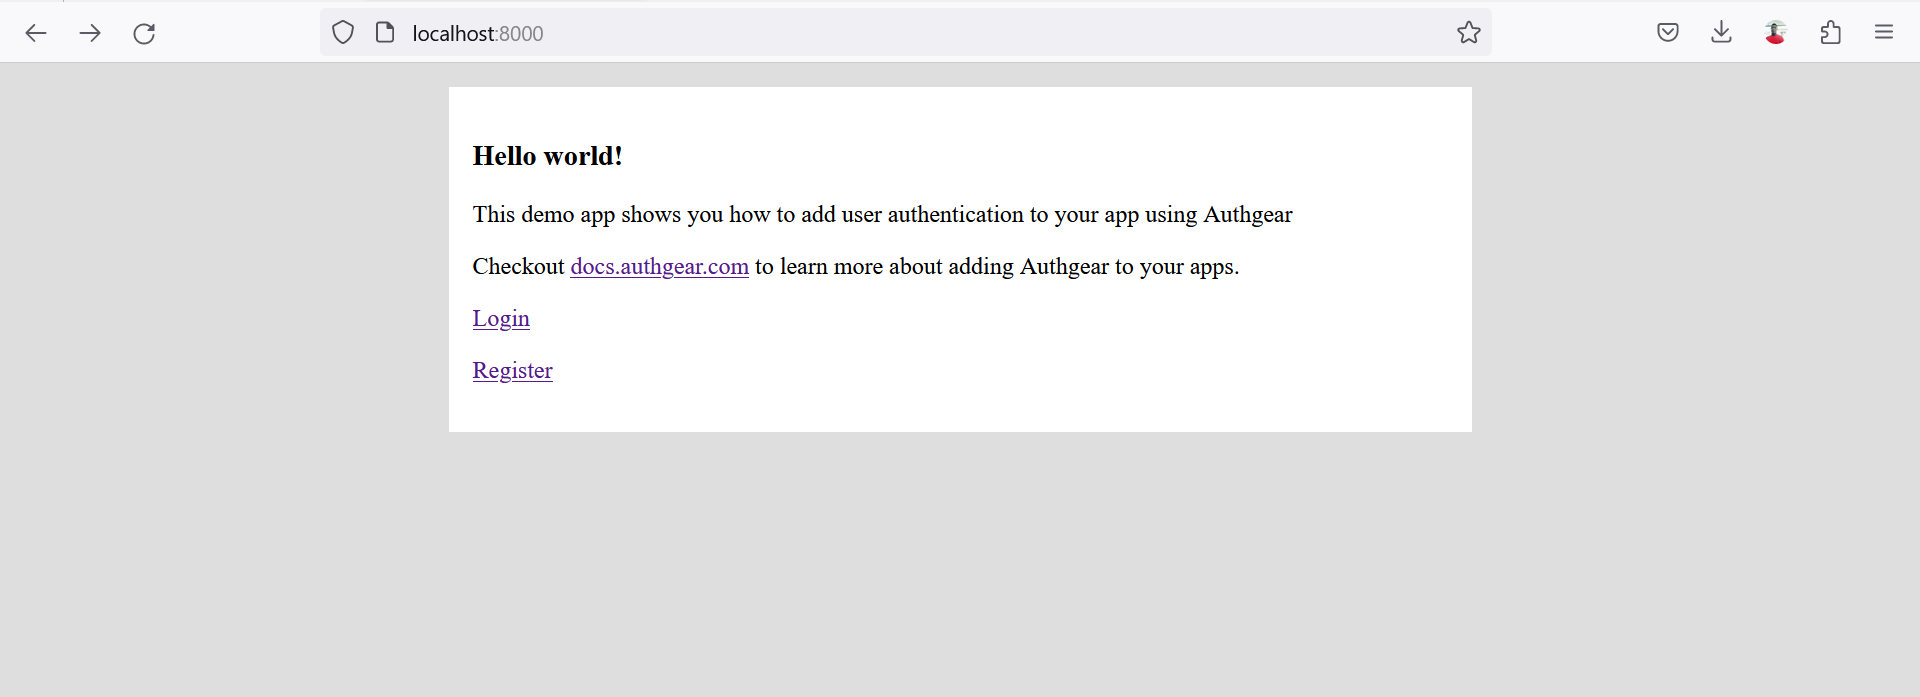
How to Add User Authentication to PHP with Authany
Now let's dive into the actual steps of how to add Authany to a PHP application.
Part 1: Configure an Authany Application
Under this section, we will cover the steps for configuring the Authany application our PHP website will be connecting to. We'll do all these configurations in the Authany Portal.
Step 1: Set up Authany Application
The first step you need to take is to create a new application or configure an existing application on the Authany Portal.
To do that, log in to the Authany Portal, and select your project (or create a new one if you don't have any yet). From your project dashboard navigate to the Applications section and enter the details for your new application as shown below:
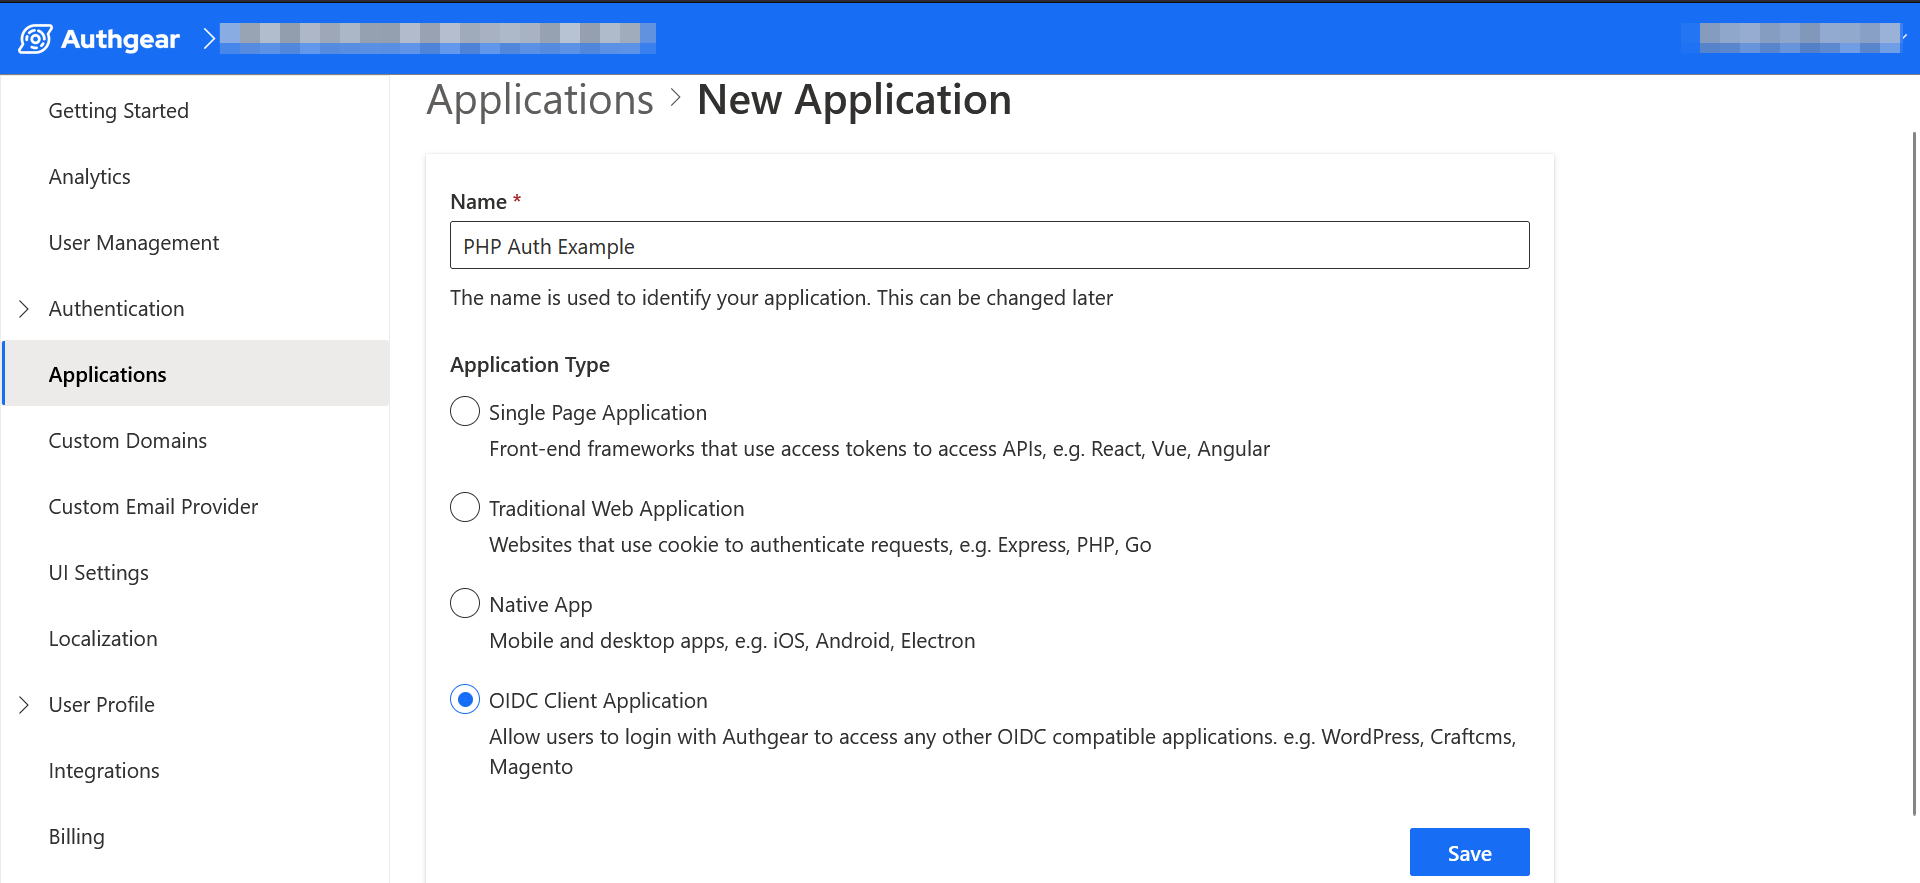
Once you're done, click on the Save button to continue. Then, click on Next to see the configuration page for your application.
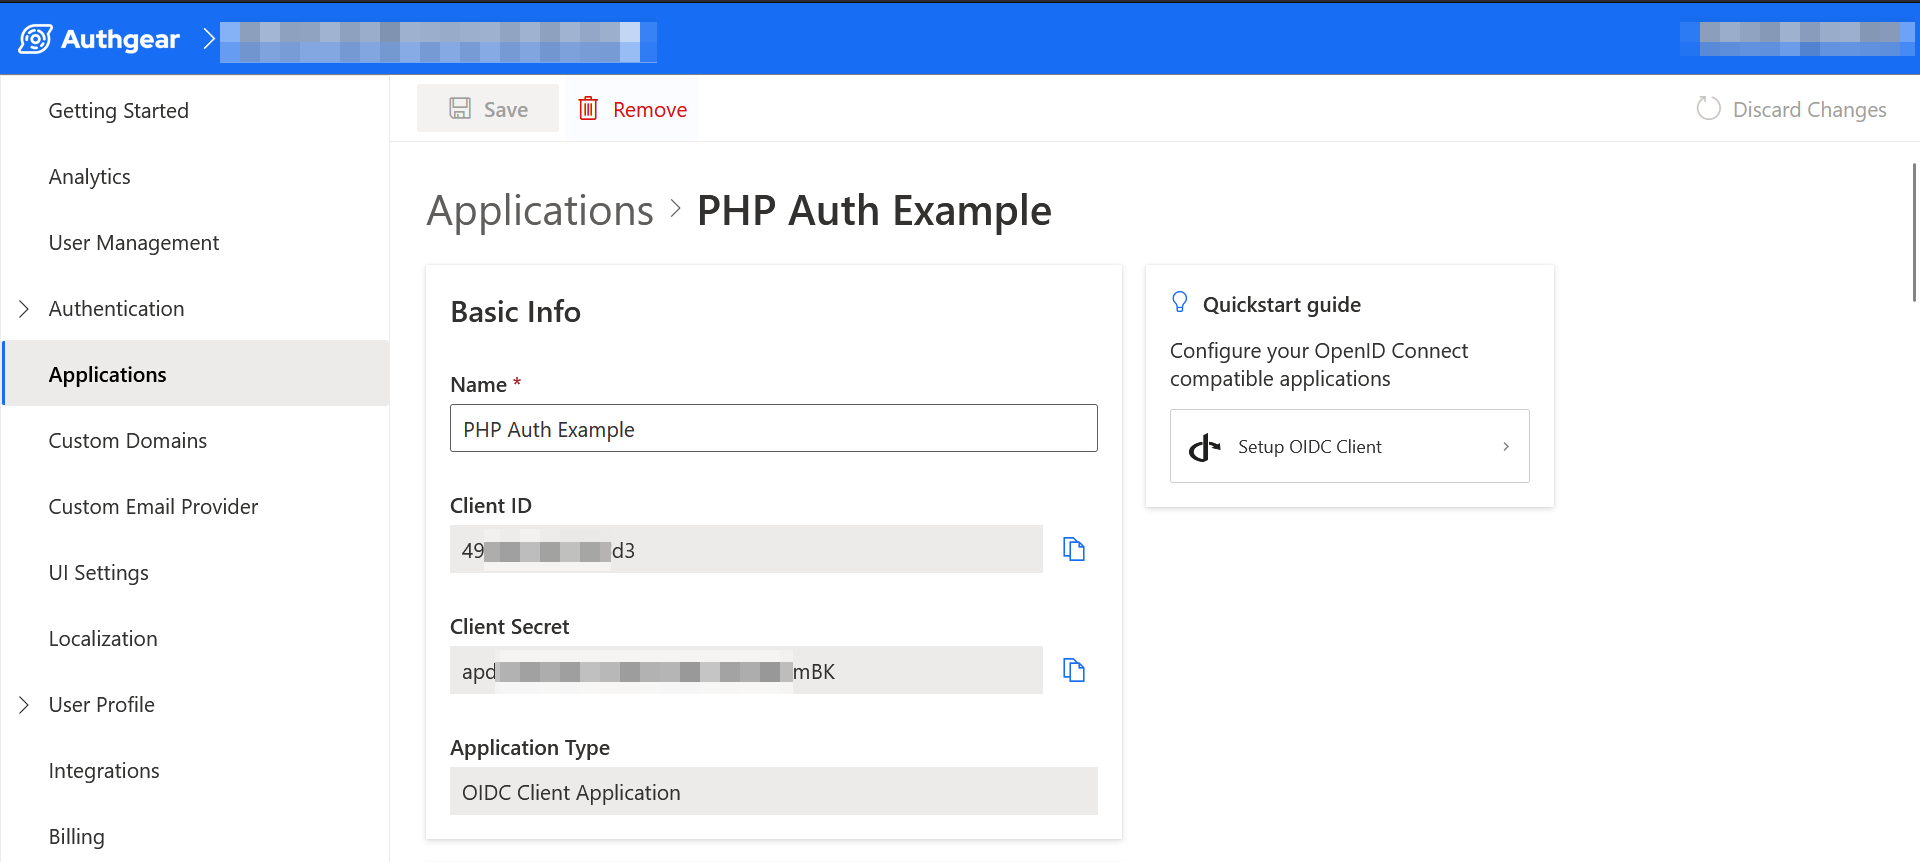
The application configuration page contains basic information like Client ID and Client Secret that we'll use later in this tutorial. Hence, try to note the values down.
In addition to basic information, you can find other configuration information including endpoints and Authorized Redirect URIs.
Step 2: Authorized Redirect URIs
The Authorized Redirect URIs section contains a link to the page you want Authany to redirect users to after login.
Update the value for Authorized Redirect URIs to a page on your application. For our example PHP application the value will be http://localhost because we plan to test run it offline using XAMPP. Also, try to note this value down as we'll be using it in later steps.
Part 2: Implement PHP Project
Here we will cover the steps for implementing a PHP website that interacts with Authany using the Open ID Connect (OIDC) standard.
Step 1: Create a PHP Project
Create a new PHP project on your computer and add an index.php file to the root of the project folder.
Add the following code to index.php to create the User Interface of the example app.
<?php
$appUrl = "REPLACE WITH YOUR AUTHGEAR PROJECT URL";
?>
<!DOCTYPE html>
<html lang="en">
<head>
    <meta charset="UTF-8">
    <meta name="viewport" content="width=device-width, initial-scale=1.0">
    <title>PHP Demo - Home</title>
</head>
<body style="background-color: #DEDEDE">
    <div style="max-width: 650px; margin: 16px auto; background-color: #FFFFFF; padding: 16px;">
        <h3>Hello world!</h3>
        <p>This demo app shows you how to add user authentication to your app using Authgear</p>
        <p>Checkout <a href="https://docs.authany.com/">docs.authgear.com</a> to learn more about adding Authgear to your apps.</p>

        <p><a href="login.php">Login</a></p>
        <p><a href="logout.php">Logout</a></p>
    </div>
</body>
</html>
Note: The Login and Logout links in the above code currently point to login.php and logout.php respectively, we'll create both files later.
Step 2: Add Authany Configuration to PHP Project
In this step, we'll add our Authany application configuration to the PHP project.
We'll use the OAuth 2.0 Client PHP package for the configuration.
Install the package manually from Github or via Composer by running the following command from your PHP project's root directory:
Next, after the package is installed, create a new config.php file in the PHP project folder. Add the following code to the file:
<?php
require 'vendor/autoload.php';

$appUrl = "PLACE_YOUR_PROJECT_URL_HERE";
$clientID = "PLACE_YOUR_CLIENT_ID_HERE";
$clientSecret = "PLACE_YOUR_CLIENT_SECRET_HERE";
$redirectUri = "PLACE_YOUR_REDIRECT_URI_HERE";

$provider = new \League\OAuth2\Client\Provider\GenericProvider([
    'clientId'                => $clientID,    // The client ID assigned to you by the provider (authgear).
    'clientSecret'            => $clientSecret,    // The client secret is assigned to you by the provider.
    'redirectUri'             => $redirectUri, // The authorized Redirect URI you specified in your authgear app.
    'urlAuthorize'            => $appUrl.'/oauth2/authorize',
    'urlAccessToken'          => $appUrl.'/oauth2/token',
    'urlResourceOwnerDetails' => $appUrl.'/oauth2/userInfo',
    'scopes' => 'openid offline_access'
]);
?>
Note: Replace the values for clientId, clientSecret, redirectUri with corresponding values from the Authany application you created in Step 1.
Including the offline_access scope is required to get a refresh token from Authany.
Step 3: Add Login Authorization
The flow for Login on our app is as follows:
- The user clicks on the Login button
- User is redirected to the Authany authorization page where they can sign in using email and password or any other sign-in methods you have enabled for your Authany project.
- The user is redirected back to your website with an authorization code.
In order to implement the above, you need to create a login.php file in your project's root directory. Add the following code to the login.php file:
<?php
include "config.php";

if (!isset($_GET['code'])) {
    // Fetch the authorization URL from the provider; this returns the
    // urlAuthorize option and generates and applies any necessary parameters
    // (e.g. state).
    $authorizationUrl = $provider->getAuthorizationUrl();

    // Redirect the user to the authorization URL.
    header('Location: ' . $authorizationUrl);
    exit;
}
?>
At this point, if you try running the example app in a browser and click the Login link in index.php, your app should redirect to the Authany login page. If you sign in successfully, you should be redirected back to the redirect URL you specified earlier in your project configuration.
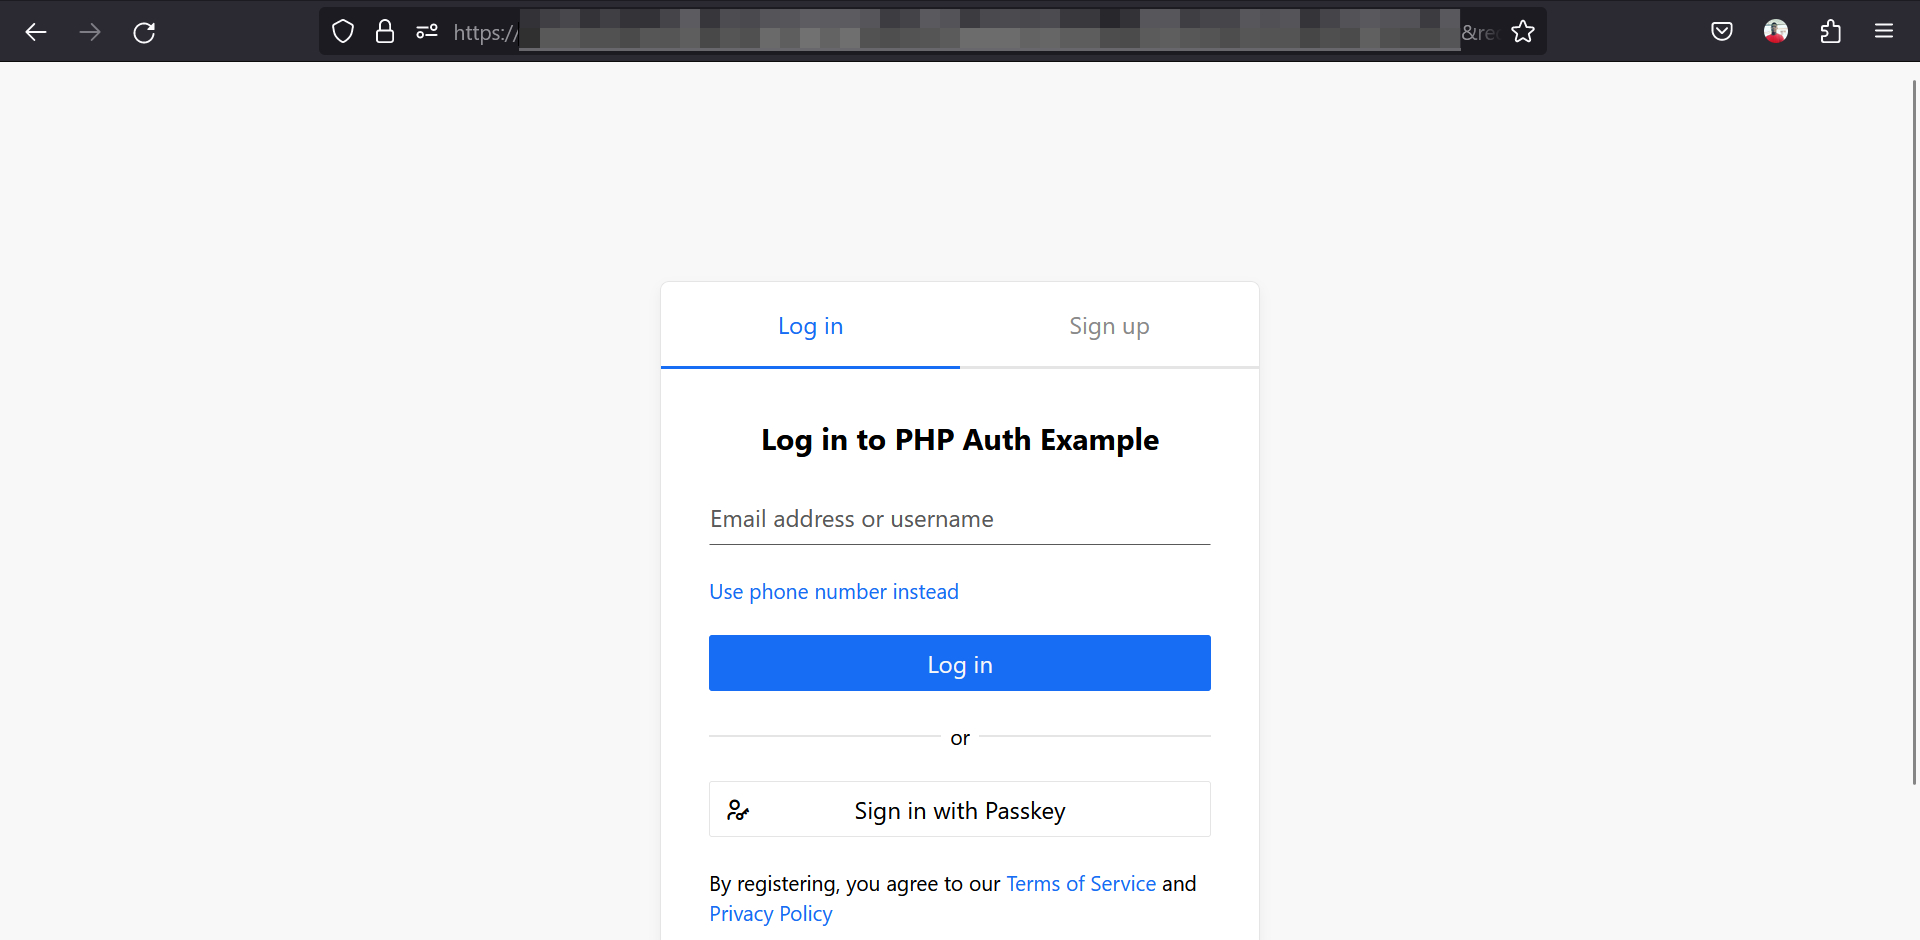
Authany will redirect to your Authorized Redirect URI with extra parameters like code or an error message in the URL. The value for the code parameter is your authorization code. In the next step, we'll use the authorization code to generate an access token.
Step 4: Get Access Token and Request User Info
Usually, after successful sign-in, you'll want to start using the current user's info to offer custom experience in your app.
In this step, we'll use the PHP OAuth 2.0 Client once more to interact with our Authany app.
First, open index.php and search for the line with the following code:
Replace the above line with this code:
include "config.php";
session_start();

// if code is set, get access token
if (isset($_GET['code'])) {
    $code = $_GET['code'];

    try {
        $accessToken = $provider->getAccessToken('authorization_code', [
            'code' => $code
        ]);
        $_SESSION['accessToken'] = $accessToken;
        $_SESSION['refreshToken'] = $accessToken->getRefreshToken(); //store refresh token so that you can use it later
    } catch (\League\OAuth2\Client\Provider\Exception\IdentityProviderException $e) {
        // Failed to get the access token or user details.
        exit($e->getMessage());
    }
}
The above code exchanges the authorization code returned in the redirect for an access token. It then stores the access token in the PHP session so that we can use this token in future requests to protected resources.
Now that we have the access token, let's try to get the current user's details. To do that, update the HTML part in index.php like this:
<div style="max-width: 650px; margin: 16px auto; background-color: #FFFFFF; padding: 16px;">
        <h3>Hello world!</h3>
        <p>This demo app shows you how to add user authentication to your app using Authgear</p>
        <p>Checkout <a href="https://docs.authany.com/">docs.authgear.com</a> to learn more about adding Authgear to your apps.</p>
        <?php
        if (isset($_SESSION['accessToken'])) {

            //if access token exists in session, attempt to fetch user info
            $storedAccessToken = $_SESSION['accessToken'];
            $resourceOwner = $provider->getResourceOwner($storedAccessToken);
            $userInfo = $resourceOwner->toArray();

            echo "Welcome back " . $userInfo['email'];
            echo "<br/>";
            echo '<a href="">Logout</a>';

        } else { ?>
        <p><a href="login.php">Login</a></p>

        <?php
        }
        ?>
    </div>
Now test the app on your browser again and you should get the following page after login:
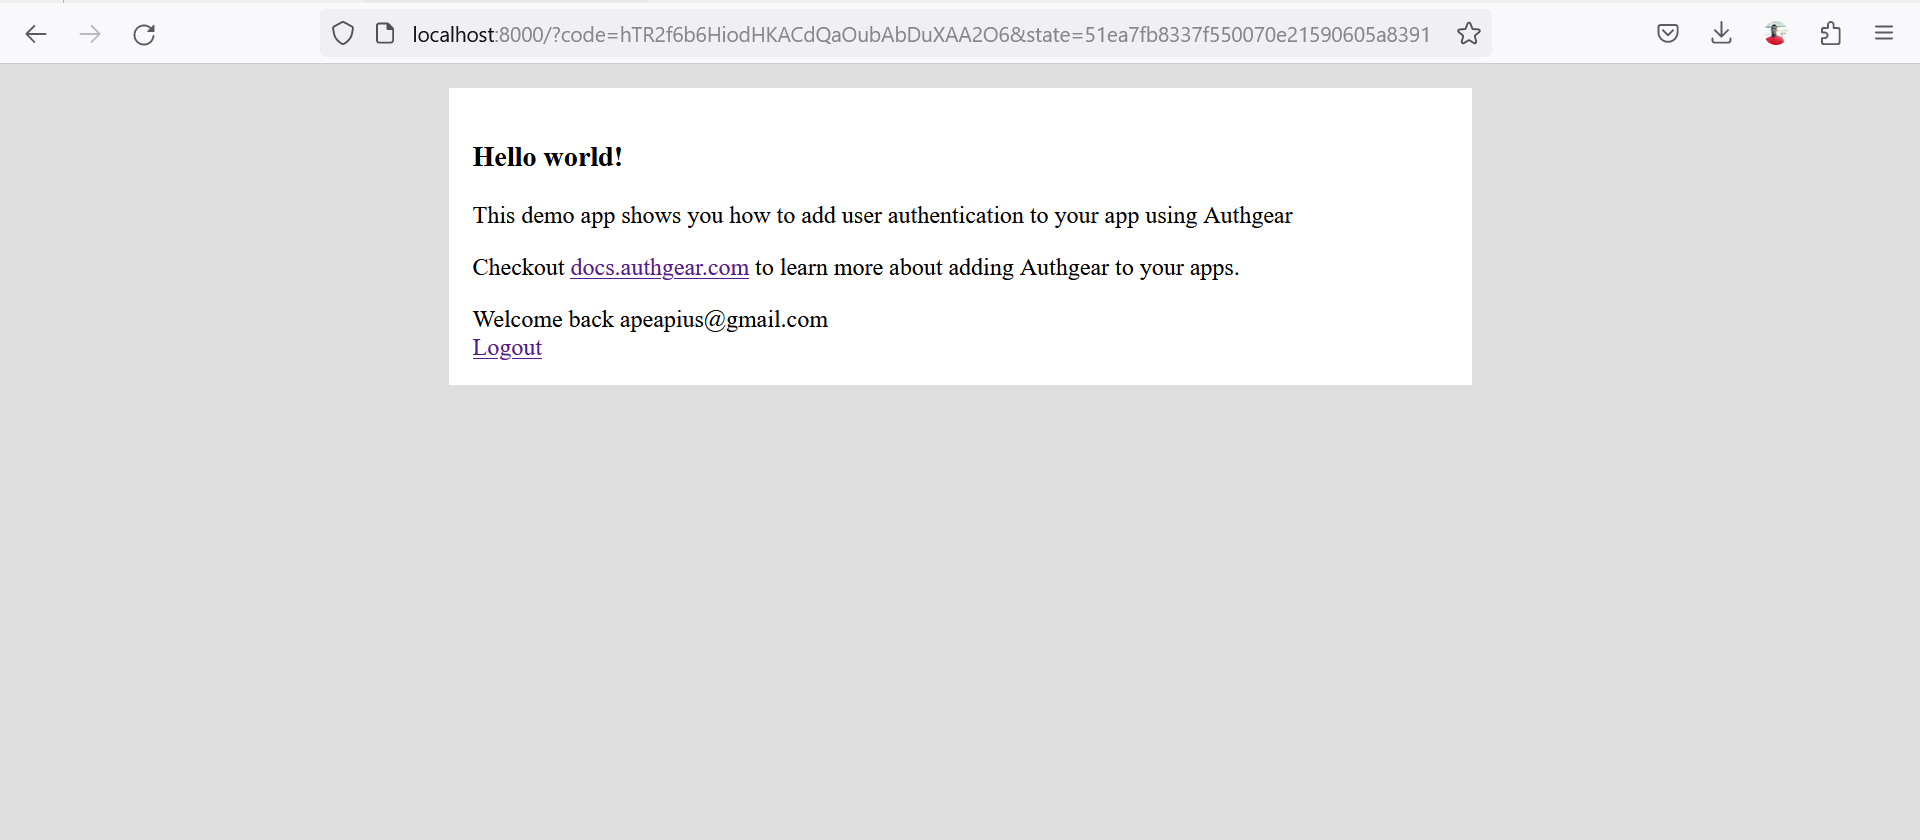
We've successfully added user authentication to our PHP app using Authany as the identity provider. The above page displays a welcome message with the email address the user registered with on your Authany project. You can display other info about the user from the value of $userInfo variable.
Step 5: Getting and Using a Refresh Token
In OAuth 2.0, a refresh token is a key that's usually included in the response from the token endpoint when a client application exchanges the authorization code for an access token.
Access tokens expire after some time. Hence, we can use this refresh token to request a new access token without requiring our application users to log in again. In this step, we'll show you how to use the refresh token.
In the last step, we stored the value for the refresh token in the $_SESSION['refreshToken'] variable. So, to get the refresh token, simply read the value from that variable.
Now, add the following code to index.php to read and use the refresh token to get a new access token:
First, find the line with the following code:
Replace that line with the following blocks of code:
if ($storedAccessToken->hasExpired()) {
    $newAccesstoken = $provider->getAccessToken('refresh_token', [
        'refresh_token' => $_SESSION['refreshToken']
    ]);

    $_SESSION['accessToken'] = $newAccesstoken;
    $resourceOwner = $provider->getResourceOwner($newAccesstoken);
} else {
    $resourceOwner = $provider->getResourceOwner($storedAccessToken);
}
Note: It is required to include offline_access in your OAuth 2.0 scopes to get a refresh token from Authany.
Step 6: Logout
Authany provides a token revoke endpoint that you can use to revoke a refresh token and all the access associated with it.
To use the token revoke endpoint to log users out of your application, create a new logout.php file in your project directory then add the following code to the file:
<?php
include "config.php";
session_start();
if (isset($_SESSION['accessToken'])) {
    $options = [];
    $options['headers']['content-type'] = 'application/x-www-form-urlencoded';
    $options['body'] = http_build_query(['token'=>$_SESSION['refreshToken']]);
    $request = $provider->getRequest(
        'POST',
        $appUrl. '/oauth2/revoke',
        $options
    );
    $provider->getResponse($request);

    $_SESSION['accessToken'] = null;
    $_SESSION['refreshToken'] = null;
}
The above code will revoke your refresh token and delete all the session variables.
Summary
In this post, we covered how to get started with adding Authany to a regular web app built with PHP and no framework.
We also tried out an example of using the Authany authorization code to retrieve an access token, then we used the token to access the user info endpoint.
Here's a link complete source code for our example app on Github.
There's so much more you can do with Authany and you can continue learning by checking out more topics on the documentation page.