JavaScript (Web)
In this guide, you'll learn how to integrate Authany into your website using the Token Approach. In the token approach, the Authany server returns an access token and a refresh token to your SPA application after successful user authentication.
Your application can send the access token in subsequent HTTP requests to access protected resources.
Follow this guide to add Authany SDK to any web application in under 🕐 10 minutes.
Note
See and clone the full code for the demo app for this tutorial in the Github Repo here.
This guide uses the Authany Web SDK for integrating Authany with a SPA Web app. Supported browsers include:
- Last 2 Firefox major versions
- Last 2 Chrome major versions
- Last 2 Edge major versions
- Last 3 Safari major versions
Setup Application in Authany
Signup for an Authany Portal account in https://manage.authany.com/. Or you can use your self-deployed Authany.
From the Project listing, create a new Project or select an existing Project. After that, we will need to create an application in the project.
Step 1: Create an application in the Portal
Go to Applications on the left menu bar.
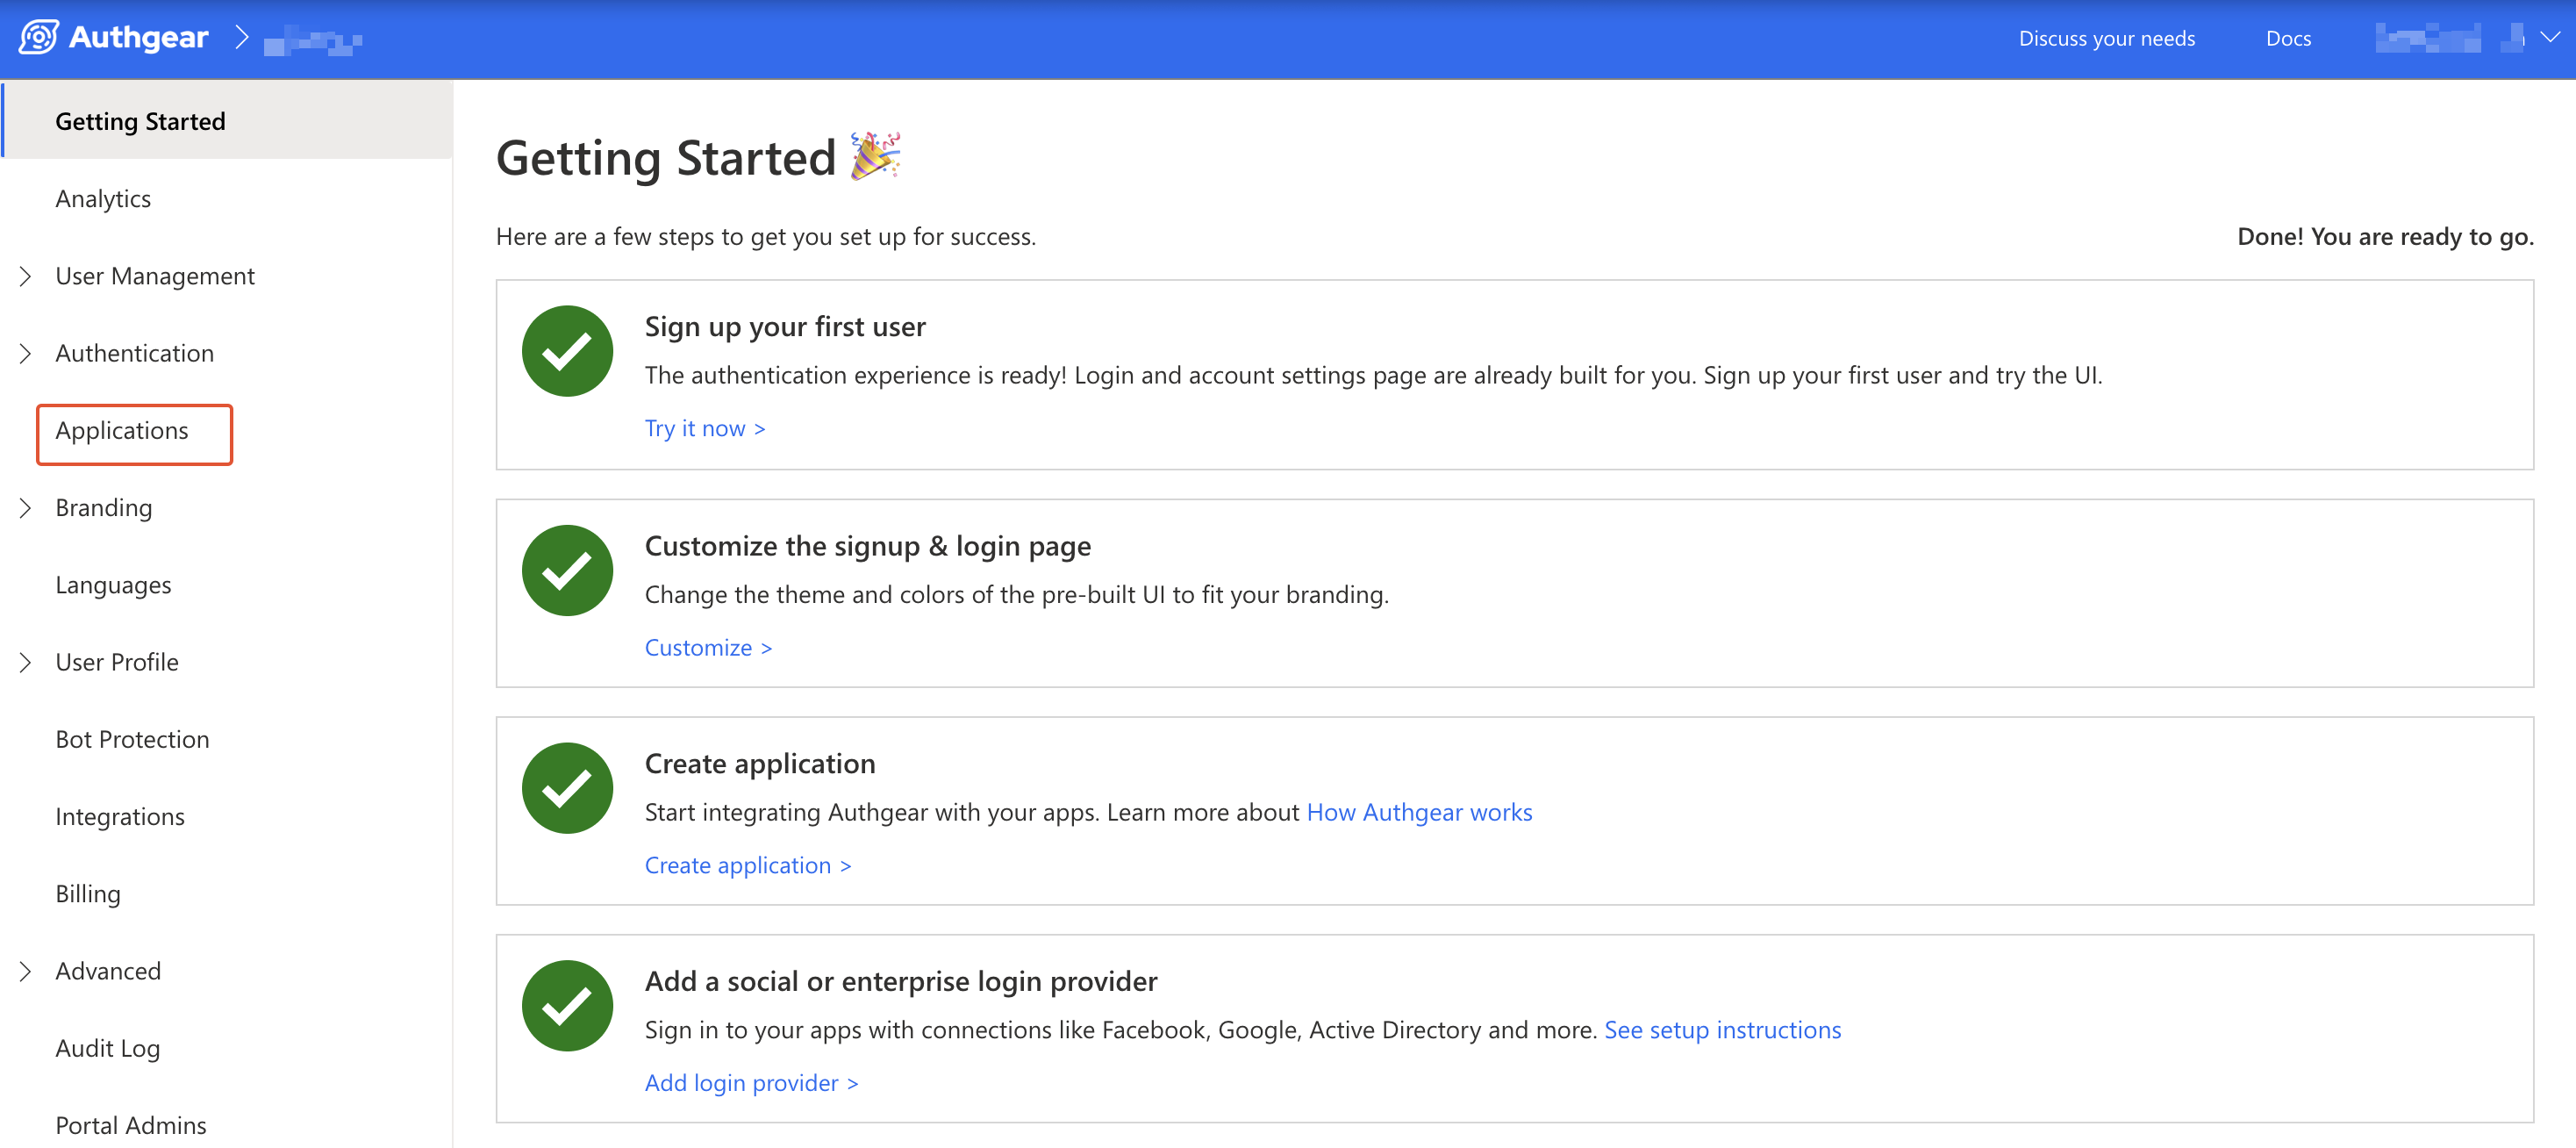
Click ⊕Add Application in the top toolbar.
Input the name of your application and select the application type Single Page Application. Click the Save button to proceed.
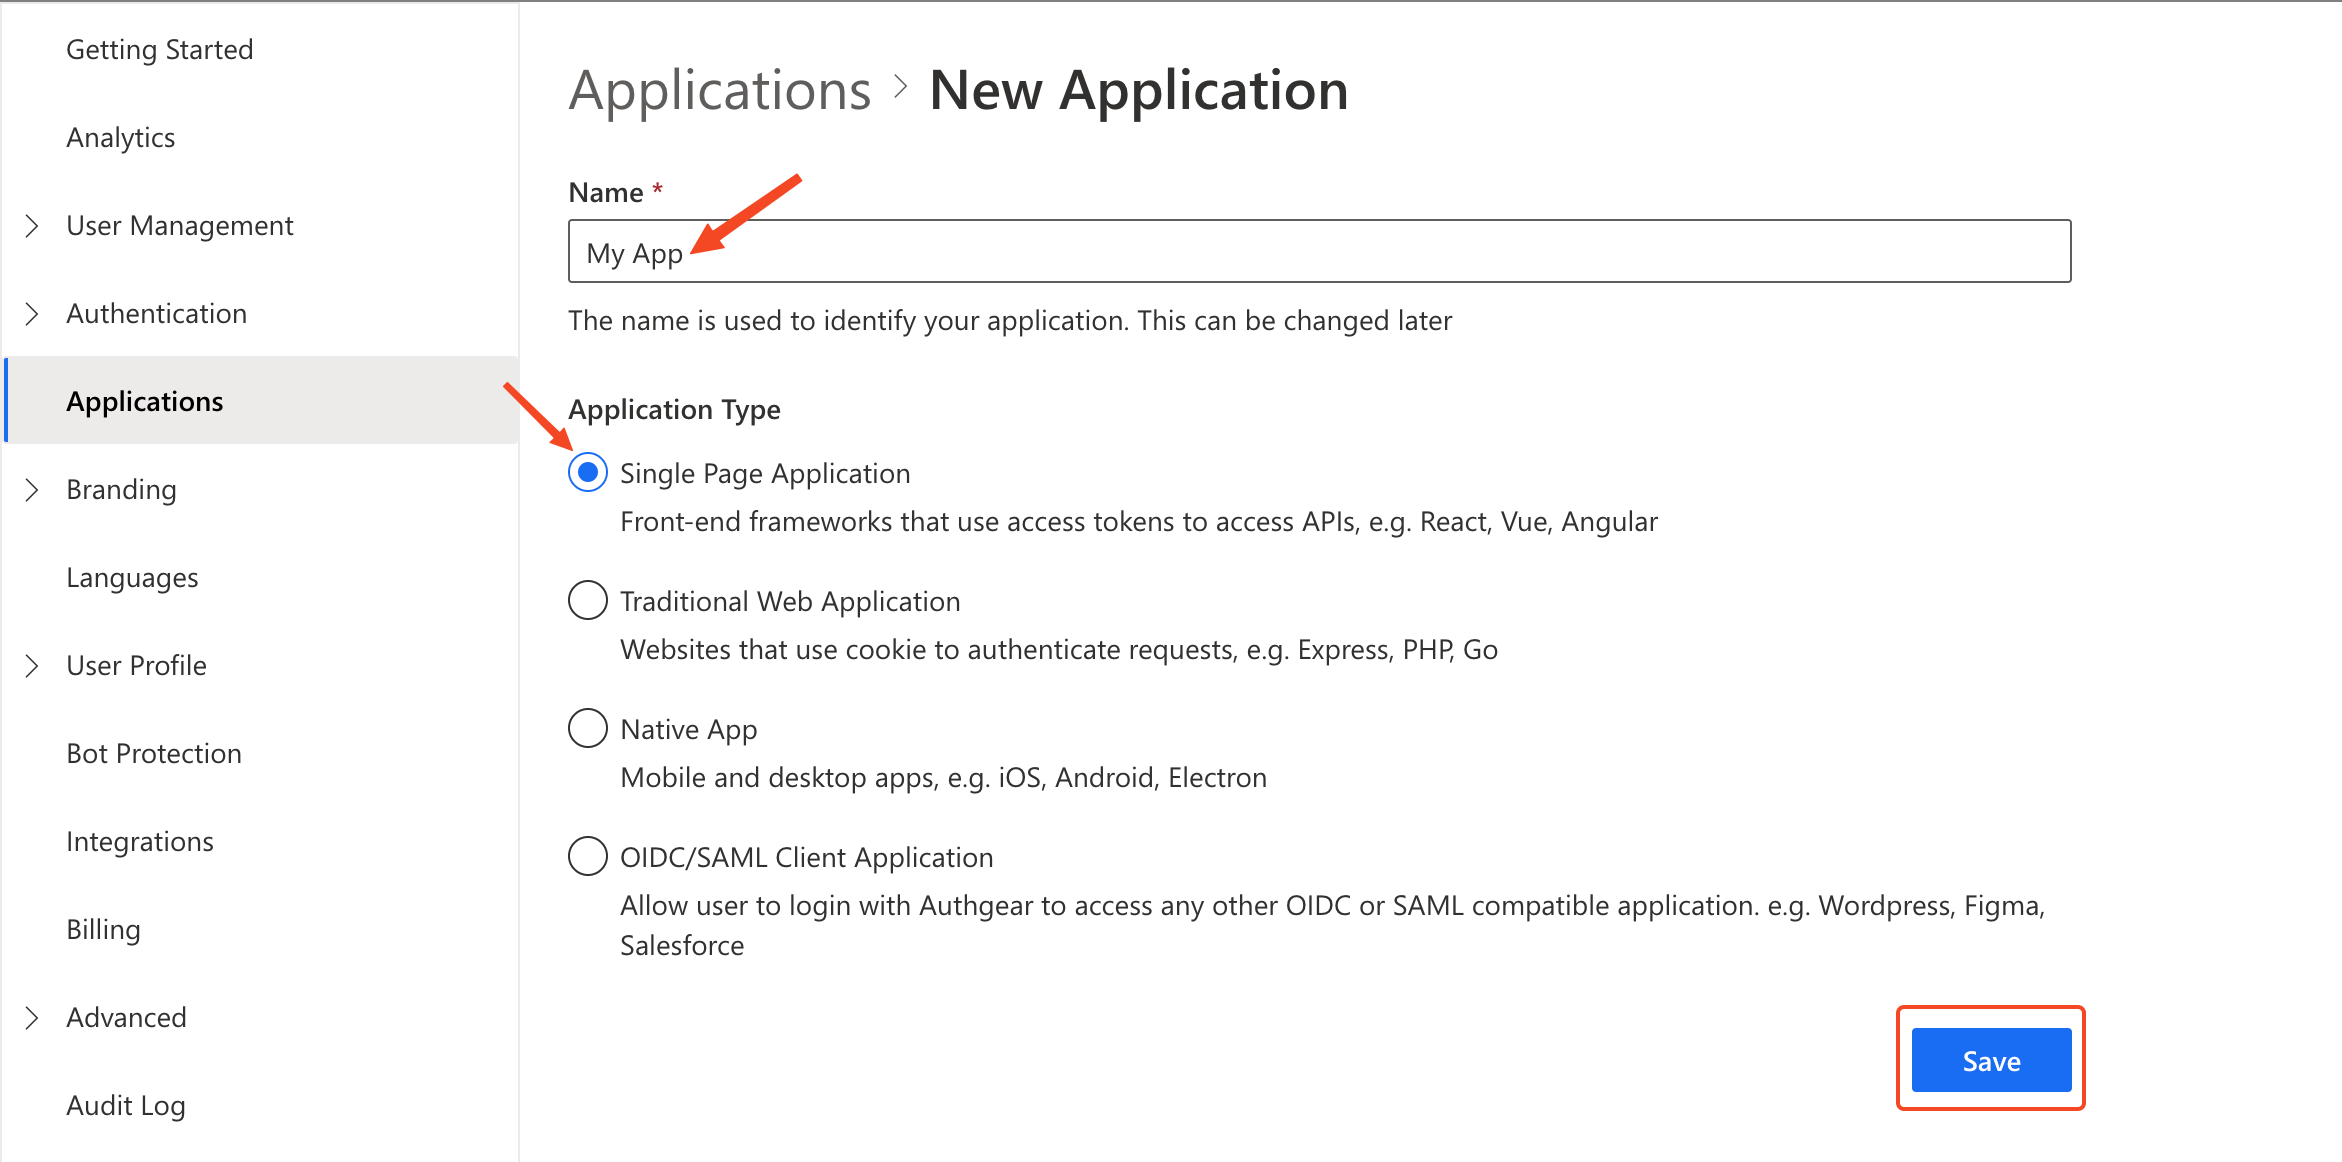
create spa application Authany portal
On the next screen you will see a list of tutorials for different frameworks, click on Next to skip to your client application configuration page.
Step 2: Configure the application
First, decide the paths in your website that users will be redirected to after they have authenticated with Authany.
To run the demo app in this tutorial offline, scroll to the URIs section of your client application page add the following URI:
Under Authorized Redirect URIs add http://localhost:3000/
Note
Note that the trailing "/" in the above URLs must be included.
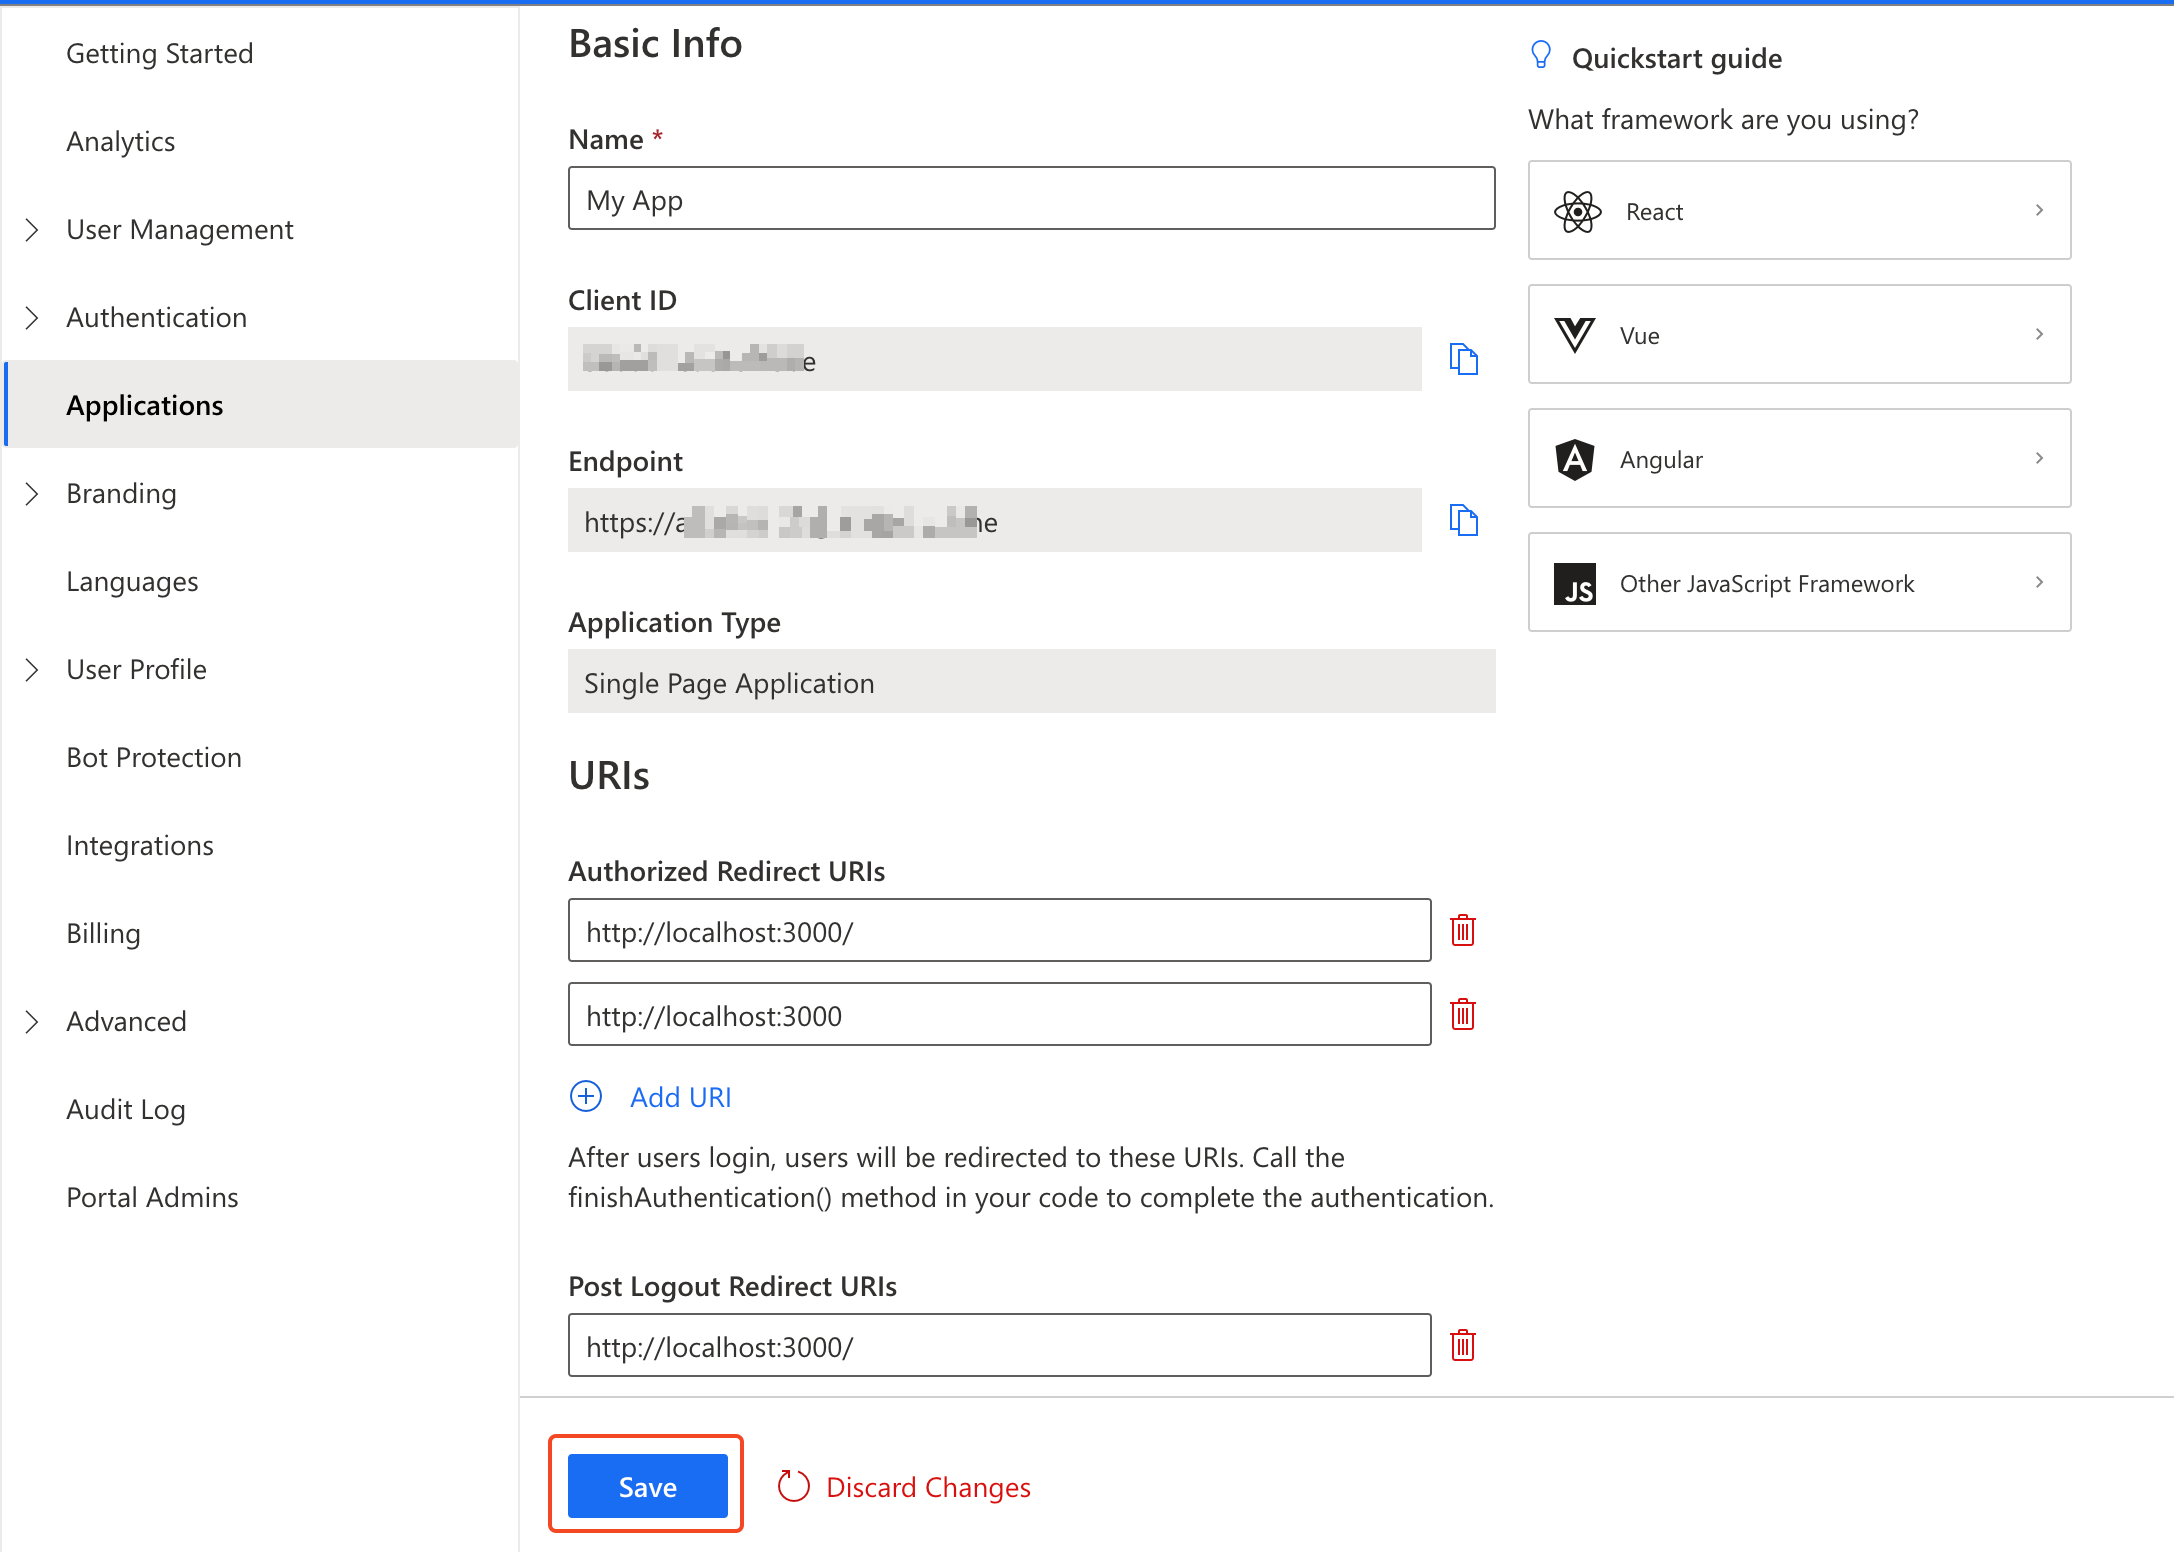
Click on the Save button to keep your changes.
Add Authany to any web page using JavaScript
In this section, we'll create a simple web page and use the Authany Web JavaScript SDK to add user authentication to the page.
Step 1: Create a Basic Single Page Web Application
For this guide, we'll create a basic web application with only one page. Follow these steps to set up the application. First, create a new directory on your computer for the project. You can do this in a terminal using the following commands:
Step 2: Create Web Server
We'll create an Express.js server in the web project directory so that we can access the HTML page in a web browser using http://localhost:3000. Run the following commands from the root of your web project directory to install Express.
First, generate a package.json file in your project directory:
Install the Express npm package:
Install Nodemon (used for adding hot road to JavaScript development):
Now create a server.js file in the root folder of your project. Add the following code to server.js:
const express = require("express");
const { join } = require("path");
const path = require("path");
const app = express();

// Serve static assets from the /public folder
app.use(express.static(join(__dirname, "public")));

// Serve the index page for all other requests
app.get(/.*/, (req, res) => {
  res.sendFile(path.join(__dirname, "index.html"));
});

// Listen on port 3000
app.listen(3000, () => console.log("Application running on port 3000"));
Next, open the package.json in your project directory and add the following lines in the script section:
Note
Note that the above you may use your preferred tool/environment to serve the HTML file and skip the step of creating an Express server.
Step 3: Create Web Page
Create a new file called index.html in the root of your project directory. Add the following code to the file:
<!DOCTYPE html>
<html>
  <head>
    <meta charset="UTF-8" />
    <title>Authgear SPA SDK Sample</title>
    <link rel="stylesheet" type="text/css" href="/css/main.css" />
  </head>

  <body>
    <h2>SPA Authentication Sample</h2>
    <p>Welcome to our page!</p>
    <button id="btn-login" disabled="true" onclick="login()">Log in</button>
    <button id="btn-logout" disabled="true" onclick="logout()">Log out</button>
  </body>
</html>
The content index.html is a simple web page that contains some text, a Log in button, and a Log out button. In later steps, we will implement the onclick events for both steps such that each calls the correct function from the Authany Web JavaScript SDK.
Step 4: Install Authany Web JavaScript SDK
CDN
The Web JS SDK is available on a CDN that you can include in any webpage using the following script tag:
The Web JS SDK is also available as an npm package. That can be installed using any of the following commands:
NPM
Yarn
We recommend that you use the npm package to add Authany to your web application when you're using build tools like Vite and Webpack, and when building with frameworks like React, Vue, Angular, etc.
The easiest way to add a JavaScript library such as the Authany SDK to a generic Single Page Application (a basic .html file page), is to use a CDN. Hence, we'll use the CDN method to add the Authany Web JavaScript SDK to our demo application for this tutorial.
To install the Authany SDK, add the Authany SDK CDN <script> tag to index.html on a new line just before the </body> . Your index.html should look like this at this point:
<!DOCTYPE html>
<html>
  <head>
    <meta charset="UTF-8" />
    <title>Authgear SPA SDK Sample</title>
    <link rel="stylesheet" type="text/css" href="/css/main.css" />
  </head>

  <body>
    <h2>SPA Authentication Sample</h2>
    <p>Welcome to our page!</p>
    <button id="btn-login" disabled="true" onclick="login()">Log in</button>
    <button id="btn-logout" disabled="true" onclick="logout()">Log out</button>
    <script src="https://unpkg.com/@authgear/web@2.2.0/dist/authgear-web.iife.js"></script>
  </body>
</html>
With that, we have added the Authany SDK to a basic HTML page and we are ready to start making calls to its functions.
Checkpoint
At this point, the structure of your project folder should look like this:
To test your progress so far save your files then run the npm run dev command. Next open localhost:3000 on your preferred web browser and you should see a page that looks like this:
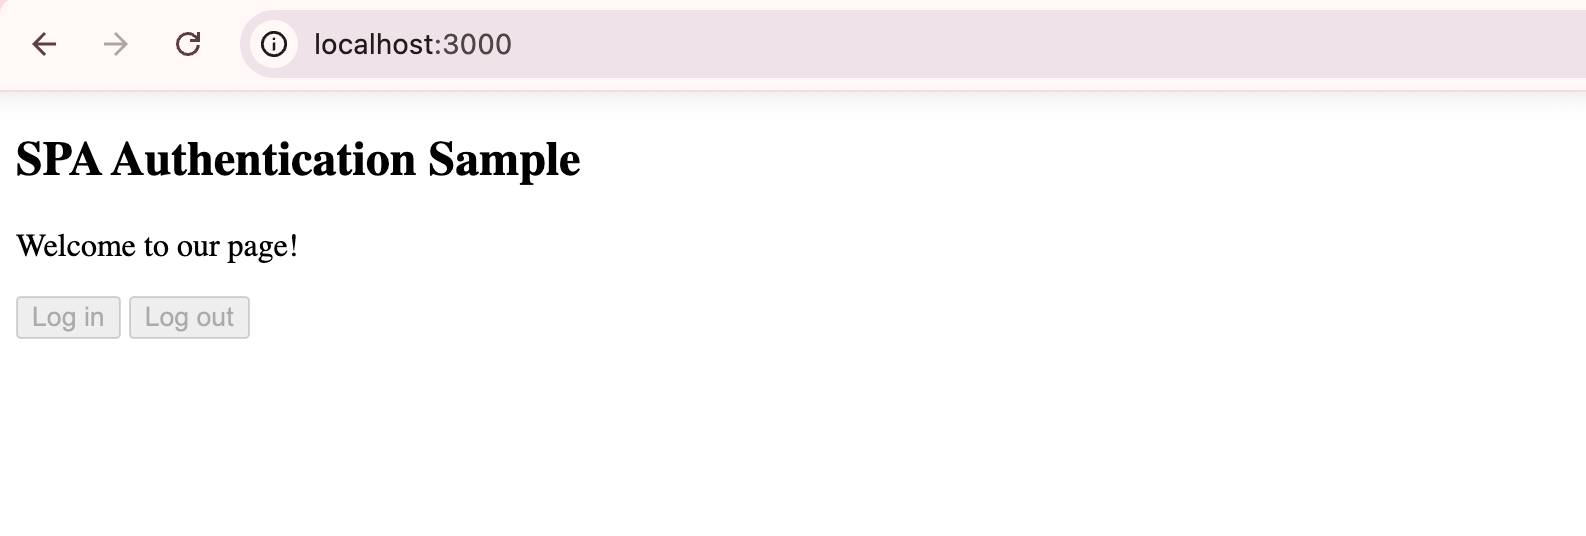
spa demo web app page
Step 5: Initialize Authany SDK
Create a new public/js directory in the root of your project directory.
Create a new file called app.js in the public/js directory. Add the following content to app.js:
let authgearClient = null;

const configureClient = async () => {
    authgearClient = window.authgear.default;

    await authgearClient.configure({
        endpoint: "<YOUR_AUTHGEAR_PROJECT_DOMAIN>",
        clientID: "<YOUR_AUTHGEAR_APP_CLIENT_ID>",
        sessionType: "refresh_token",
    }).then(
        () => {
            console.log("Authgear client successfully configured!");
        },
        (err) => {
            console.log("Failed to configure Authgear");
        }
    );
};

window.onload = async () => {
    await configureClient();
}
In app.js, the configureClient() function gets an instance of the Authany Web SDK (authgearClient) and then calls the configure() function of the SDK to initialize Authany.
You can find value for clientID and endpoint from your Authany client application configuration page.
Finally, link app.js in index.html using <script src="js/app.js"></script> just above the line with the Authany CDN <script> tag as shown below:
<body>
  <h2>SPA Authentication Sample</h2>
  <p>Welcome to our page!</p>
  <button id="btn-login" disabled="true" onclick="login()">Log in</button>
  <button id="btn-logout" disabled="true" onclick="logout()">Log out</button>
  <script src="js/app.js"></script>
  <script src="https://unpkg.com/@authgear/web@2.2.0/dist/authgear-web.iife.js"></script>
</body>
Step 6: Start the authentication flow
When the user clicks login/signup on your website, make a start authorization call to redirect them to the login/signup page (AuthUI).
In this step, we'll implement the login() function that is called when the Log in button is pressed.
Update app.js by adding the following code after the declaration of the configureClient() function:
const login = async () => {
    await authgearClient
        .startAuthentication({
            redirectURI: "http://localhost:3000/",
            prompt: "login",
        })
        .then(
            () => {
                console.log("Logged in!");
            },
            (err) => {
                console.log("Log in failed", err);
            }
        );
};
Note
Make sure you have added http://localhost:3000/ as an Authorized Redirect URI in the portal for your Authany client application. Note that the last "/" in the URL is required.
Step 7: Handling auth result in the redirectURI
After the user authenticates on the login page, the user will be redirected to the redirectURI with a code parameter in the URL query. In the redirectURI of your application, make a finish authorization call to handle the authentication result. This will attempt to exchange the code for the access token and user info.
Once authorization succeeds, the application should be able to display user info and access protected resources.
To handle the redirect after authentication, we'll call the Authany SDK's finishAuthentication() function when there's a code parameter in the URL of the current page. To do that, update the window.onload callback in app.js to the following:
window.onload = async () => {
    await configureClient();
    updateUI();

    const query = window.location.search;
    if (query.includes("code=")) {
        await authgearClient.finishAuthentication();
        updateUI();
        window.history.replaceState({}, document.title, "/");
    }
}
The updateUI() function will update the state of the webpage when the user's logged-in state changes. Add the following code to the end of app.js to implement updateUI:
const updateUI = async () => {
    const isAuthenticated = authgearClient.sessionState === "AUTHENTICATED";

    document.getElementById("btn-logout").disabled = !isAuthenticated;
    document.getElementById("btn-login").disabled = isAuthenticated;
};
The complete content of app.js at the end of this step should look like this:
let authgearClient = null;

const configureClient = async () => {
    authgearClient = window.authgear.default;

    await authgearClient.configure({
        endpoint: "<YOUR_AUTHGEAR_PROJECT_DOMAIN>",
        clientID: "<YOUR_AUTHGEAR_CLIENT_APP_ID>",
        sessionType: "refresh_token",
    }).then(
        () => {
            console.log("Authgear client successfully configured!");
        },
        (err) => {
            console.log("Failed to configure Authgear");
        }
    );
};

const login = async () => {
    await authgearClient
        .startAuthentication({
            redirectURI: "http://localhost:3000/",
            prompt: "login",
        })
        .then(
            () => {
                console.log("Logged in!");
            },
            (err) => {
                console.log("Log in failed", err);
            }
        );
};

window.onload = async () => {
    await configureClient();
    updateUI();

    const query = window.location.search;
    if (query.includes("code=")) {
        await authgearClient.finishAuthentication();
        updateUI();
        window.history.replaceState({}, document.title, "/");
    }
}

const updateUI = async () => {
    const isAuthenticated = authgearClient.sessionState === "AUTHENTICATED";

    document.getElementById("btn-logout").disabled = !isAuthenticated;
    document.getElementById("btn-login").disabled = isAuthenticated;
};
Checkpoint
At this point, your file structure should look like this:
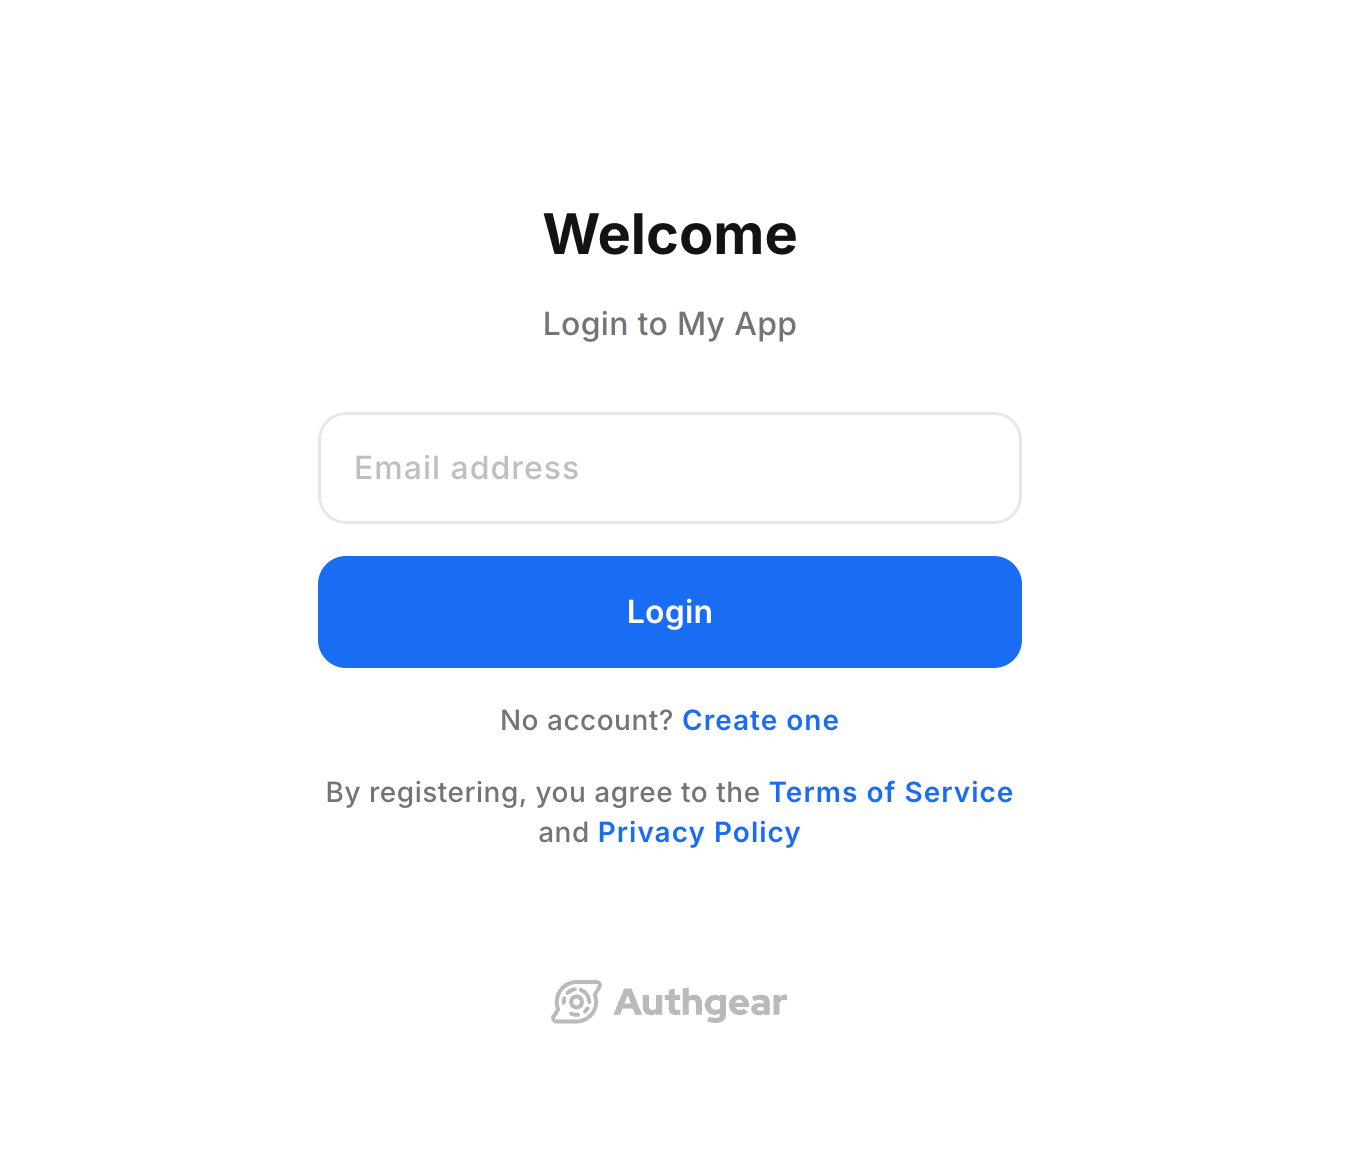
Save all changes in your code, and rerun your app on a web browser. This time, clicking on the Log in button should redirect you to your Authany project's user login page (AuthUI).
Step 8: Open User Settings Page
To add a User Settings button to your app, add the following tag to your index.html just below the Logout button:
Next, add the following code to app.js: just below the logout() function:
Finally, add the following line to the end of your updateUI() function so that the User Settings button is displayed when the user is authenticated:
Save your work and run your app again. When you click on the User Settings button, your web app should open the pre-built User Settings page.
Step 9: Additional Actions
Get the Logged In State
When you start launching the application. You may want to know if the user has logged in. (e.g. Redirect users to log in if they haven't logged in). The sessionState reflects the user logged-in state in the SDK local state. That means even thesessionState is AUTHENTICATED, the session may be invalid if it is revoked remotely. After initializing the Authany SDK, call fetchUserInfo to update the sessionState as soon as it is proper to do so.
// After authgearClient.configure, it only reflect SDK local state.
// value can be NO_SESSION or AUTHENTICATED
let sessionState = authgearClient.sessionState;

if (sessionState === "AUTHENTICATED") {
    authgearClient
        .fetchUserInfo()
        .then((userInfo) => {
            // sessionState is now up to date
        })
        .catch((e) => {
            // sessionState is now up to date
            // it will change to NO_SESSION if the session is invalid
        });
}
The value of sessionState can be UNKNOWN, NO_SESSION or AUTHENTICATED. Initially the sessionState is UNKNOWN. After a call to authgearClient.configure, the session state would become AUTHENTICATED if a previous session was found, or NO_SESSION if such session was not found.
Fetching User Info
In some cases, you may need to obtain current user info through the SDK. (e.g. Display email address in the UI). Use the fetchUserInfo function to obtain the user info.
See more user info examples.
Log the user out
Use the logout function to log out the user. The user will be redirected to your Authany endpoint to log out their session. You should provide the redirectURI for the user to return to your app.
authgearClient
  .logout({
    // user will navigate to the redirectURI after logged out
    // make sure it is in the "Post Logout Redirect URIs" in the application portal
    redirectURI: "https://yourdomain.com",
  })
  .then(
    () => {
      // logged out successfully
    },
    (err) => {
      // failed to logout
    }
  );
Calling an API
Once you have logged-in user, you can start making authenticated requests to backend APIs as described below.
Token-based authentication
There are two ways to include the access token in the HTTP requests to your application server.
Option 1: Using fetch function provided by Authany SDK
Authany SDK provides the fetch function for you to call your application server. This fetch function will include the Authorization header in your application request, and handle refresh access token automatically. The authgearClient.fetch implements fetch.
authgearClient
    .fetch("YOUR_SERVER_URL")
    .then(response => response.json())
    .then(data => console.log(data));
Option 2: Add the access token to the HTTP request header
You can get the access token through authgearClient.accessToken. Call refreshAccessTokenIfNeeded every time before using the access token, the function will check and make the network call to refresh the access token only if it is expired. Include the access token in the Authorization header of the application request.
authgearClient
    .refreshAccessTokenIfNeeded()
    .then(() => {
        // access token is ready to use
        // accessToken can be string or undefined
        // it will be empty if user is not logged in or session is invalid
        const accessToken = authgearClient.accessToken;

        // include Authorization header in your application request
        const headers = {
            Authorization: `Bearer ${accessToken}`
        };
    });
Next steps
To protect your application server from unauthorized access. You will need to integrate Authany to your backend.
JavaScript SDK Reference
For detailed documentation on the JavaScript Web SDK, visit @authgear/web Reference