Android SDK
This guide provides instructions on integrating Authany with an Android app. Supported platforms include:
- Android 5.0 (API 21) or higher
Follow this guide to add Authany to your Android app in 🕐 10 minutes.
Note
You can find the full code for the demo app for this tutorial in this Github repo
Setup Application in Authany
Sign up for an Authany Portal account at https://manage.authany.com. Or you can use your self-deployed Authany.
From the Project listing, create a new Project or select an existing Project. After that, we will need to create an application in the project.
Step 1: Create an application in the Portal
Go to Applications on the left menu bar.
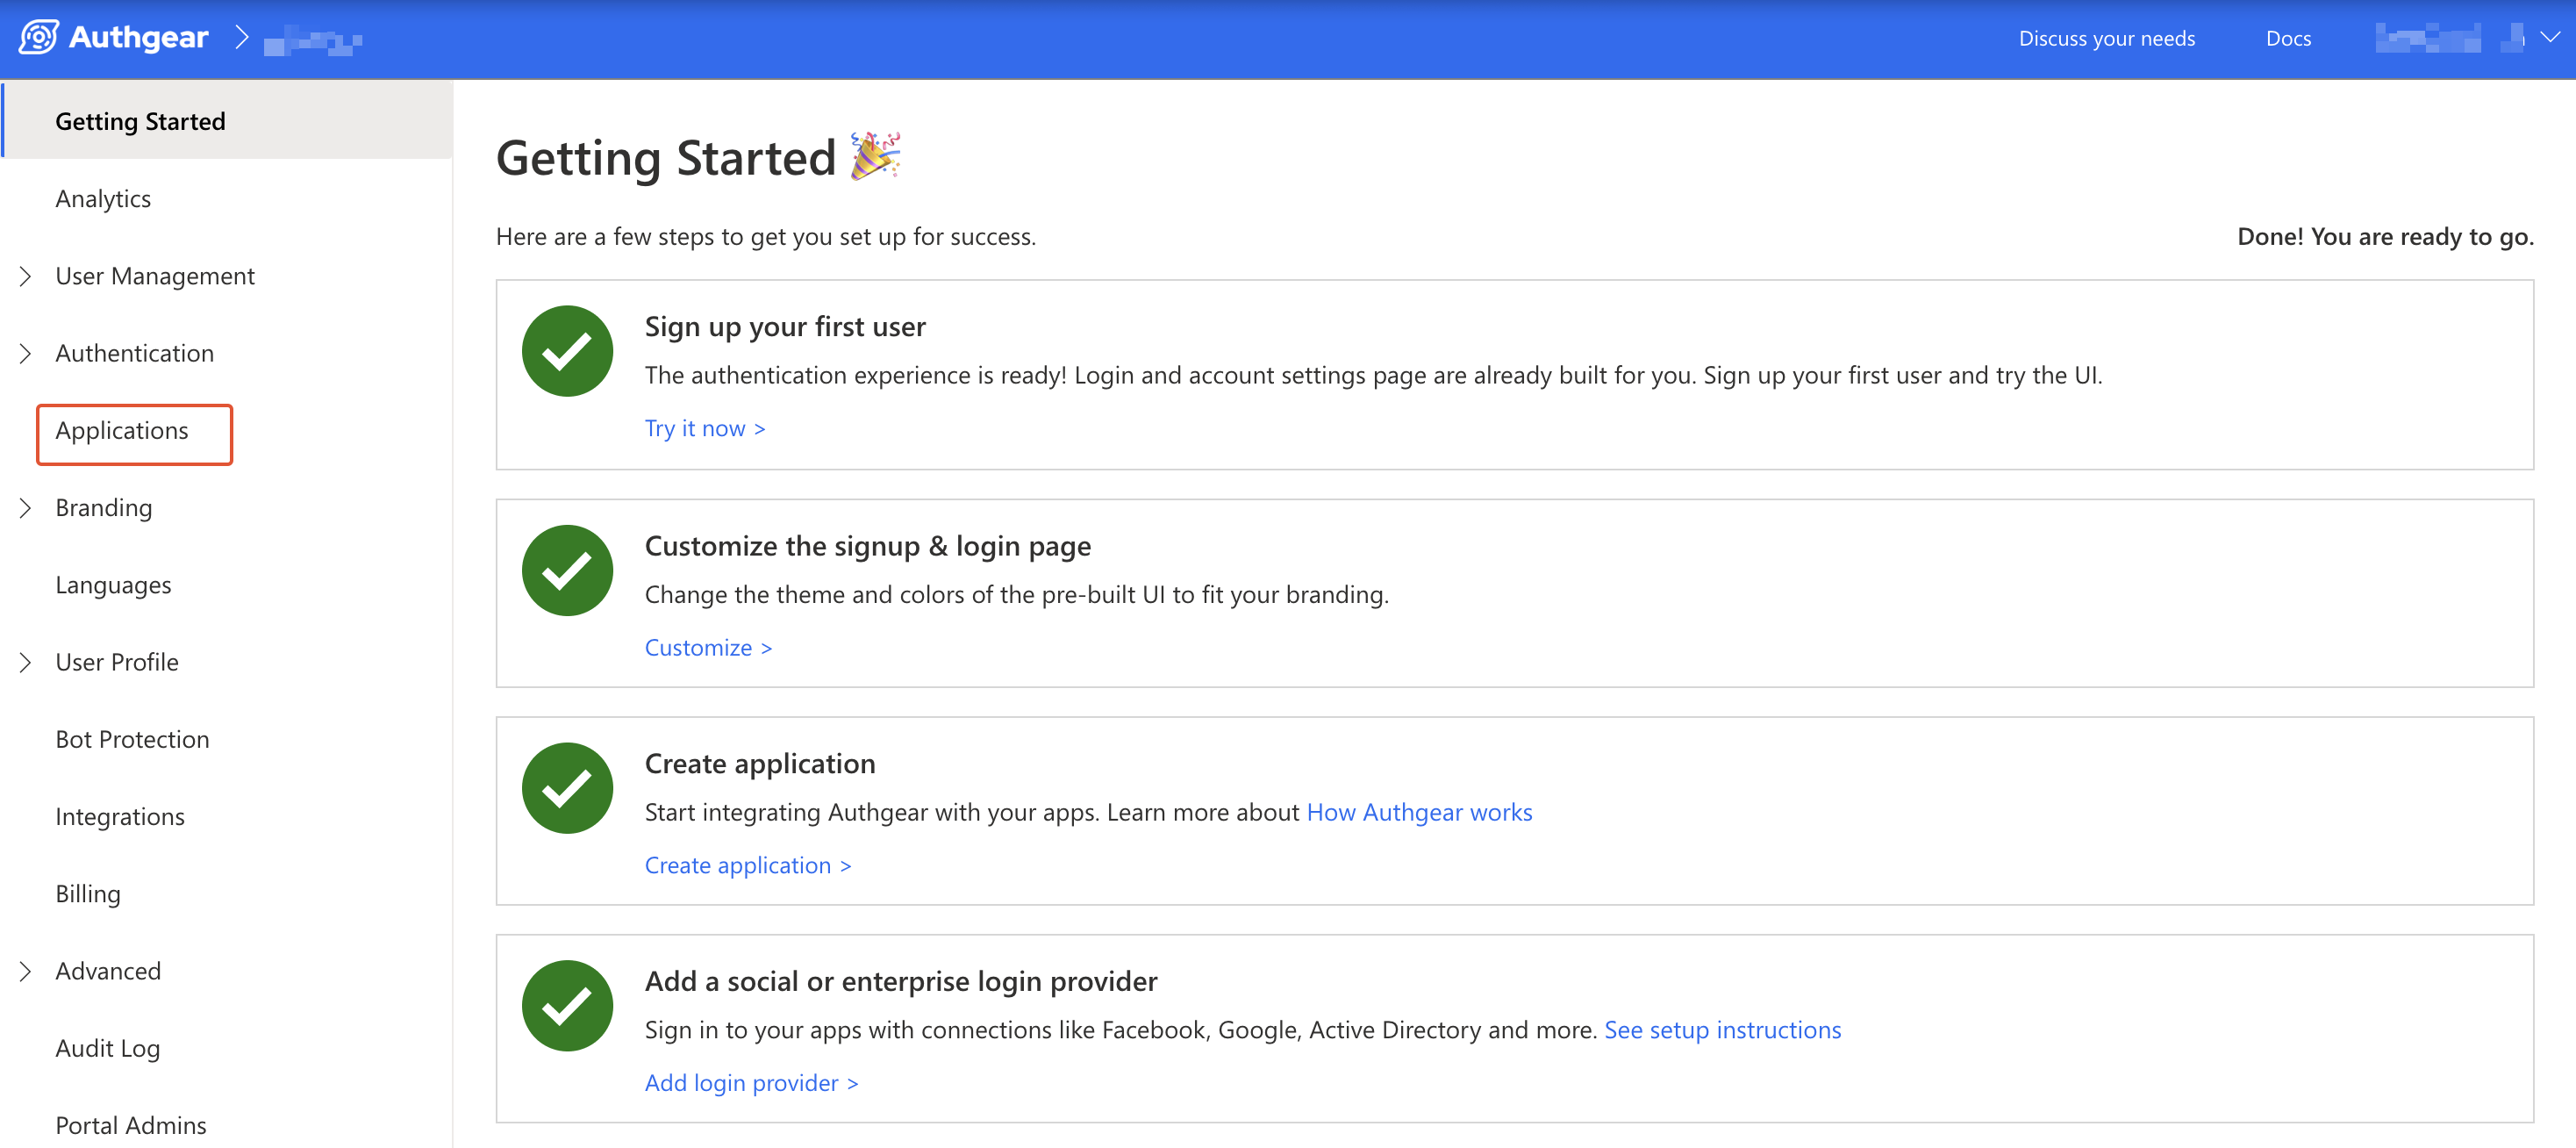
Click ⊕Add Application in the top toolbar.
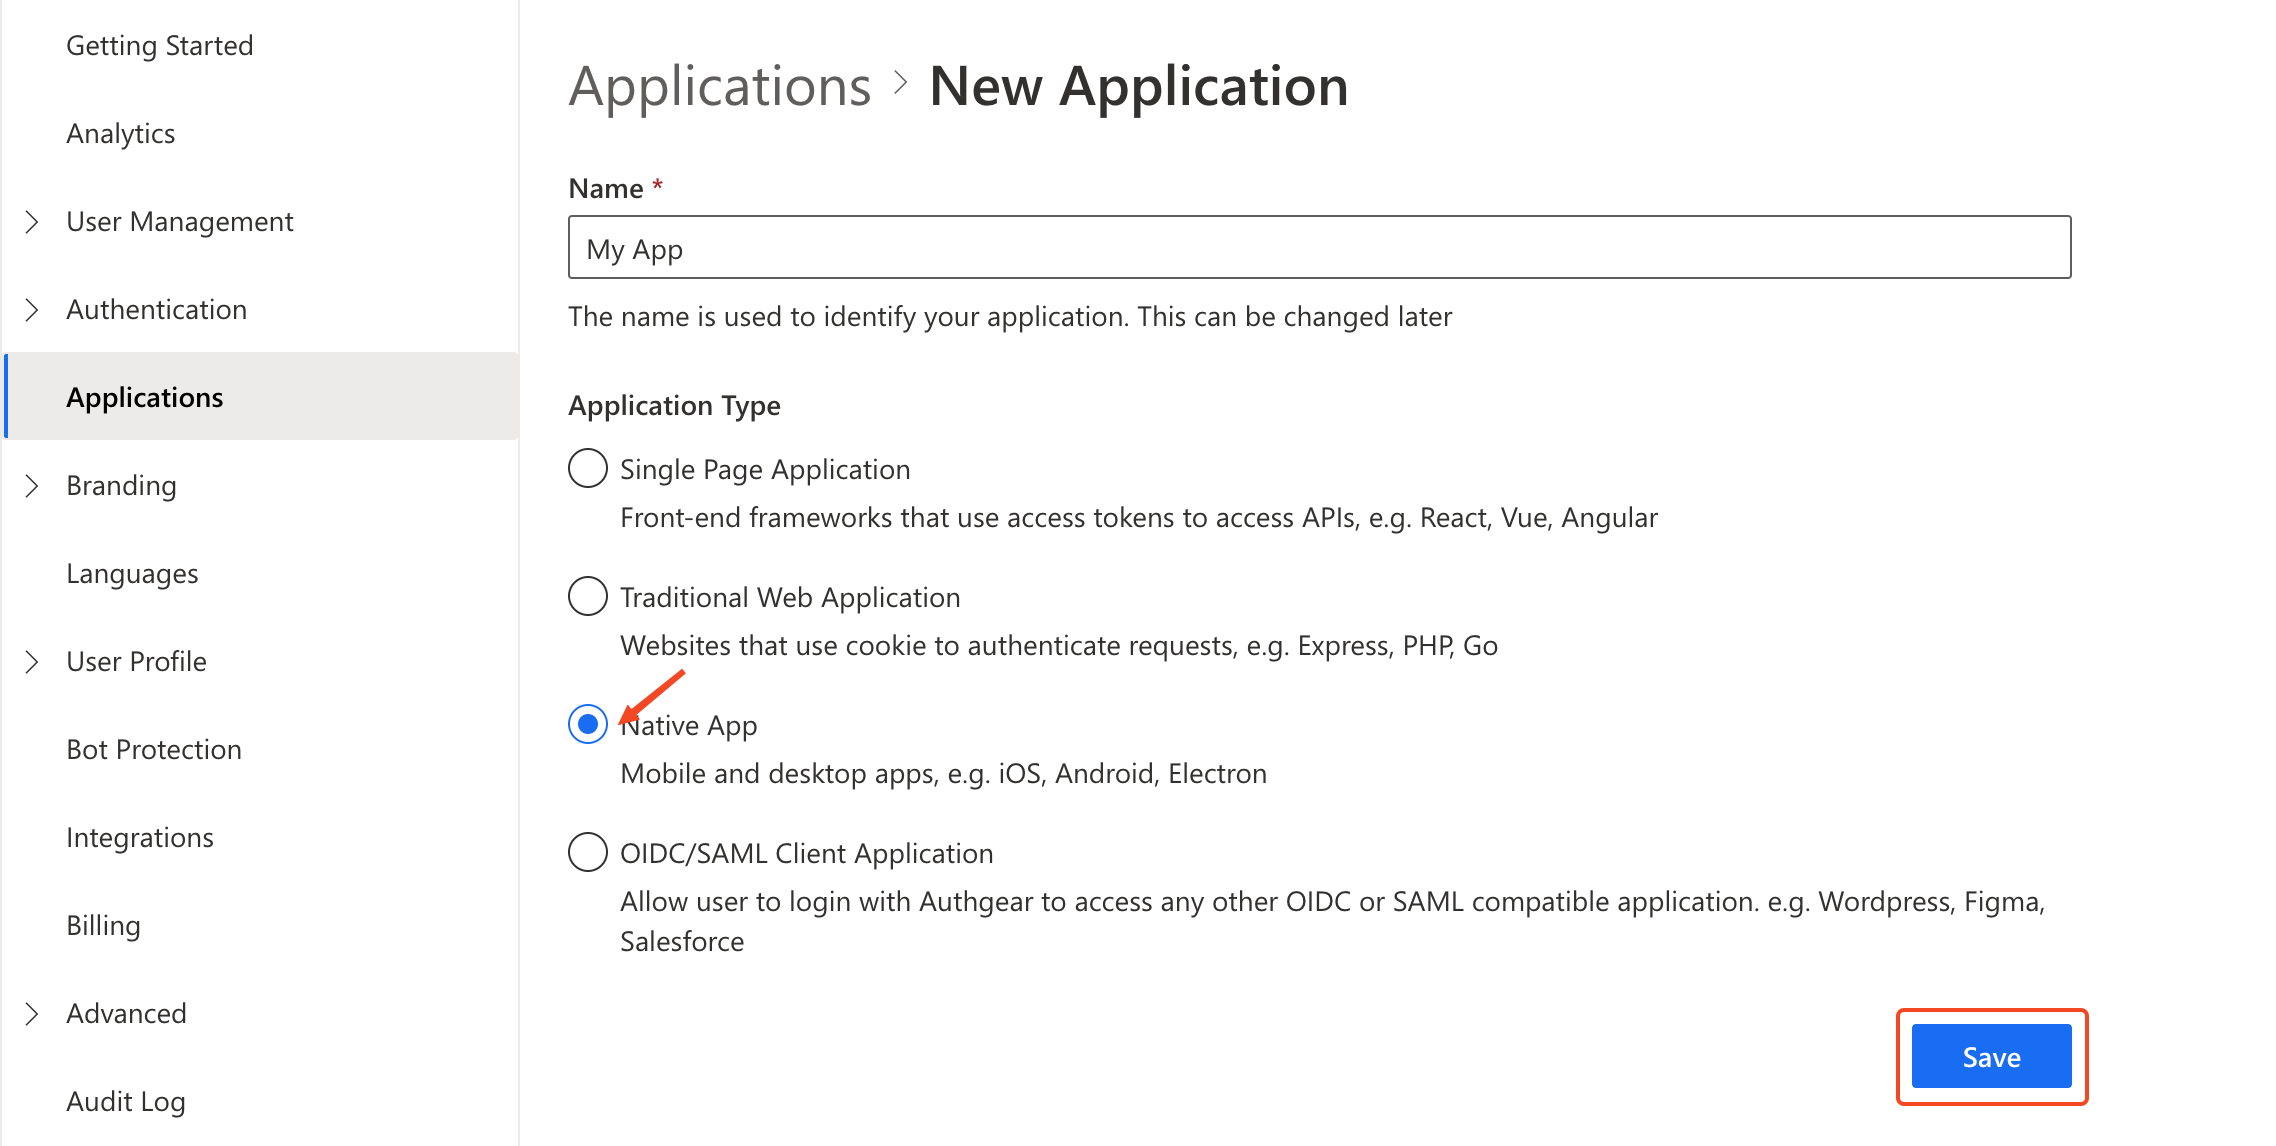
Input the name of your application and select Native App as the application type. Click "Save".
You will see a list of guides that can help you for setting up, then click "Next".
Step 2: Configure the application
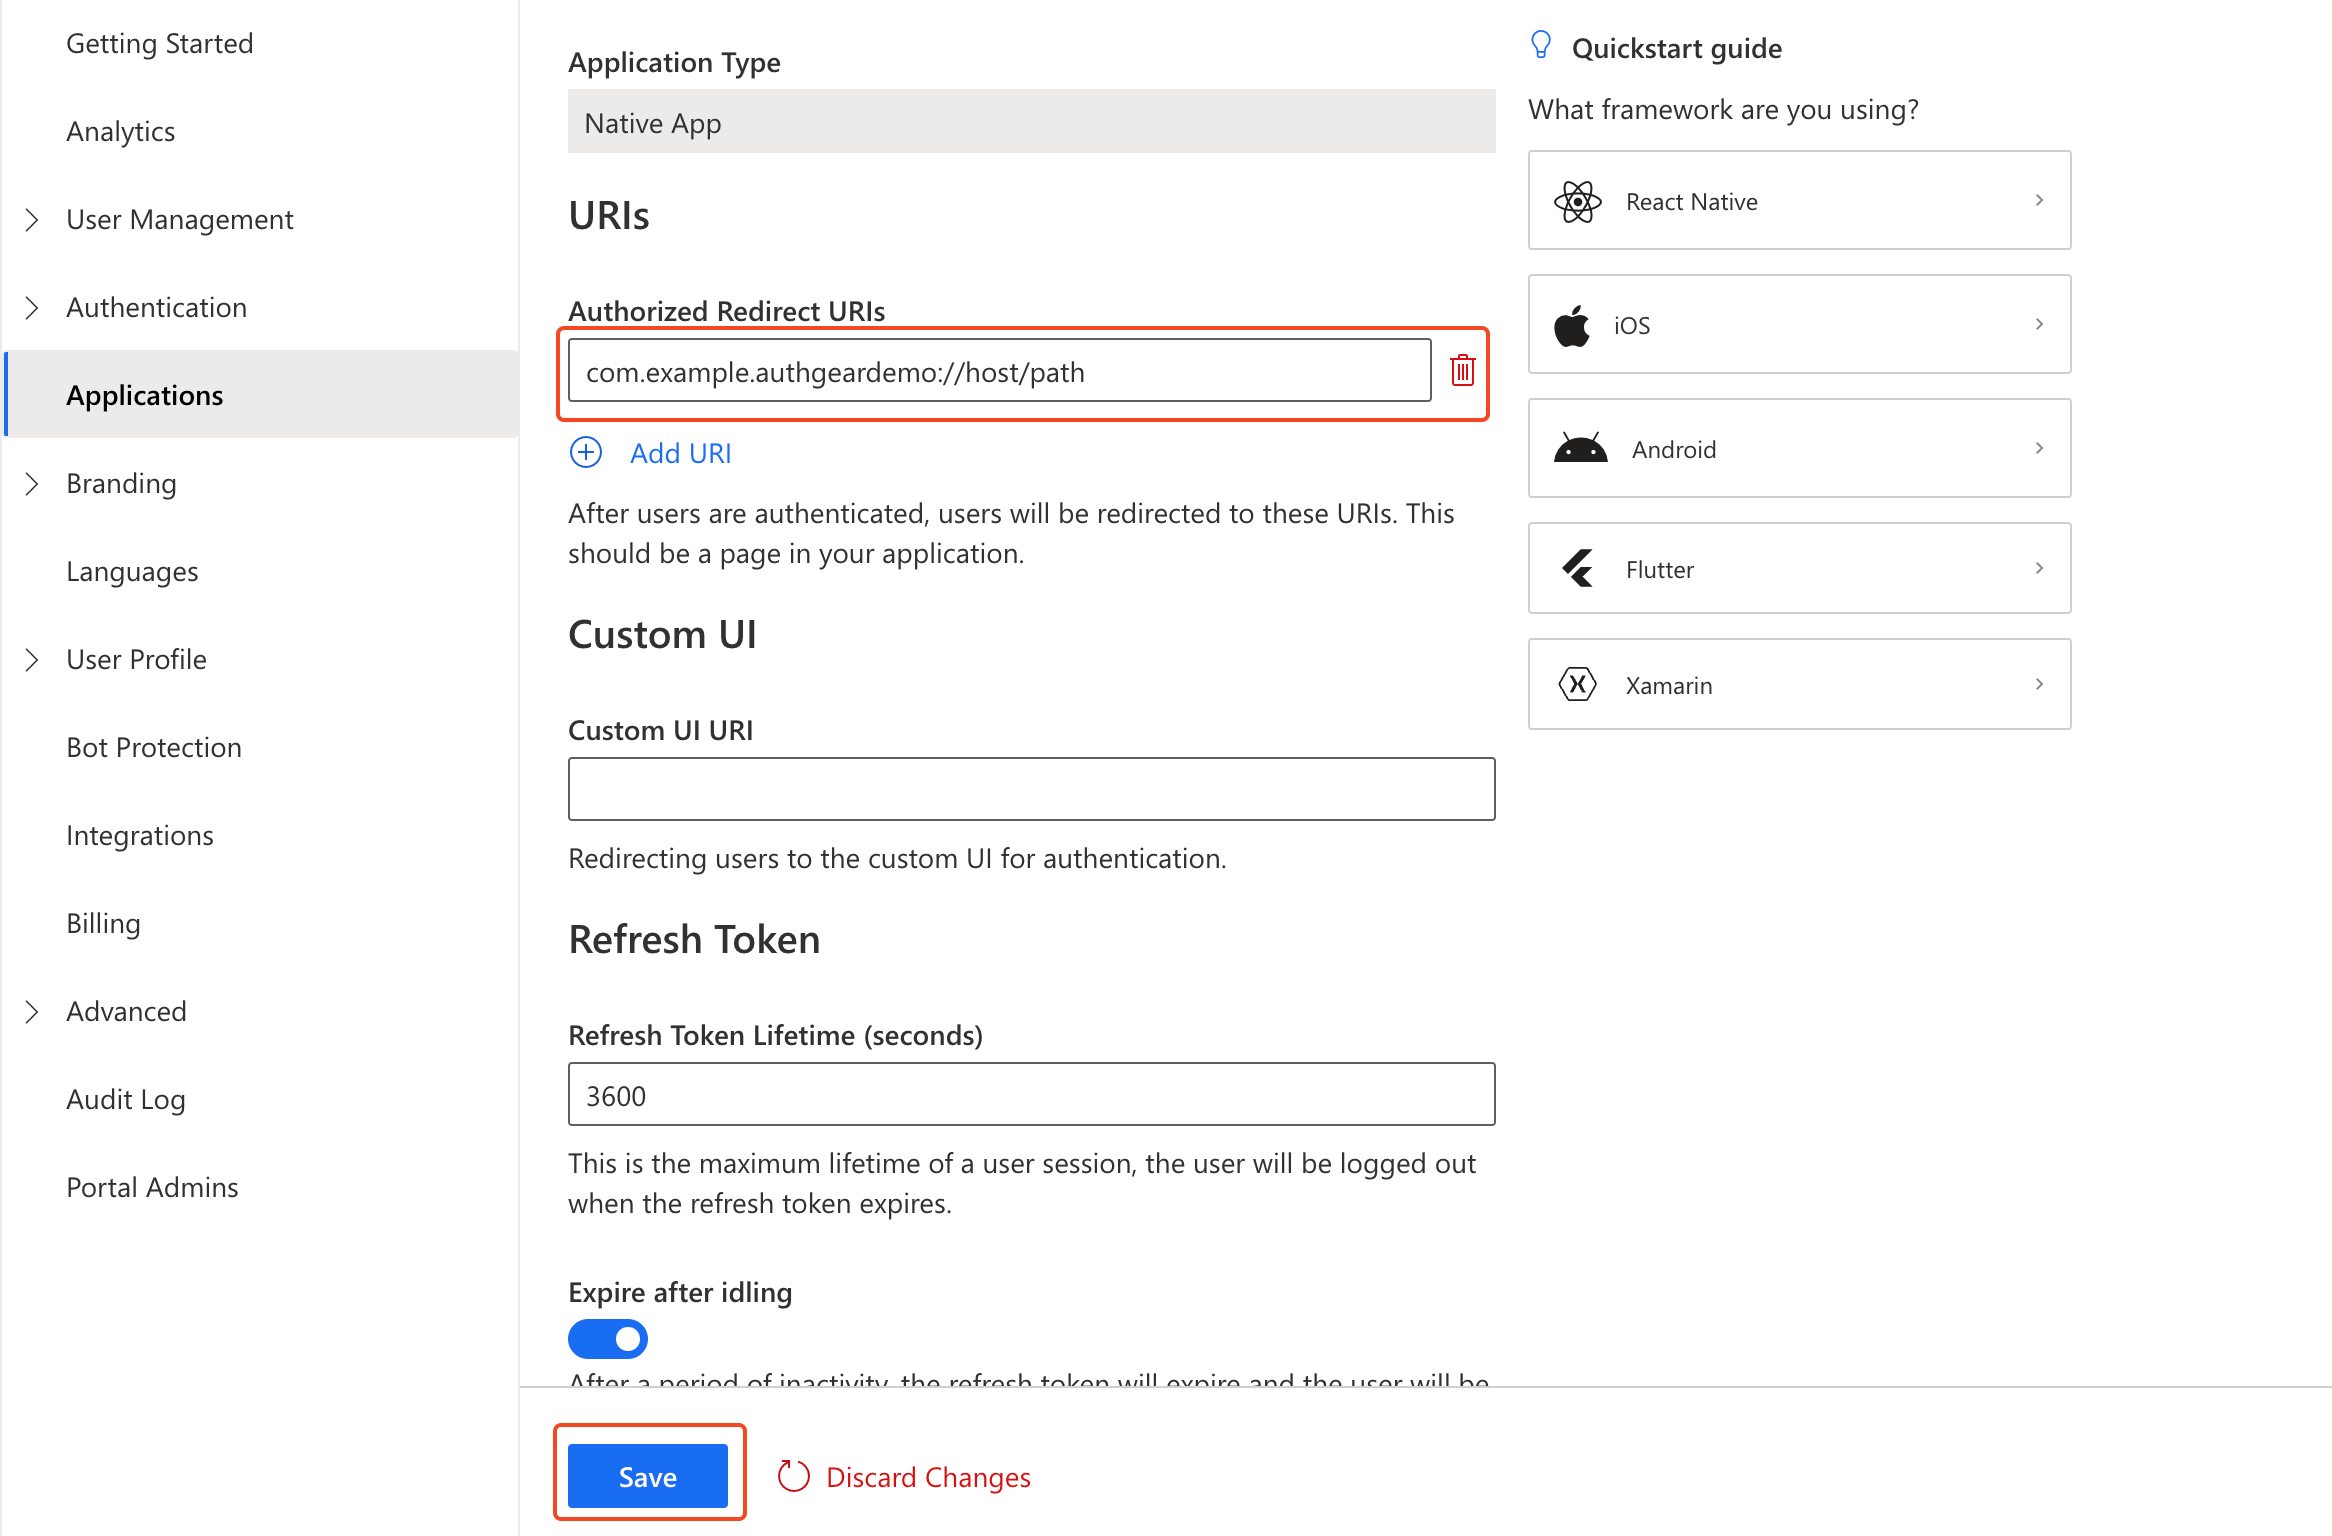
Define a custom URI scheme that Authany will use to redirect users back to your app after they have authenticated. The scheme should be based on the package name for your Android app. For the demo app, we'll be creating in this guide the scheme is: com.example.authgeardemo://host/path. To learn more about setting up a custom URI scheme in Android, see the official documentation here.
Head back to Authany Portal, and add the URL scheme you have defined as a Redirect URI. For our demo app, add the following URI:
Click "Save" in the top toolbar and note the Client ID as you'll use it later in your Android app. You can also obtain it again from the Applications list later.
Add Authany to an Android Application
In this step, we'll add user authentication to an Android application using the Authany client application we set up in the previous steps.
The Authany SDK works with both Jetpack Compose and the classic View/XML UI toolkit. Step 4 below provides the implementation for each — pick the tab that matches your app.
Pre-requisites
To follow along, you need to have the following:
- Android Studio installed on your computer
- Basic knowledge of Kotlin or Java
Step 1: Create an Android App project
For the purpose of this guide, we'll be creating a new simple Android app project. Feel free to skip this step if you are adding Authany to your existing app.
Open Android Studio and create a new project with the following details:
- On the Activity selection screen, choose Empty Activity (Jetpack Compose) or Empty Views Activity (XML) — this guide covers both. The current Android Studio default, Empty Activity, uses Jetpack Compose.
- Name: My Demo App
- Build configuration language: Groovy DSL
Note
The reason for recommending you use Groovy DSL as Build configuration language for this guide is to make it easier to copy and paste the Gradle configurations we've provided without having to make many rewrites.
Step 2: Add Authany SDK to your project
The Authany Android SDK makes it easier to interact with Authany endpoints and services from your Android app.
The SDK is published on Maven Central. Make sure the mavenCentral() repository is available to your project. It is included by default in new Android Studio projects; if it is missing, add it to your project's settings.gradle file:
dependencyResolutionManagement {
    repositoriesMode.set(RepositoriesMode.FAIL_ON_PROJECT_REPOS)
    repositories {
        mavenCentral()
    }
}
Next, add the Authany SDK to the dependencies section of your app-level (/app/build.gradle) build.gradle:
3.0.0 is the latest version at the time of writing. Check for newer releases on Maven Central or the release tags.
Enable Java 8+ API desugaring support
To enable Java 8+ API desugaring support for your project, make the following changes to the app-level build.gradle file.
- Add
coreLibraryDesugaringEnabled trueto theandroid>compileOptionssection:
- Then add the coreLibraryDesugaring to the dependencies section:
dependencies {
    // Other implementations
    coreLibraryDesugaring 'com.android.tools:desugar_jdk_libs:2.0.3'
}
Learn more about Java 8+ API desugaring support here.
Warning
Your app's window theme must descend from a Theme.AppCompat theme. The SDK's authentication screens (OAuthActivity, OAuthRedirectActivity) are AppCompatActivity, and Android throws You need to use a Theme.AppCompat theme (or descendant) with this activity on login if the app theme is a plain framework theme.
An Empty Views Activity project already uses a Material Components (AppCompat-descendant) theme. If you created a Jetpack Compose project, open res/values/themes.xml and make sure your app theme uses an AppCompat or Material 3 parent, for example:
<resources>
    <style name="Theme.MyDemoApp" parent="Theme.AppCompat.DayNight.NoActionBar" />
</resources>
Your Compose UI still themes itself; this is only the window theme.
Sync Gradle to continue.
Step 3: Set up the Redirect URI
Add the following activity entry to the AndroidManifest.xml of your app. The intent system would dispatch the redirect URI to OAuthRedirectActivity and the SDK would handle the rest.
<!-- Your application configuration. Omitted here for brevity -->
<application>
    <!-- Other activities or entries -->

    <!-- Add the following activity -->
    <!-- android:exported="true" is required -->
    <!-- See https://developer.android.com/about/versions/12/behavior-changes-12#exported -->
    <activity android:name="com.oursky.authgear.OAuthRedirectActivity"
        android:exported="true"
        android:launchMode="singleTask">
        <intent-filter>
            <action android:name="android.intent.action.VIEW" />
            <category android:name="android.intent.category.DEFAULT" />
            <category android:name="android.intent.category.BROWSABLE" />
            <!-- Configure data to be the exact redirect URI your app uses. -->
            <!-- Here, we are using com.example.authgeardemo://host/path as configured in the portal -->
            <!-- NOTE: The redirectURI supplied in AuthenticateOptions *has* to match as well -->
            <data android:scheme="com.example.authgeardemo"
                android:host="host"
                android:pathPrefix="/path"/>
        </intent-filter>
    </activity>
</application>
Targeting API level 30 or above (Android 11 or above)
If your Android app is targeting API level 30 or above (Android 11 or above), you need to add a queries section to AndroidManifest.xml.
<?xml version="1.0" encoding="utf-8"?>
<manifest xmlns:android="http://schemas.android.com/apk/res/android">
  <!-- Other elements such <application> -->
  <queries>
    <intent>
      <action android:name="android.support.customtabs.action.CustomTabsService" />
    </intent>
  </queries>
</manifest>
Step 4: Implement authentication
Now initialize Authany and build the screen with a Login button, plus User Settings and Logout for logged-in users. Choose the tab that matches your UI toolkit — both produce the same flow.
Replace <CLIENT_ID> and <AUTHGEAR_ENDPOINT> in the code below with the values from the configuration page of your Authany client application.
The SDK exposes suspend functions, so you call them from Compose with rememberCoroutineScope() and LaunchedEffect.
Create the Authany instance in your MainActivity and host your Compose UI:
class MainActivity : ComponentActivity() {

    private lateinit var authgear: Authgear

    override fun onCreate(savedInstanceState: Bundle?) {
        super.onCreate(savedInstanceState)
        authgear = Authgear(application, "<CLIENT_ID>", "<AUTHGEAR_ENDPOINT>")
        setContent {
            MaterialTheme {
                Surface(modifier = Modifier.fillMaxSize()) {
                    MainScreen(authgear)
                }
            }
        }
    }
}
The MainScreen composable configures Authany when it first appears (restoring an existing session), then shows a Login button or the logged-in view based on sessionState:
private const val REDIRECT_URI = "com.example.authgeardemo://host/path"
private const val TAG = "AuthgearDemo"

@Composable
fun MainScreen(authgear: Authgear) {
    val scope = rememberCoroutineScope()
    var configuring by remember { mutableStateOf(true) }
    var email by remember { mutableStateOf<String?>(null) }
    var busy by remember { mutableStateOf(false) }

    // Configure once when the screen first appears; restore an existing session.
    LaunchedEffect(Unit) {
        try {
            authgear.configure()
            if (authgear.sessionState == SessionState.AUTHENTICATED) {
                email = authgear.fetchUserInfo().email
            }
        } catch (e: Throwable) {
            Log.e(TAG, "configure failed", e)
        }
        configuring = false
    }

    Column(
        modifier = Modifier
            .fillMaxSize()
            .padding(24.dp),
        horizontalAlignment = Alignment.CenterHorizontally,
        verticalArrangement = Arrangement.Center,
    ) {
        when {
            configuring -> CircularProgressIndicator()

            email != null -> {
                Text("Welcome, $email")
                OutlinedButton(
                    enabled = !busy,
                    onClick = { authgear.open(Page.SETTINGS) },
                    modifier = Modifier.padding(top = 16.dp),
                ) { Text("User Settings") }
                Button(
                    enabled = !busy,
                    onClick = {
                        scope.launch {
                            busy = true
                            try {
                                authgear.logout()
                                email = null
                            } catch (e: Throwable) {
                                Log.e(TAG, "logout failed", e)
                            }
                            busy = false
                        }
                    },
                ) { Text("Logout") }
            }

            else -> {
                Button(
                    enabled = !busy,
                    onClick = {
                        scope.launch {
                            busy = true
                            try {
                                email = authgear.authenticate(AuthenticateOptions(REDIRECT_URI)).email
                            } catch (e: Throwable) {
                                Log.e(TAG, "login failed", e)
                            }
                            busy = false
                        }
                    },
                ) { Text("Login") }
            }
        }
    }
}
Note
configure, authenticate, logout, and fetchUserInfo are suspend extension functions on Authgear — import them (e.g. import com.oursky.authgear.configure) if they show as unresolved. Import any other unresolved class as well.
Enable View Binding
Add the following to your app-level (/app/build.gradle) build.gradle under the android block:
Build the layout
Open res/layout/activity_main.xml, delete the default "Hello World!" TextView, and add a title, a Login button, and the logged-in views (a progress bar, welcome text, User Settings and Logout buttons) grouped so they can be shown/hidden together:
<TextView
    android:id="@+id/app_title"
    android:layout_width="wrap_content"
    android:layout_height="wrap_content"
    android:text="My Demo App!"
    app:layout_constraintBottom_toBottomOf="parent"
    app:layout_constraintEnd_toEndOf="parent"
    app:layout_constraintStart_toStartOf="parent"
    app:layout_constraintTop_toTopOf="parent" />

<Button
    android:id="@+id/login_btn"
    android:layout_width="wrap_content"
    android:layout_height="wrap_content"
    android:text="Login"
    app:layout_constraintEnd_toEndOf="parent"
    app:layout_constraintStart_toStartOf="parent"
    app:layout_constraintTop_toBottomOf="@+id/app_title" />

<ProgressBar
    android:id="@+id/progressBar"
    style="?android:attr/progressBarStyleHorizontal"
    android:layout_width="0dp"
    android:layout_height="wrap_content"
    android:layout_marginTop="48dp"
    android:indeterminate="true"
    android:visibility="invisible"
    app:layout_constraintEnd_toEndOf="parent"
    app:layout_constraintStart_toStartOf="parent"
    app:layout_constraintTop_toTopOf="parent" />

<TextView
    android:id="@+id/welcome_text"
    android:layout_width="wrap_content"
    android:layout_height="wrap_content"
    android:text="welcome user"
    app:layout_constraintEnd_toEndOf="parent"
    app:layout_constraintStart_toStartOf="parent"
    app:layout_constraintTop_toTopOf="@+id/login_btn" />

<Button
    android:id="@+id/user_settings_btn"
    android:layout_width="wrap_content"
    android:layout_height="wrap_content"
    android:text="User Settings"
    app:layout_constraintEnd_toEndOf="parent"
    app:layout_constraintStart_toStartOf="parent"
    app:layout_constraintTop_toBottomOf="@+id/welcome_text" />

<Button
    android:id="@+id/logout_btn"
    android:layout_width="wrap_content"
    android:layout_height="wrap_content"
    android:text="Logout"
    app:layout_constraintEnd_toEndOf="parent"
    app:layout_constraintStart_toStartOf="parent"
    app:layout_constraintTop_toBottomOf="@+id/user_settings_btn" />

<androidx.constraintlayout.widget.Group
    android:id="@+id/logged_in_views"
    android:layout_width="wrap_content"
    android:layout_height="wrap_content"
    android:visibility="gone"
    app:constraint_referenced_ids="welcome_text,user_settings_btn,logout_btn" />
The complete activity_main.xml is available here.
Initialize Authany and wire the buttons
In MainActivity.kt, initialize Authany with view binding, call configure(), and connect the buttons:
class MainActivity : AppCompatActivity() {

    private lateinit var authgear: Authgear
    private lateinit var binding: ActivityMainBinding

    override fun onCreate(savedInstanceState: Bundle?) {
        super.onCreate(savedInstanceState)
        binding = ActivityMainBinding.inflate(layoutInflater)
        setContentView(binding.root)

        authgear = Authgear(application, "<CLIENT_ID>", "<AUTHGEAR_ENDPOINT>")
        authgear.configure(object : OnConfigureListener {
            override fun onConfigured() {
                updateUi(authgear)
            }

            override fun onConfigurationFailed(throwable: Throwable) {
                Log.d("TAG", throwable.toString())
                // Something went wrong, check the client ID or endpoint.
            }
        })

        binding.loginBtn.setOnClickListener { startLogin() }
        binding.logoutBtn.setOnClickListener { logout() }
        binding.userSettingsBtn.setOnClickListener { openUserSettings() }
    }
}
Implement the actions
Add these methods to MainActivity. startLogin() starts the authentication flow, updateUi() reflects the session state (and fetches the user's email), logout() ends the session, and openUserSettings() opens the pre-built settings page:
fun startLogin() {
    binding.progressBar.visibility = View.VISIBLE
    val options = AuthenticateOptions("com.example.authgeardemo://host/path")
    authgear.authenticate(options, object : OnAuthenticateListener {
        override fun onAuthenticated(userInfo: UserInfo) {
            updateUi(authgear)
        }

        override fun onAuthenticationFailed(throwable: Throwable) {
            binding.progressBar.visibility = View.INVISIBLE
            Log.d("TAG", throwable.toString())
        }
    })
}

fun updateUi(authgear: Authgear) {
    val state = authgear.sessionState
    if (state == SessionState.AUTHENTICATED) {
        binding.loginBtn.visibility = View.GONE
        binding.loggedInViews.visibility = View.VISIBLE
        // Get userInfo and display in welcome text
        authgear.fetchUserInfo(object : OnFetchUserInfoListener {
            override fun onFetchedUserInfo(userInfo: UserInfo) {
                binding.welcomeText.text = userInfo.email
            }

            override fun onFetchingUserInfoFailed(throwable: Throwable) {
                Log.d("TAG", "Failed to fetch UserInfo")
            }
        })
    } else {
        binding.loggedInViews.visibility = View.GONE
        binding.loginBtn.visibility = View.VISIBLE
    }
    binding.progressBar.visibility = View.INVISIBLE
}

fun logout() {
    binding.progressBar.visibility = View.VISIBLE
    authgear.logout(true, object : OnLogoutListener {
        override fun onLogout() {
            updateUi(authgear)
        }

        override fun onLogoutFailed(throwable: Throwable) {
            Log.d("TAG", throwable.toString())
        }
    })
}

fun openUserSettings() {
    authgear.open(Page.SETTINGS)
}
Note
Import any class that shows as unresolved.
Checkpoint
Run your app on a device or emulator and tap Login. Because you set up the Redirect URI in Step 3, the Authany login page opens, and on success you're returned to the app showing the user's email with the User Settings and Logout buttons.
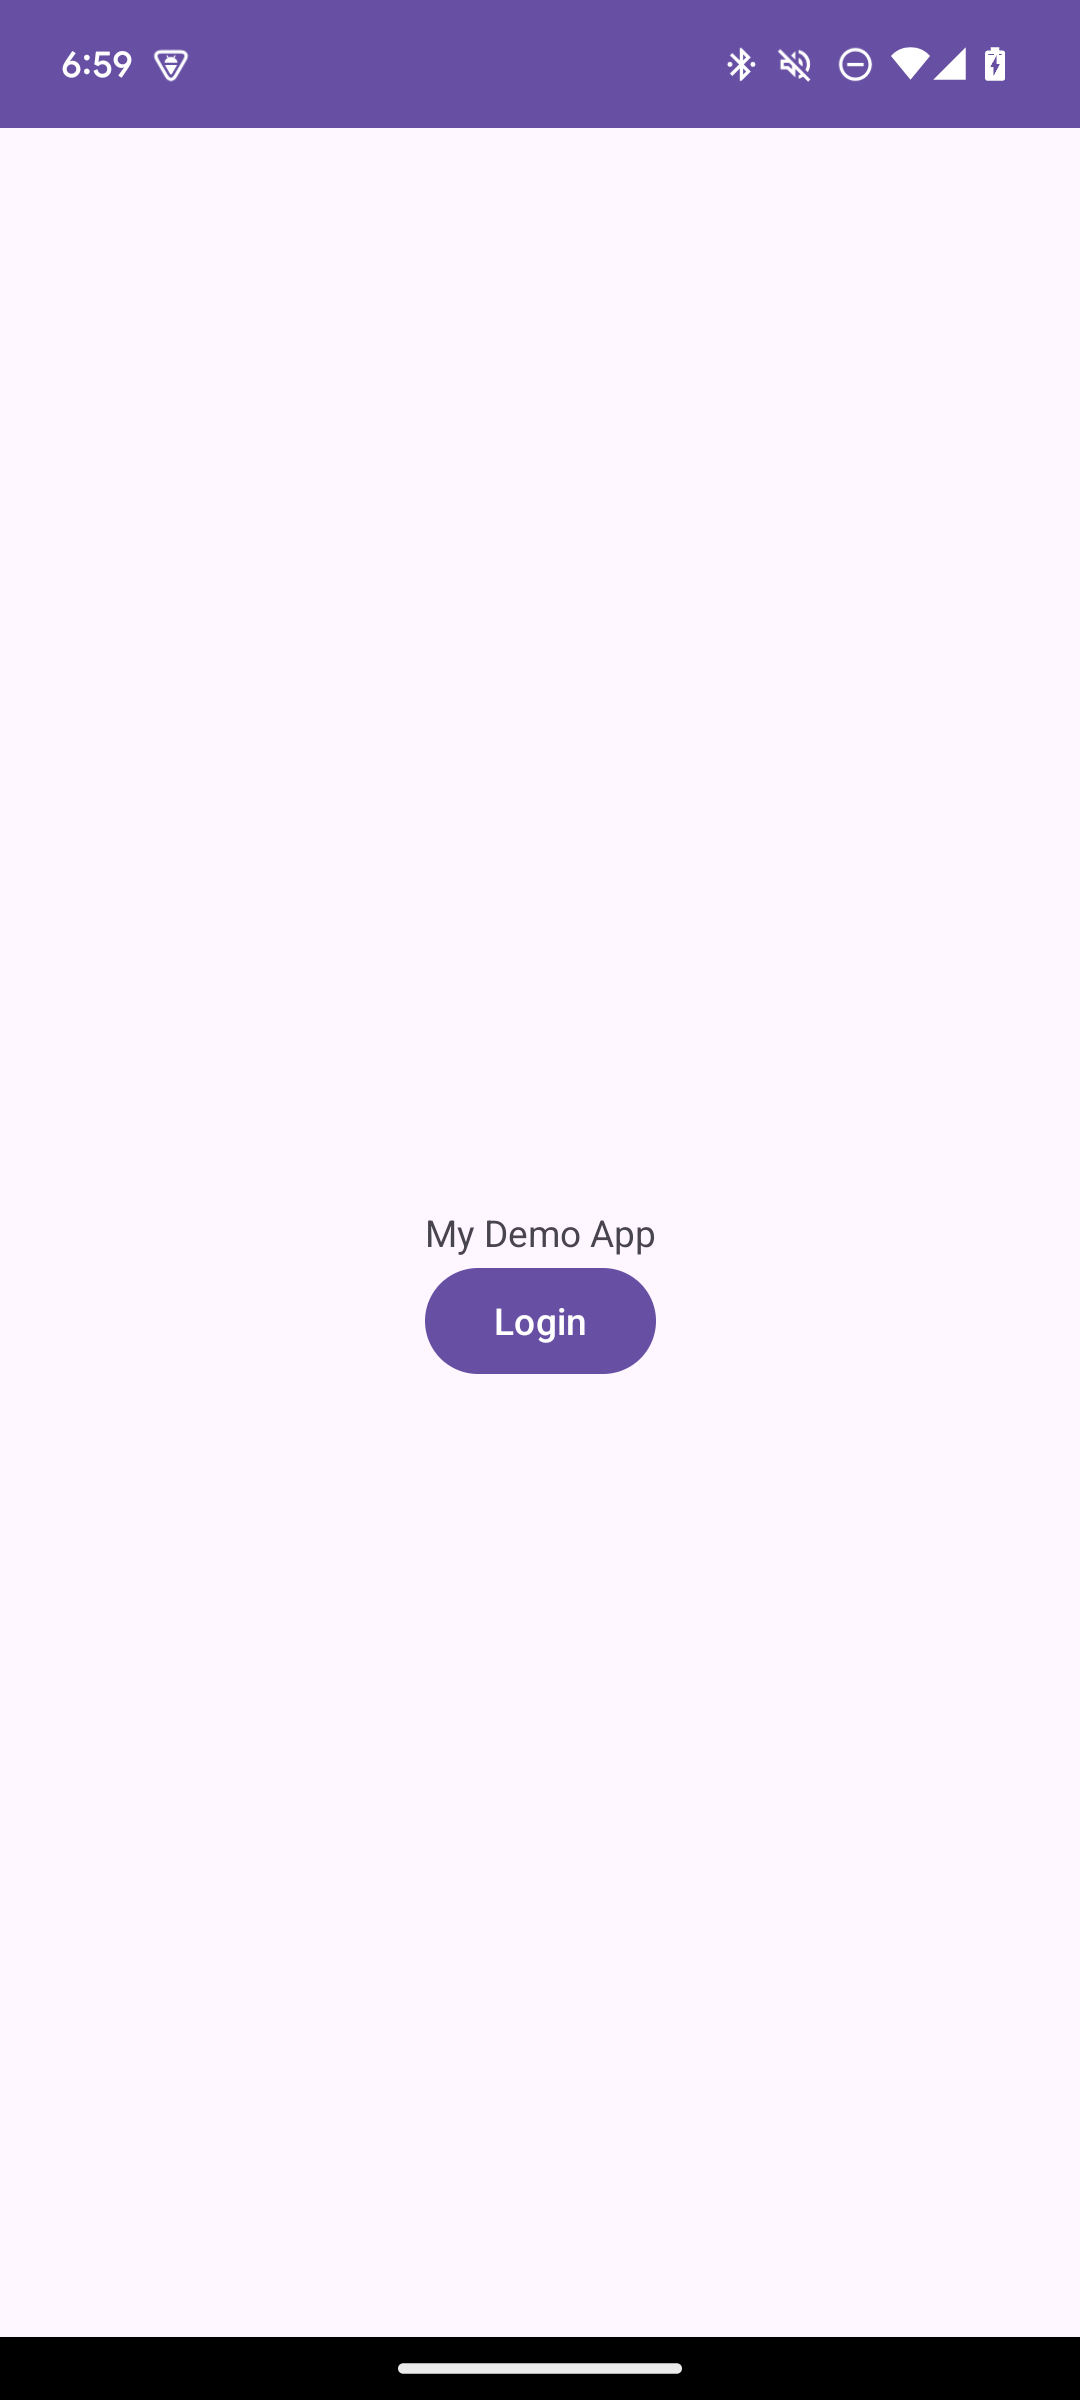
Demo app screenshot
Additional Actions
Get the Logged In State
You can use the user's logged-in state to determine whether a user is logged in and display content like their user info and a logout button, as we did in Step 4. The SessionState reflects the user logged-in state in the SDK local state. That means even if the SessionState is AUTHENTICATED, the session may be invalid if it is revoked remotely. After initializing the Authany SDK, call fetchUserInfo to update the SessionState as soon as it is proper to do so.
// After authgear.configure, it only reflect SDK local state.
// value can be NO_SESSION or AUTHENTICATED
val state = authgear.sessionState
The value of SessionState can be UNKNOWN, NO_SESSION or AUTHENTICATED. Initially, the sessionState is UNKNOWN. After a call to authgear.configure, the session state would become AUTHENTICATED if a previous session was found, or NO_SESSION if such session was not found.
Fetching User Info
In some cases, you may need to obtain current user info through the SDK. (e.g. Display email address in the UI as we did in Step 4). Use the fetchUserInfo function to obtain the user info, see example.
Using the Access Token in HTTP Requests
Call refreshAccessTokenIfNeeded every time before using the access token, the function will check and make the network call only if the access token has expired. Include the access token in the Authorization header of your application request. If you are using OKHttp in your project, you can also use the interceptor extension provided by the SDK, see detail.
Note
The access token is a JSON Web Token (JWT).
try {
    authgear.refreshAccessTokenIfNeededSync()
} catch (e: OAuthException) {
    // Something went wrong
}

val accessToken = authgear.accessToken
if (accessToken == null) {
    // The user is not logged in, or the token is expired.
    // It is up to the caller to decide how to handle this situation.
    // Typically, the request could be aborted
    // immediately as the response would be 401 anyways.
    return
}

val headers = mutableMapOf<String, String>()
headers["authorization"] = "Bearer $accessToken"

// Submit the request with the headers..
Next steps 
To protect your application server from unauthorized access. You will need to integrate Authany to your backend.
Android SDK Reference
For detailed documentation on the Android SDK, visit Android SDK Reference