Manage Users Roles and Groups
1.0 Introduction
Roles and Groups can extend access management on your application that Authany powers. Authany includes a user's roles in the response from the UserInfo endpoint and in the JWT access token.
The following case is an example of how you can use roles to deliver unique features and interfaces to different categories of users of your application. Let's say you have an application XYZ that powers a transportation business. The app has roles for admin, driver and passenger. You can use the value Authany returns in UserInfo or JWT access token to enable features for managing drivers to a user with admin role only. Similarly, you can allow only users with driver role view features to manage their vehicle, passengers, and trip. Finally, you can restrict users with the passenger role to only view their ticket and trip details.
In this post, you'll learn how to create roles and groups for your Authany project and how to manage them.
You can create a group in your Authany project and add one or more roles to the group. Both groups and roles can be applied to a user. For instance, if your Authany project, has the following roles:
managementdepartment_leadteam_member
And a managers group, you can add the management and department_lead roles to the group. Then, adding a user to the managers group will grant them both management and department_lead roles.
The following figure shows the core relationship with Groups, Roles, and Users in Authany.
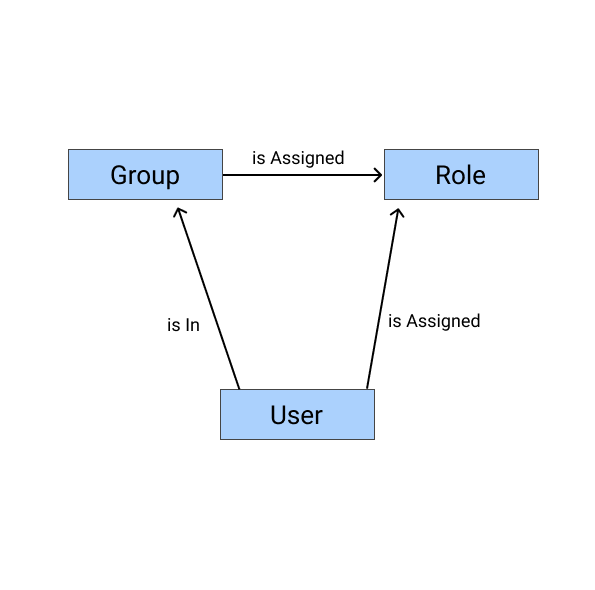
roles and group flowchart
1.1 Properties of Roles and Groups
Each role or group has three properties that describe it. These include a required key, and optional name and description.
1. Role/Group Key
The key property serves as the identifier for the role or group. The value for key is what Authany will include in the UserInfo and JWT access token of a user. A valid key must meet the following conditions:
- The value of
keycan not be empty. - A key must be between 1 and 40 characters long.
- The valid characters are
[a-zA-Z0-9:_]. - The prefix
authgear:is reserved for Authany internal use.
The following are some examples of valid keys:
readerapp:editorstore_manager
2. Name
Name is an optional label for a role or group. The value for the name property is what will be displayed in Authany portal. It has less strict constrict for allowed characters. For example, you can use white spaces here.
3. Description
The description property is also optional. You can use it to give more details about a role or group.
In the next section of this post, we'll show you how to create roles and groups for your project.
1.2 Example of Role in UserInfo Endpoint Response
The. following JSON document shows how roles are returned when your application requests for UserInfo:
{
  "custom_attributes": [],
  "email": "user@example.com",
  "email_verified": true,
  "family_name": "John",
  "gender": "male",
  "given_name": "Doe",
  "https://authgear.com/claims/user/can_reauthenticate": true,
  "https://authgear.com/claims/user/is_anonymous": false,
  "https://authgear.com/claims/user/is_verified": true,
  "https://authgear.com/claims/user/roles": [
    "department_lead",
    "team_member"
  ],
  "sub": "e3079029-f230-4c24-91c1-c2cd63a6a4af",
  "updated_at": 1694947082,
  "x_web3": {
    "accounts": []
  }
}
The value of the https://authgear.com/claims/user/roles attribute is an array that contains the roles of the current user.
2.0 How to Create a New Role
It is up to you to create roles for your Authany project based on your unique need and use case. You can create new roles using the Authany Portal or the Admin API (using GraphQL).
2.1 Creating Roles from the Authany Portal
Follow these steps to create new roles in your Authany project via the Portal.
Step 1
First, log in to Authany Portal, select your project then navigate to User Management > Roles to open the Roles page.
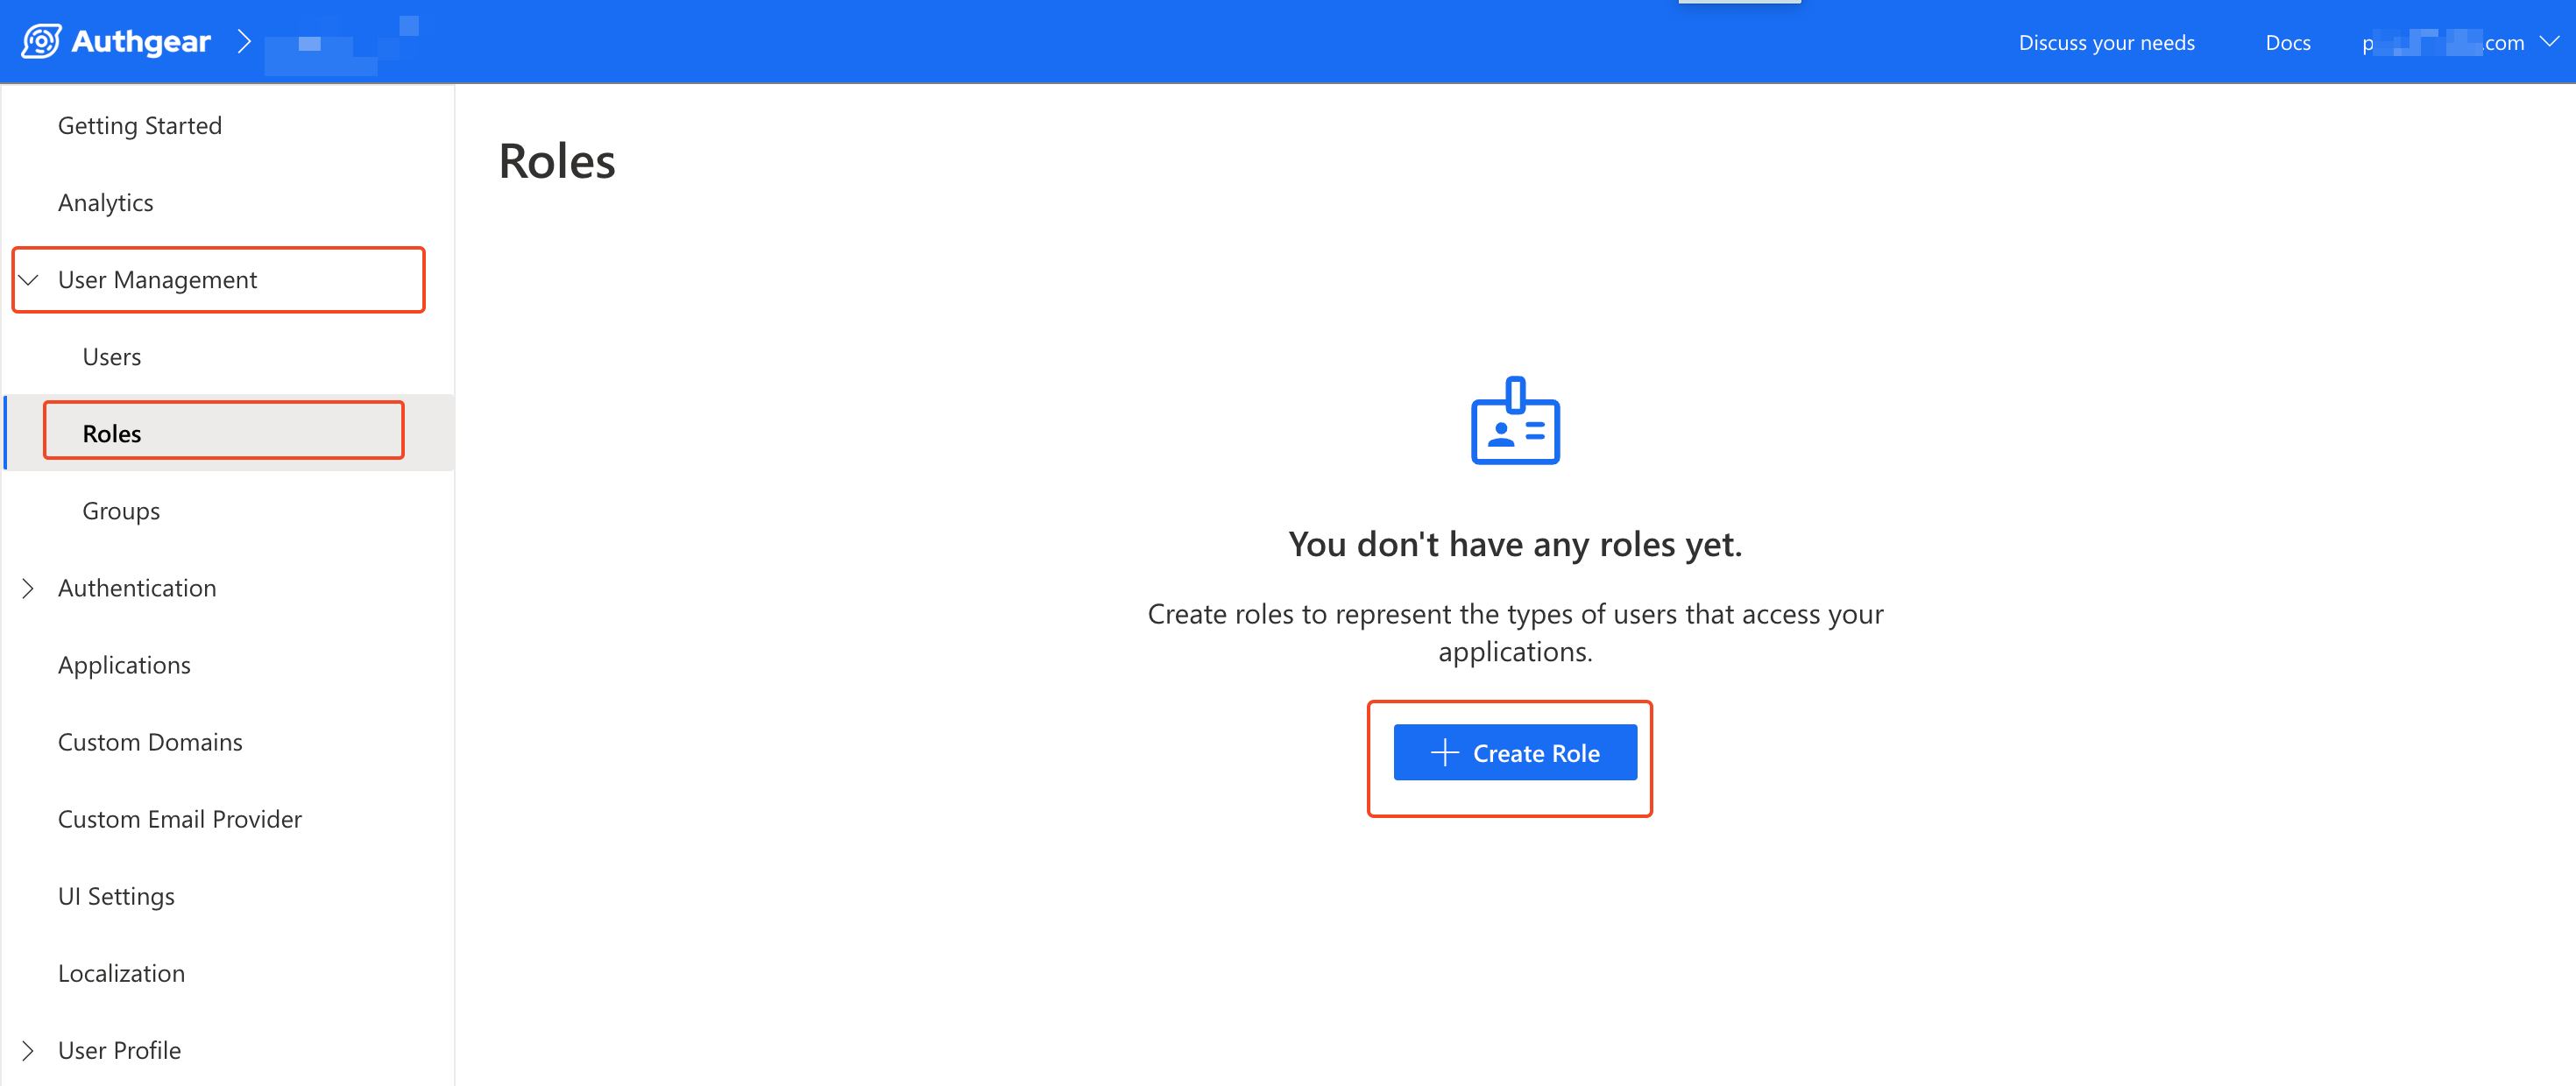
navigate to roles management page
Step 2
Click the Create Role button in the middle of the Roles page (or the top right corner if you have existing roles) to start creating a new role.
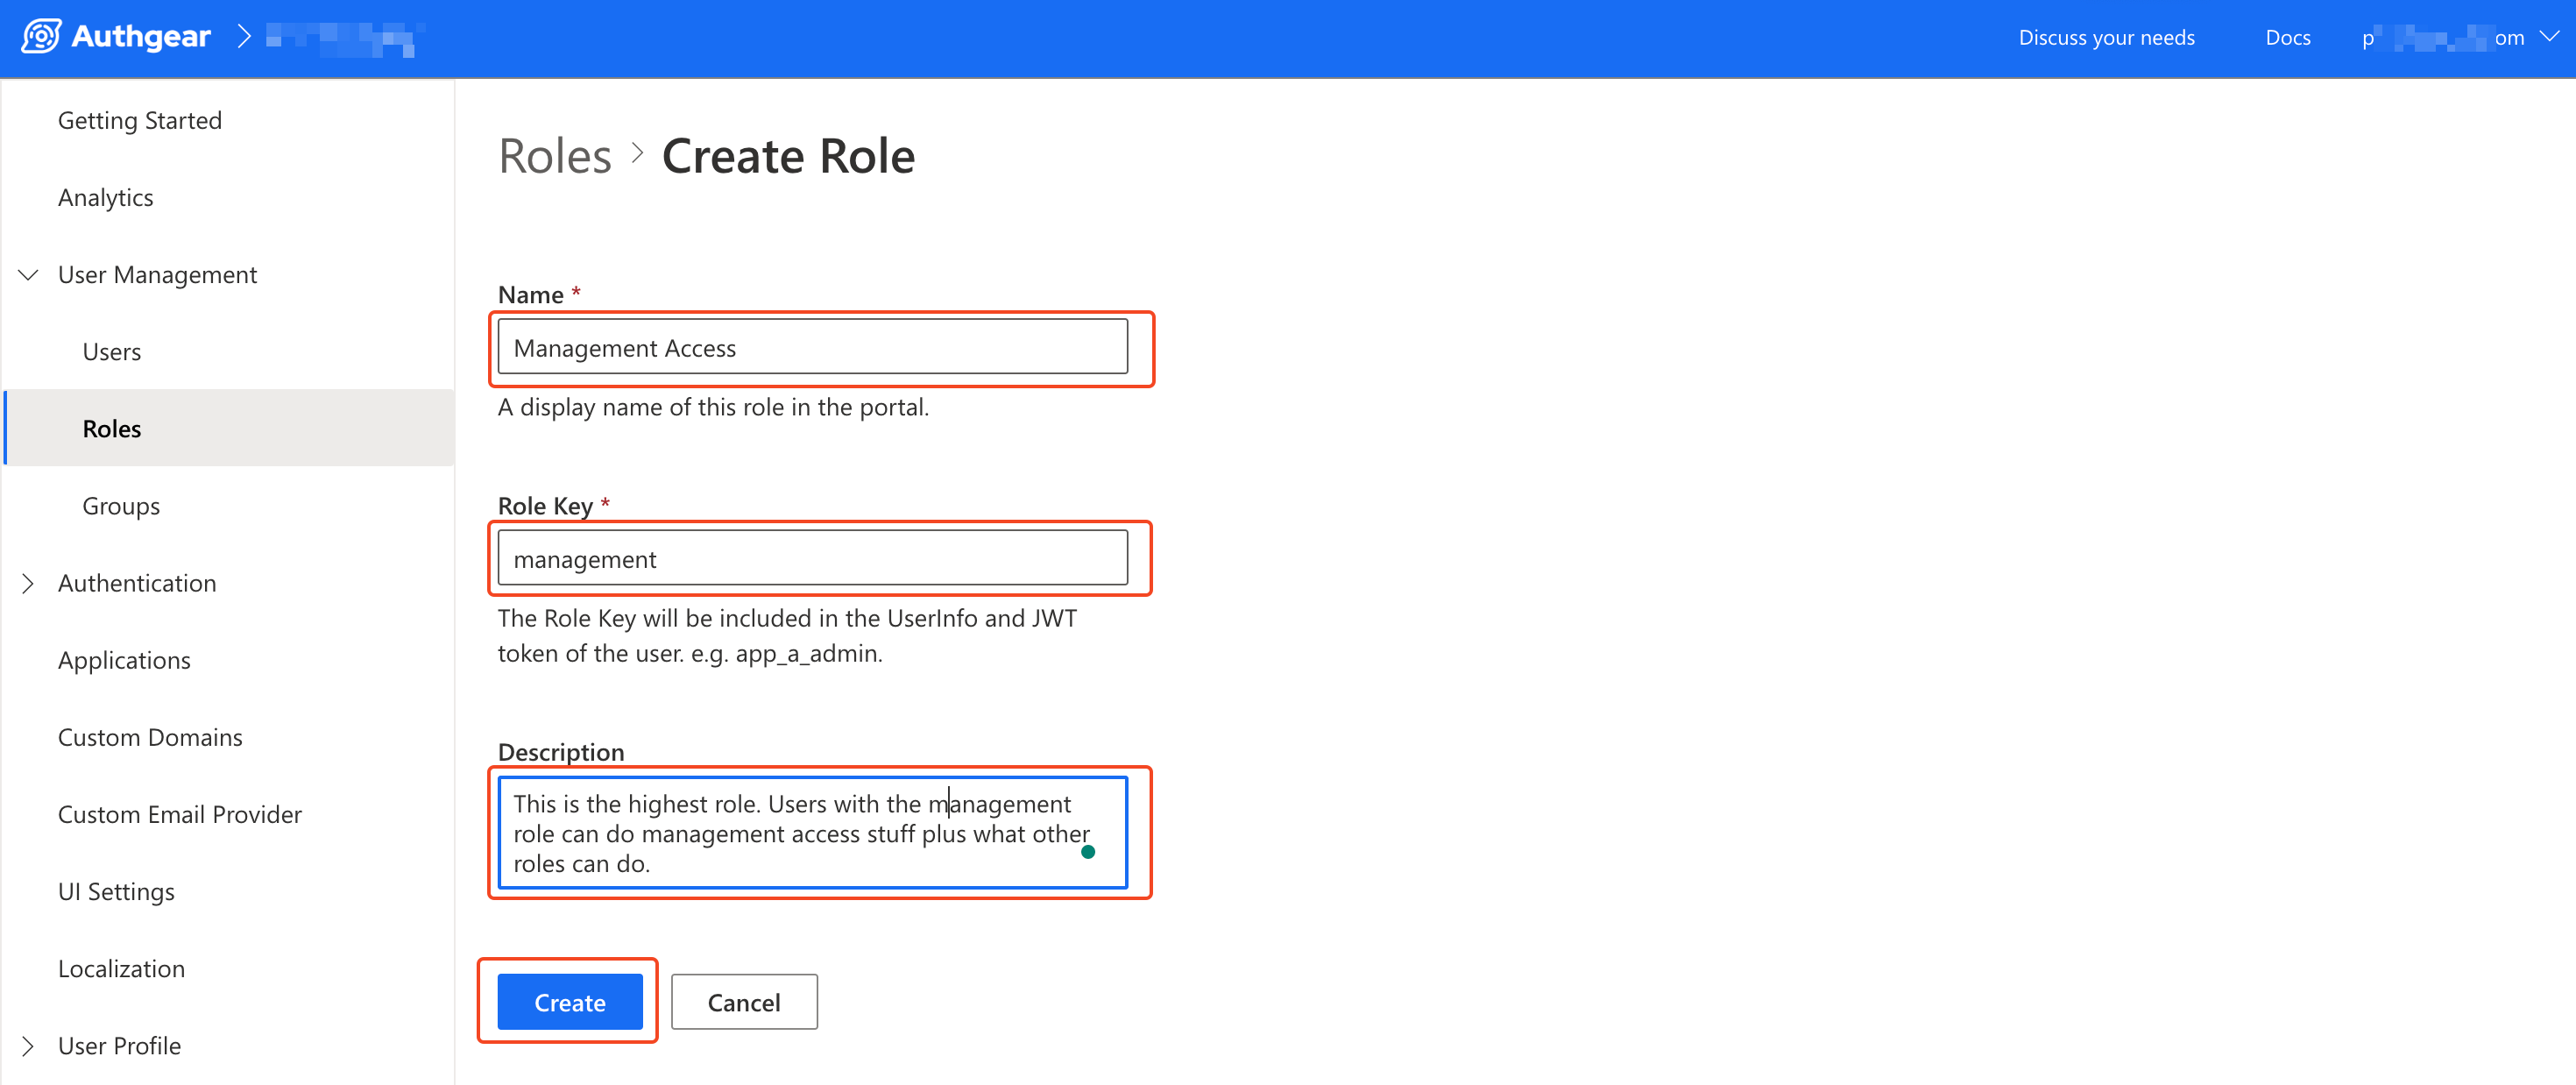
create new role page
Enter the Name, Role Key, and Description of your new role in their respective fields. Click on the Create button at the bottom of the form to finish creating your new role.
Repeat the above steps to add more roles.
2.2 Creating Roles using the Admin API
As mentioned earlier in this post, you can also create new roles using the Admin API. In this section, we'll walk you through the steps for doing that.
Step 1
Set up your custom code with the necessary authorization to interact with the Admin API GraphQL endpoint. Or use the GraphiQL Explorer provided by Authany (Navigate to Advanced > Admin API > GraphiQL Explorer in Authany Portal to access).
Step 2
Run the following mutation to create a new role:
3.0 How to Create a New Group
Just like roles, you are responsible for creating groups for your Authany project. You can also create new groups either via Authany Portal or using the Admin API.
3.1 Creating Groups from the Authany Portal
The steps for creating a new group from the Portal are similar to that of roles. The steps are as follows:
Step 1
First, log in to Authany Portal, select your project then navigate to User Management > Groups to open the Groups page.
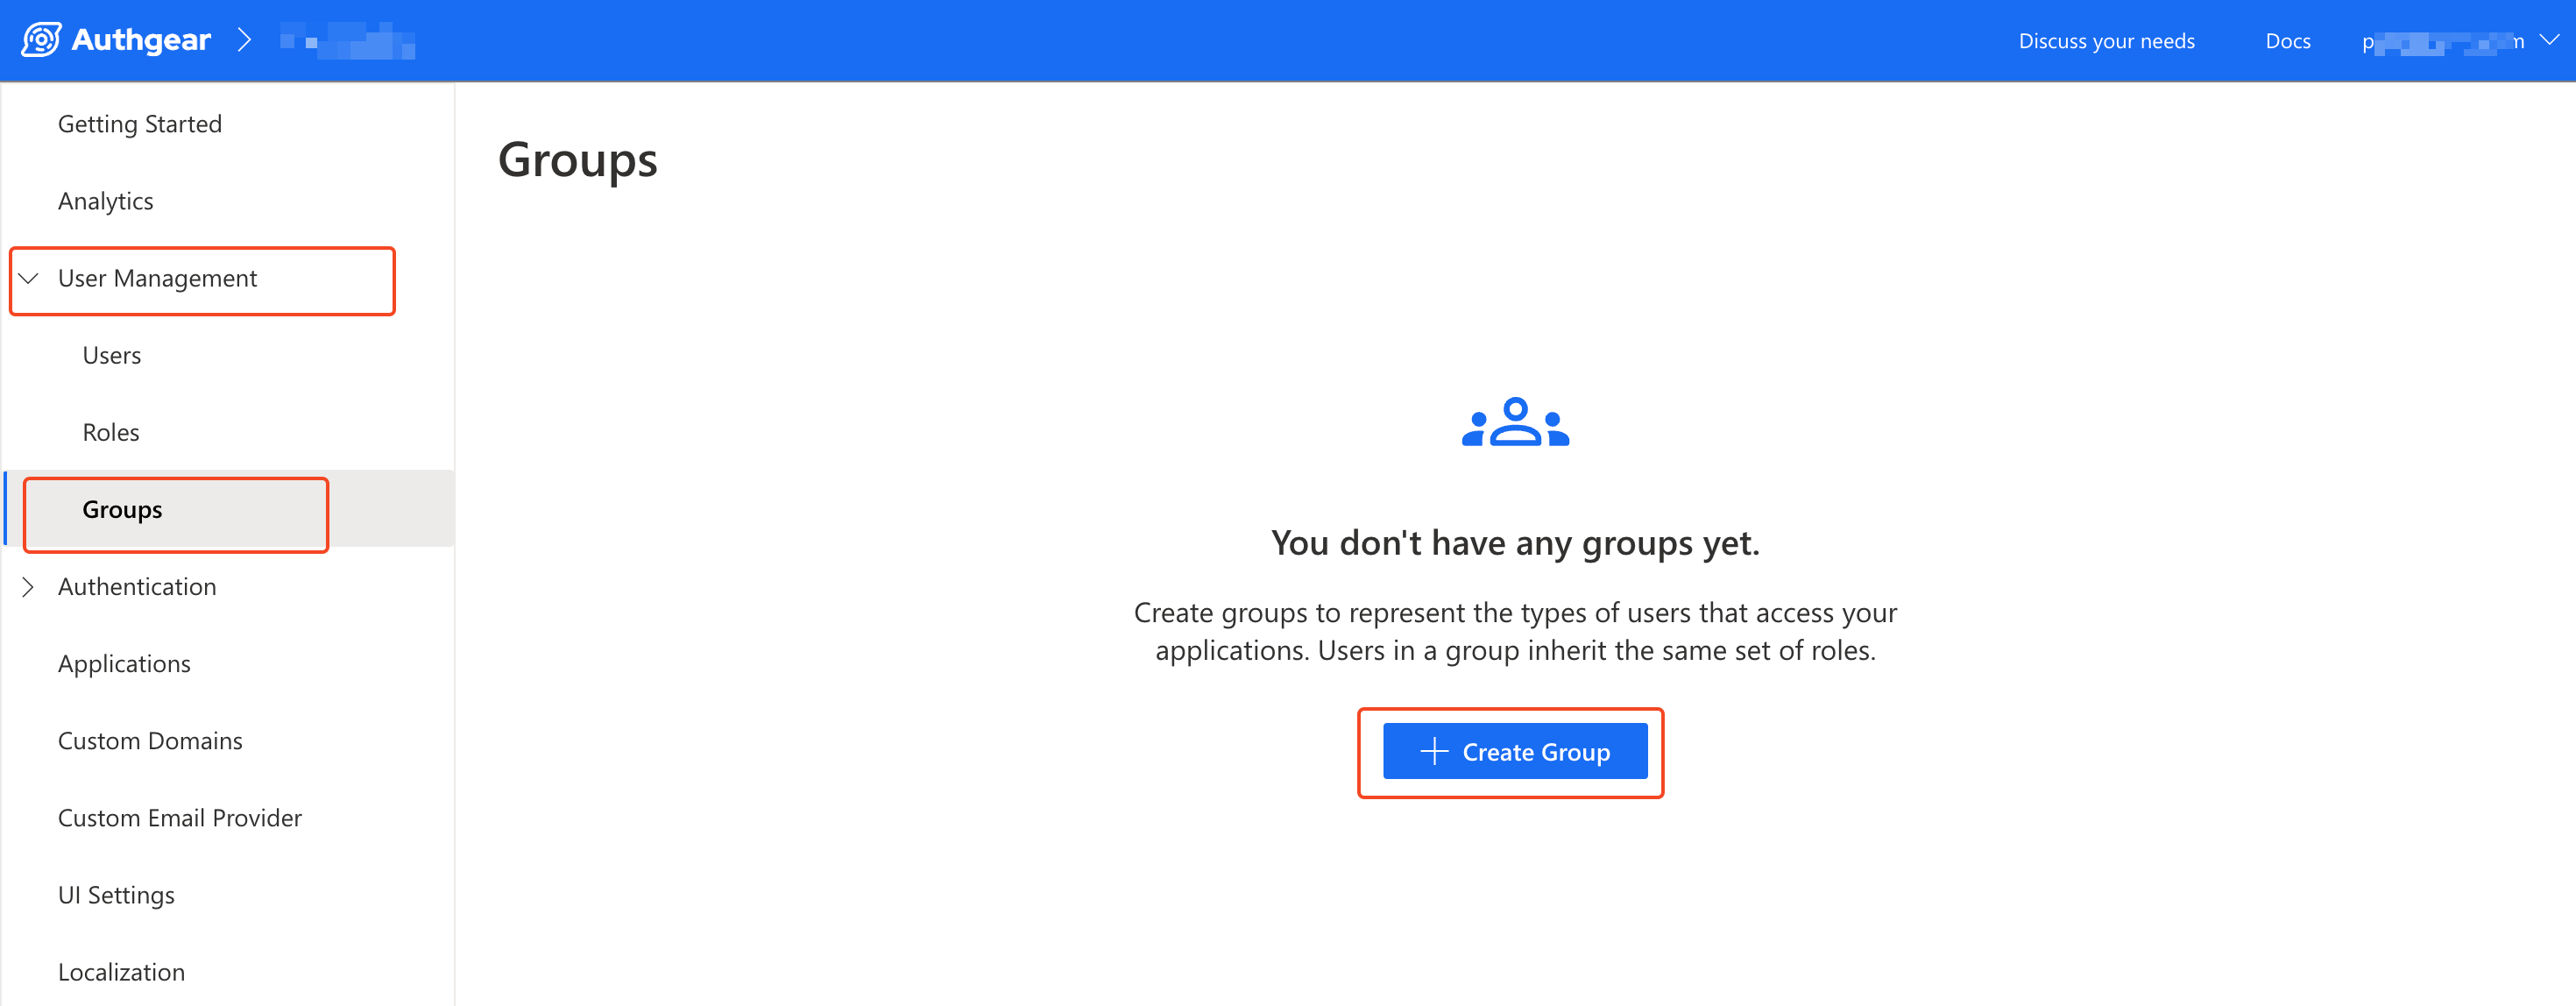
navigate to groups management page
Step 2
Click the Create Group button in the middle of the screen (or in the top right corner if you already have some groups) to access the Create Group form.
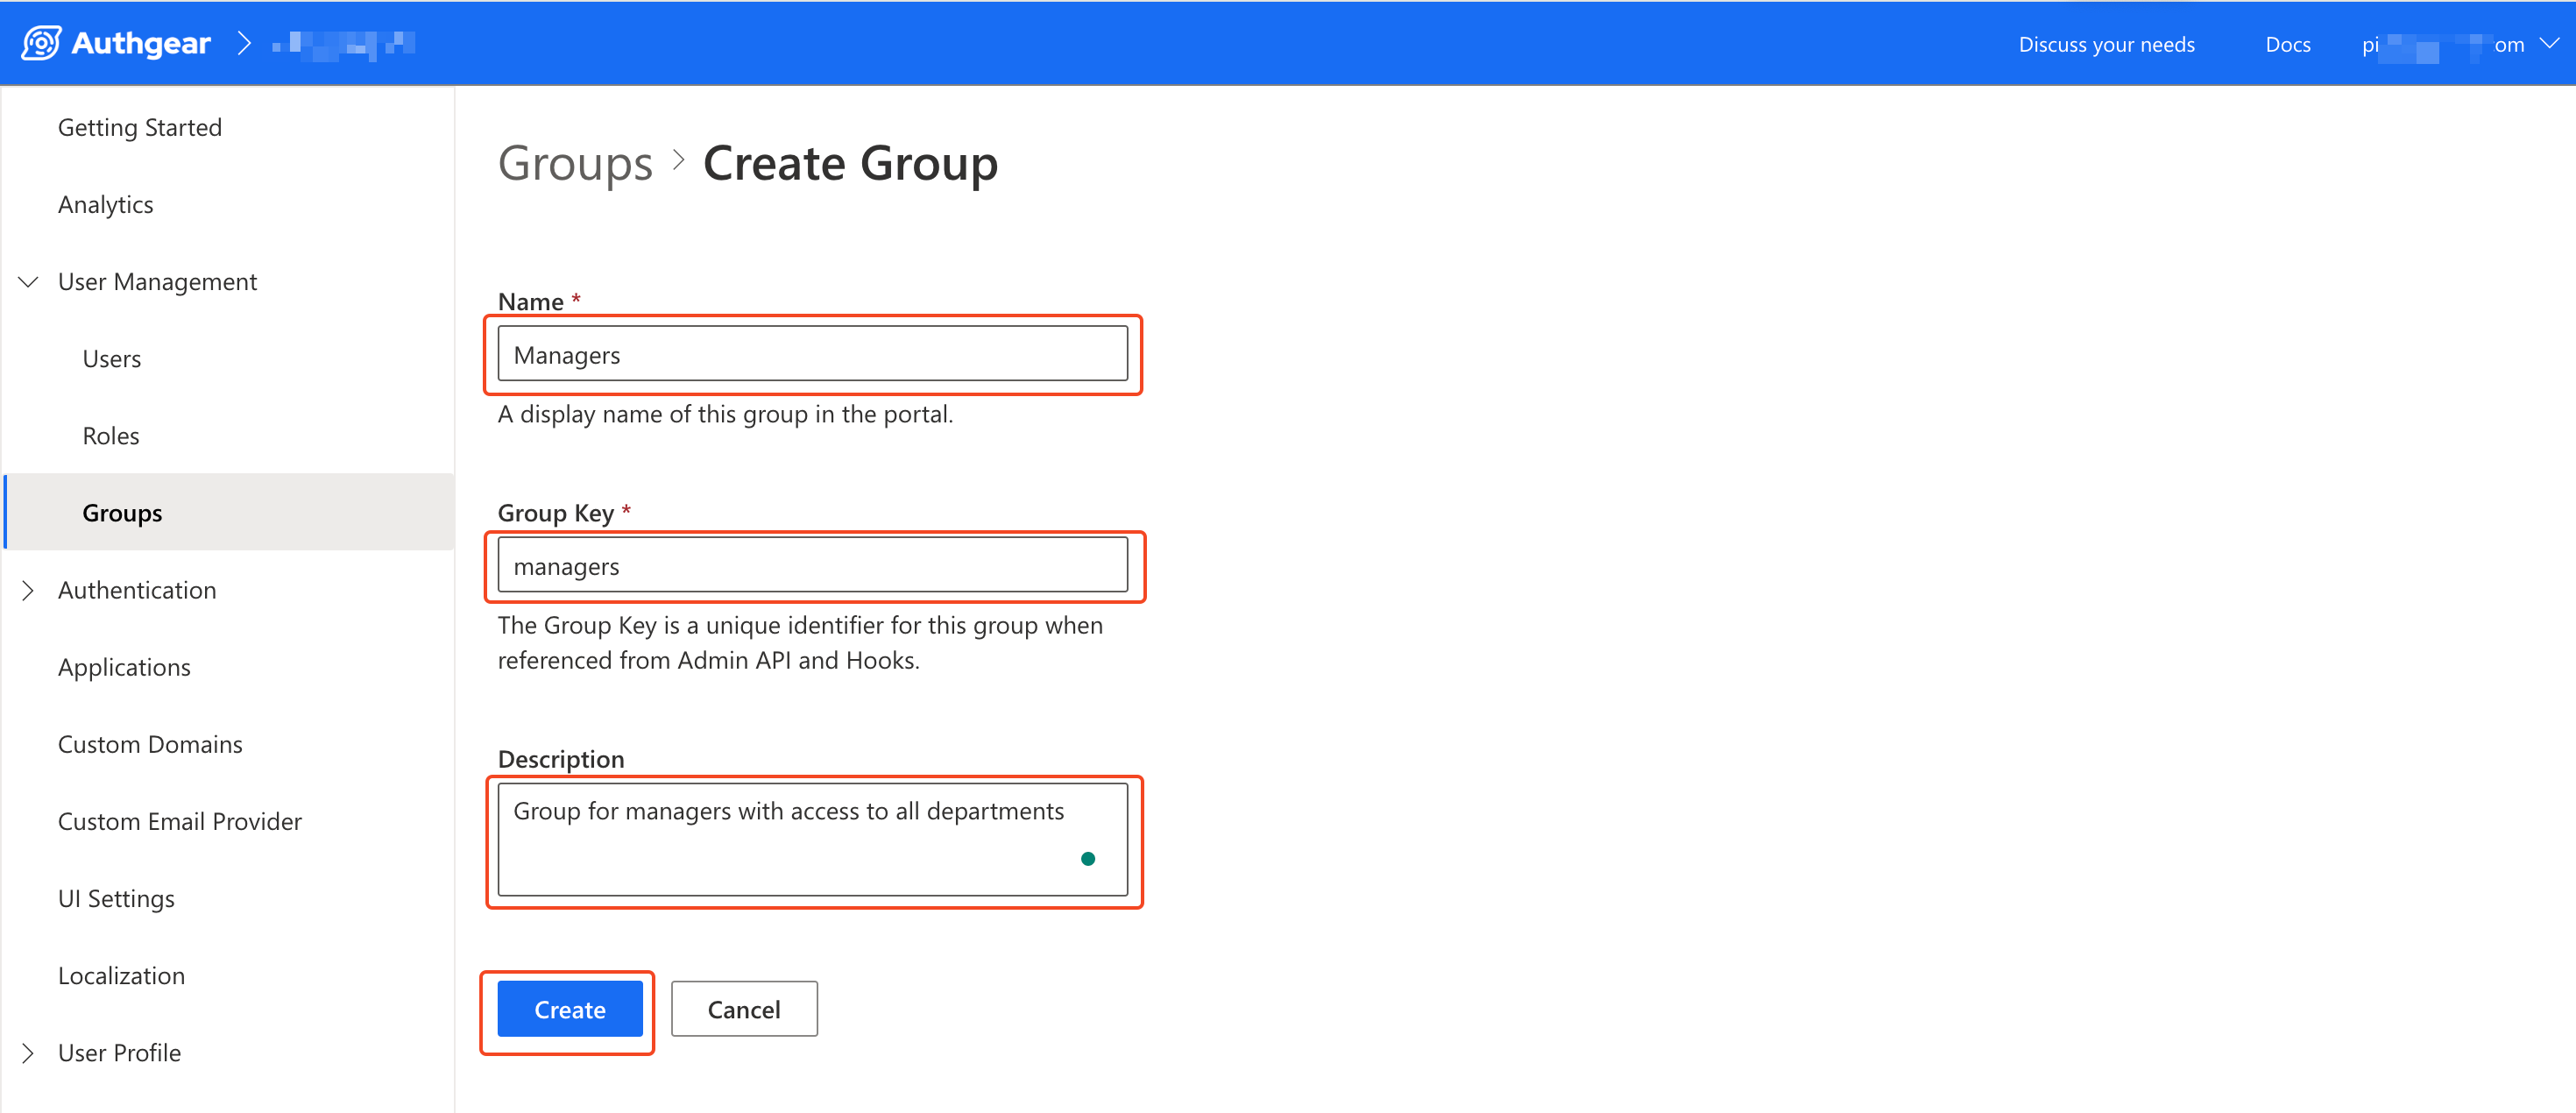
Enter the Name, Group Key and Description in the group creation form then click the Create button to finish.
3.2 Creating Groups using the Admin API
It's possible to create a new group using the Admin API GraphQL. The following guide shows the steps for doing that.
Step 1
Implement your own custom code that has access to the Admin API endpoint. Alternatively, you can use the GraphiQL Explorer in Authany Portal (Navigate to Advanced > Admin API > GraphiQL Explorer).
Step 2
Execute the following GraphQL mutation to create a new group:
4.0 Managing Existing Roles
You can manage the roles you've created via the Portal or using the Admin API. In this section, we'll cover how to manage roles.
4.1 Add Role to a User
To add a role to a user, first, in the Authany Portal, navigate to User Management > Users. From this page, you can view a list of all the users who have signed up on your Authany project. You can also search users by their current roles there.
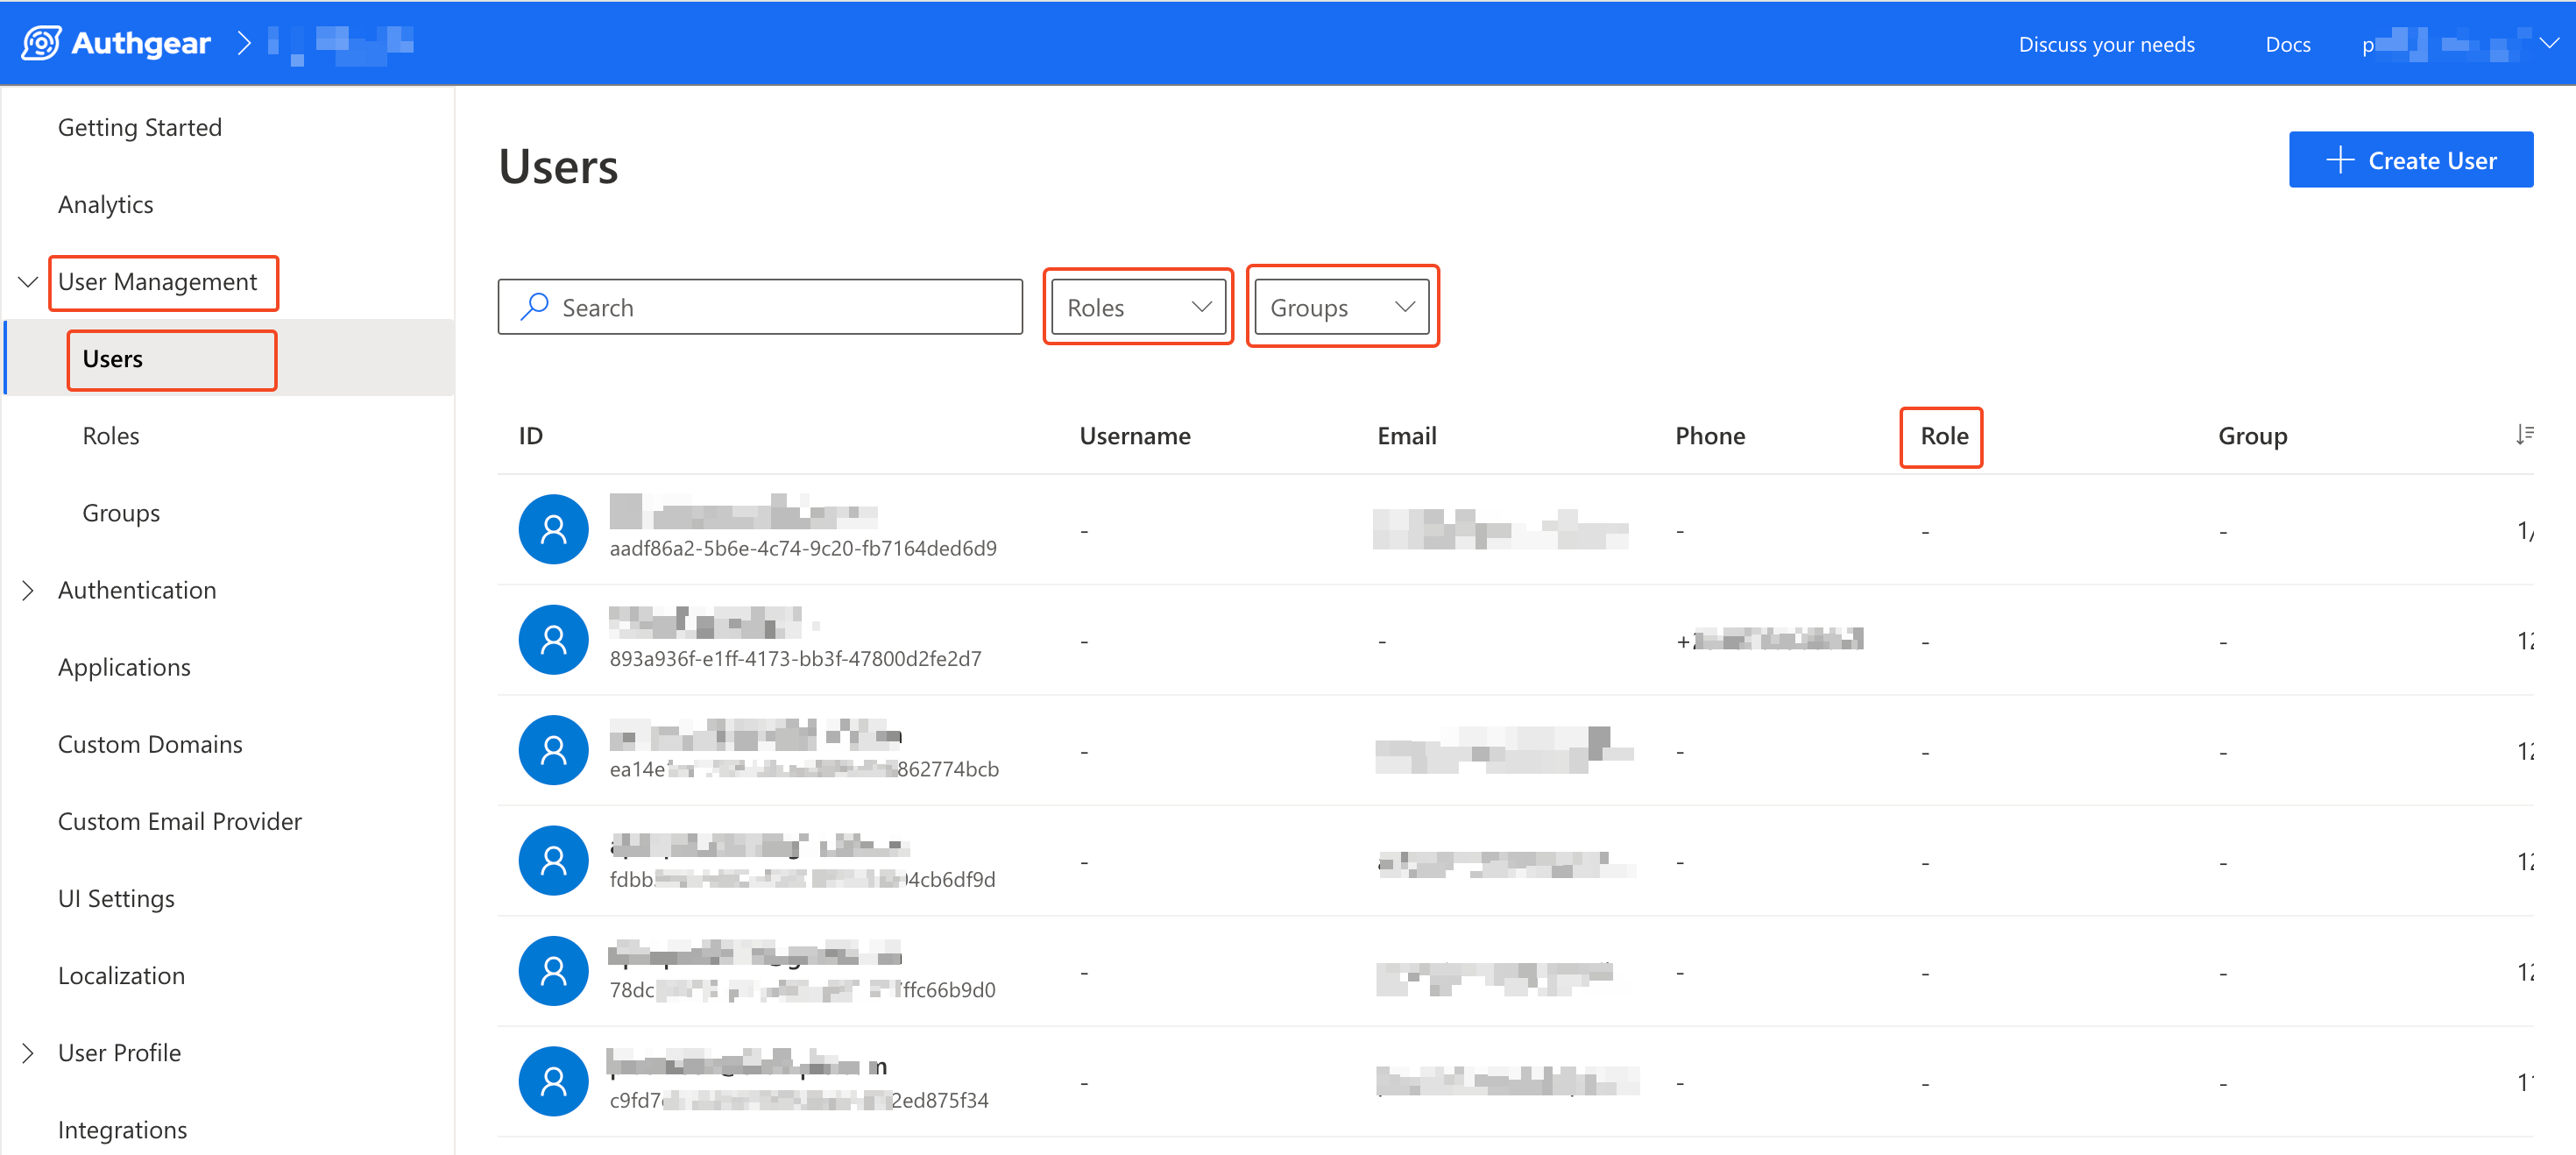
Next, click on the user you wish to add a new role to. This will open their User Details page. From that page, navigate to the Roles tab
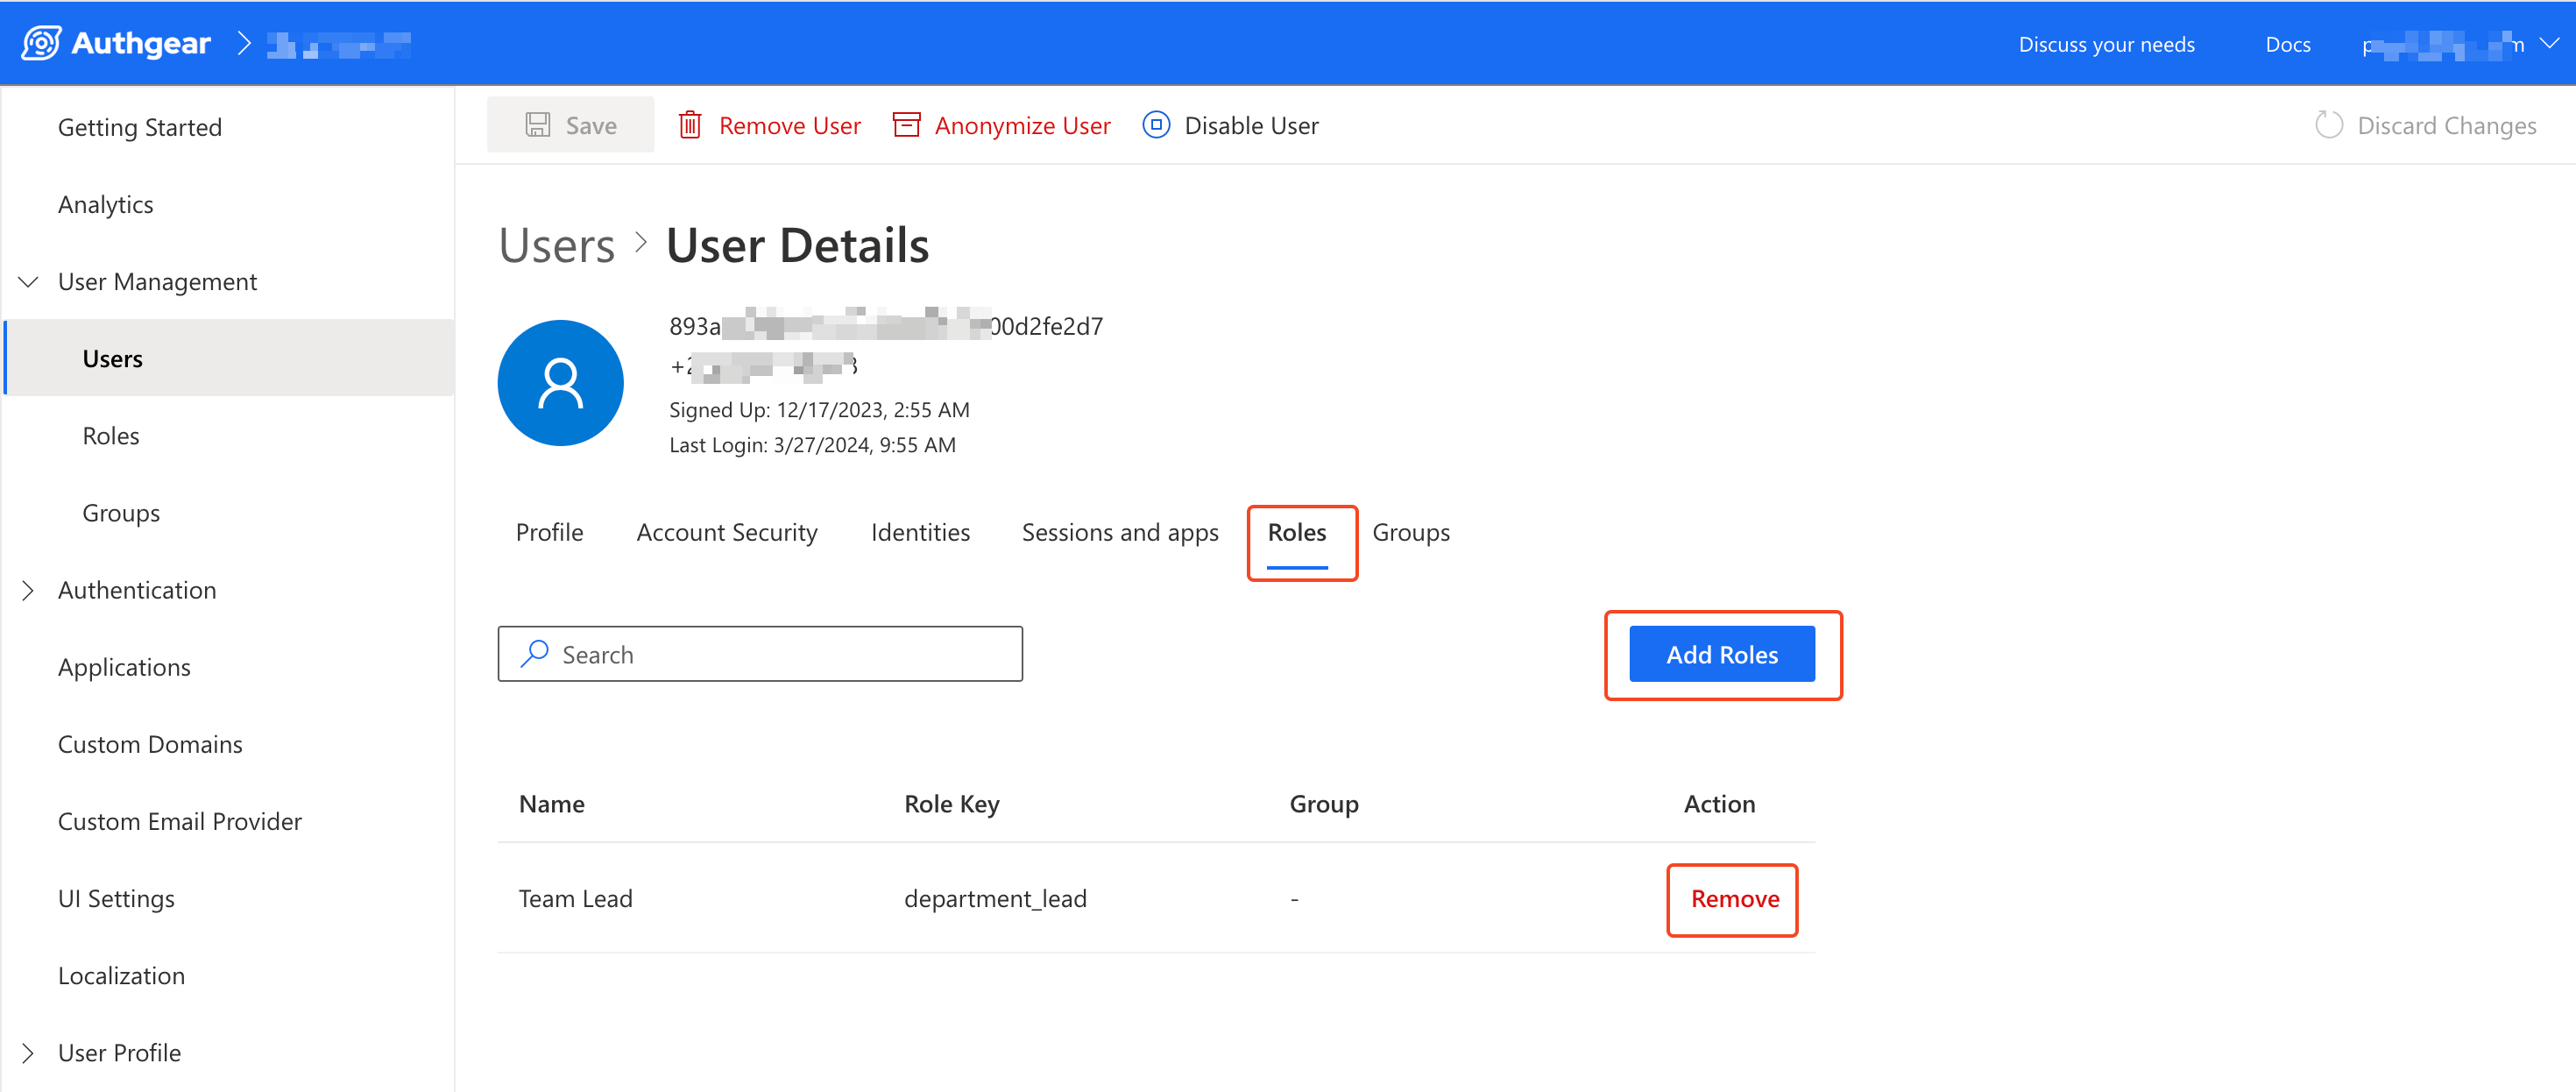
Then, click the Add Roles button, select a role from the drop-down menu, and click Add. If the drop-down is empty, it is possible that you have not created any roles yet. See how to create roles.
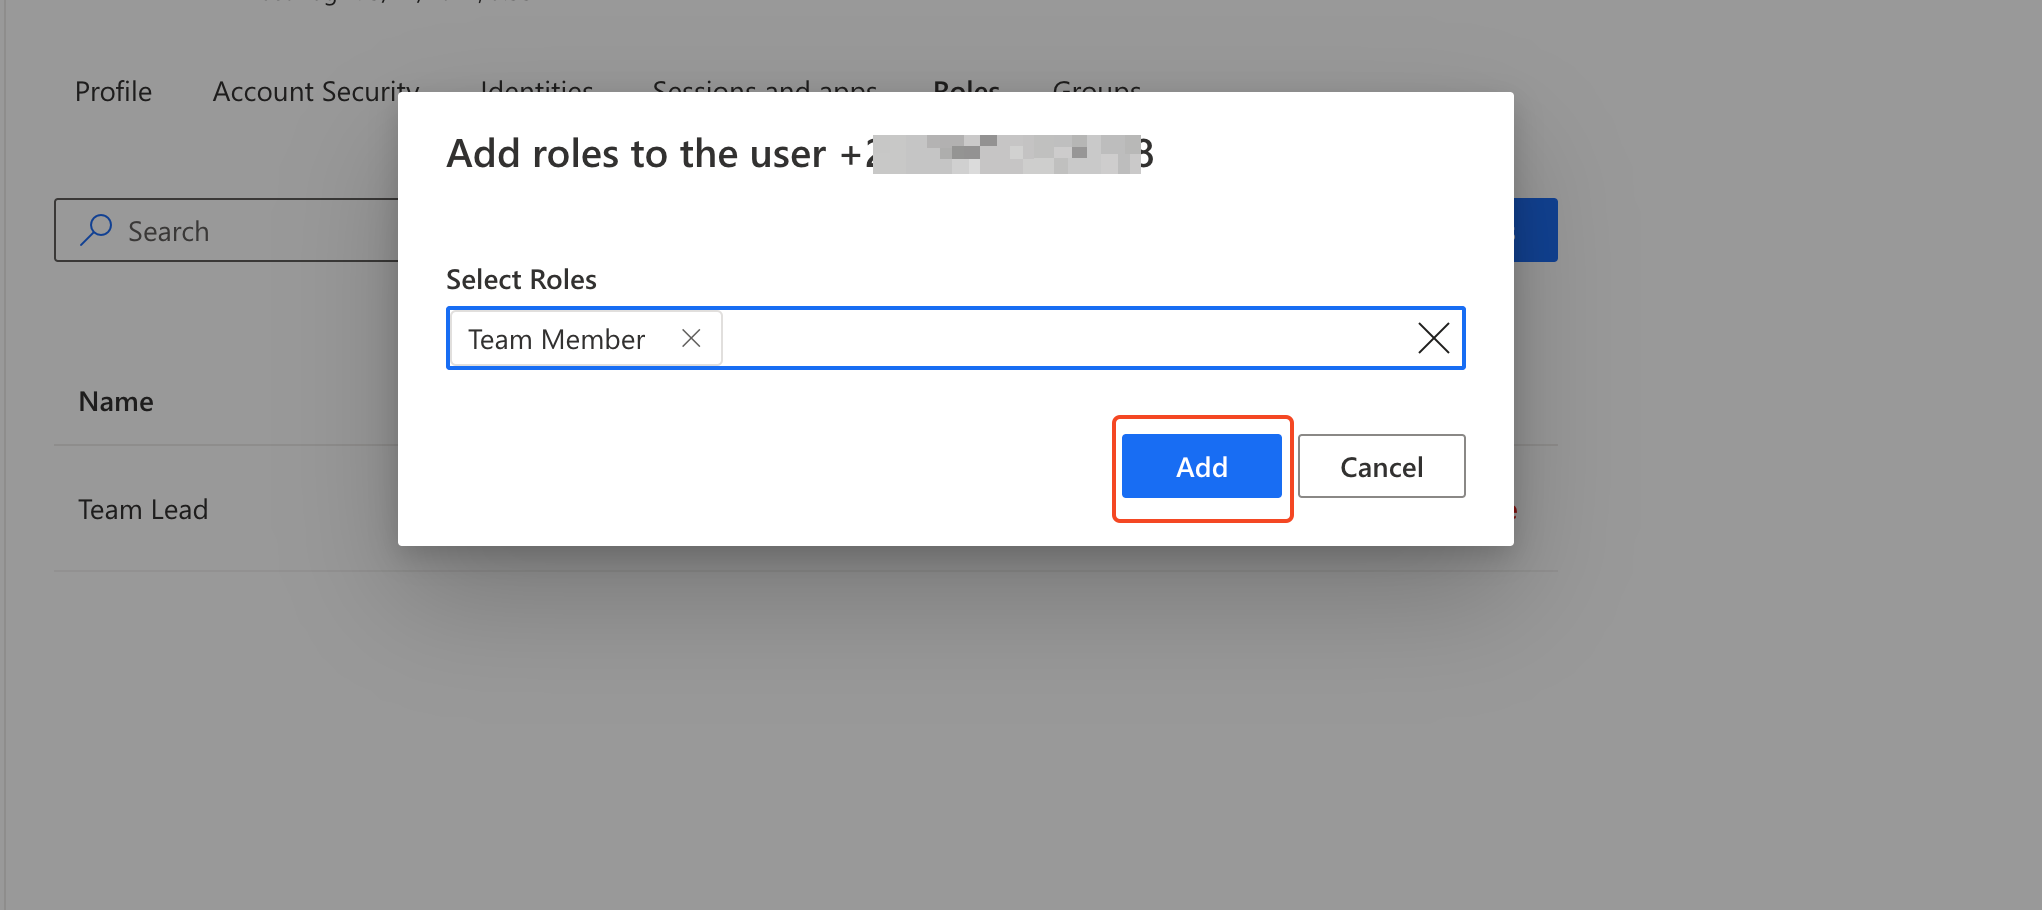
To remove an existing role from a user, click on the Remove button next to the role in the user's Roles tab.
4.2 Add Group to Role
Adding a group to a role is a way of connecting a role and a group from the role management side.
To do this in Authany Portal, first navigate to User Management > Roles, then click on the role you wish add a group to.
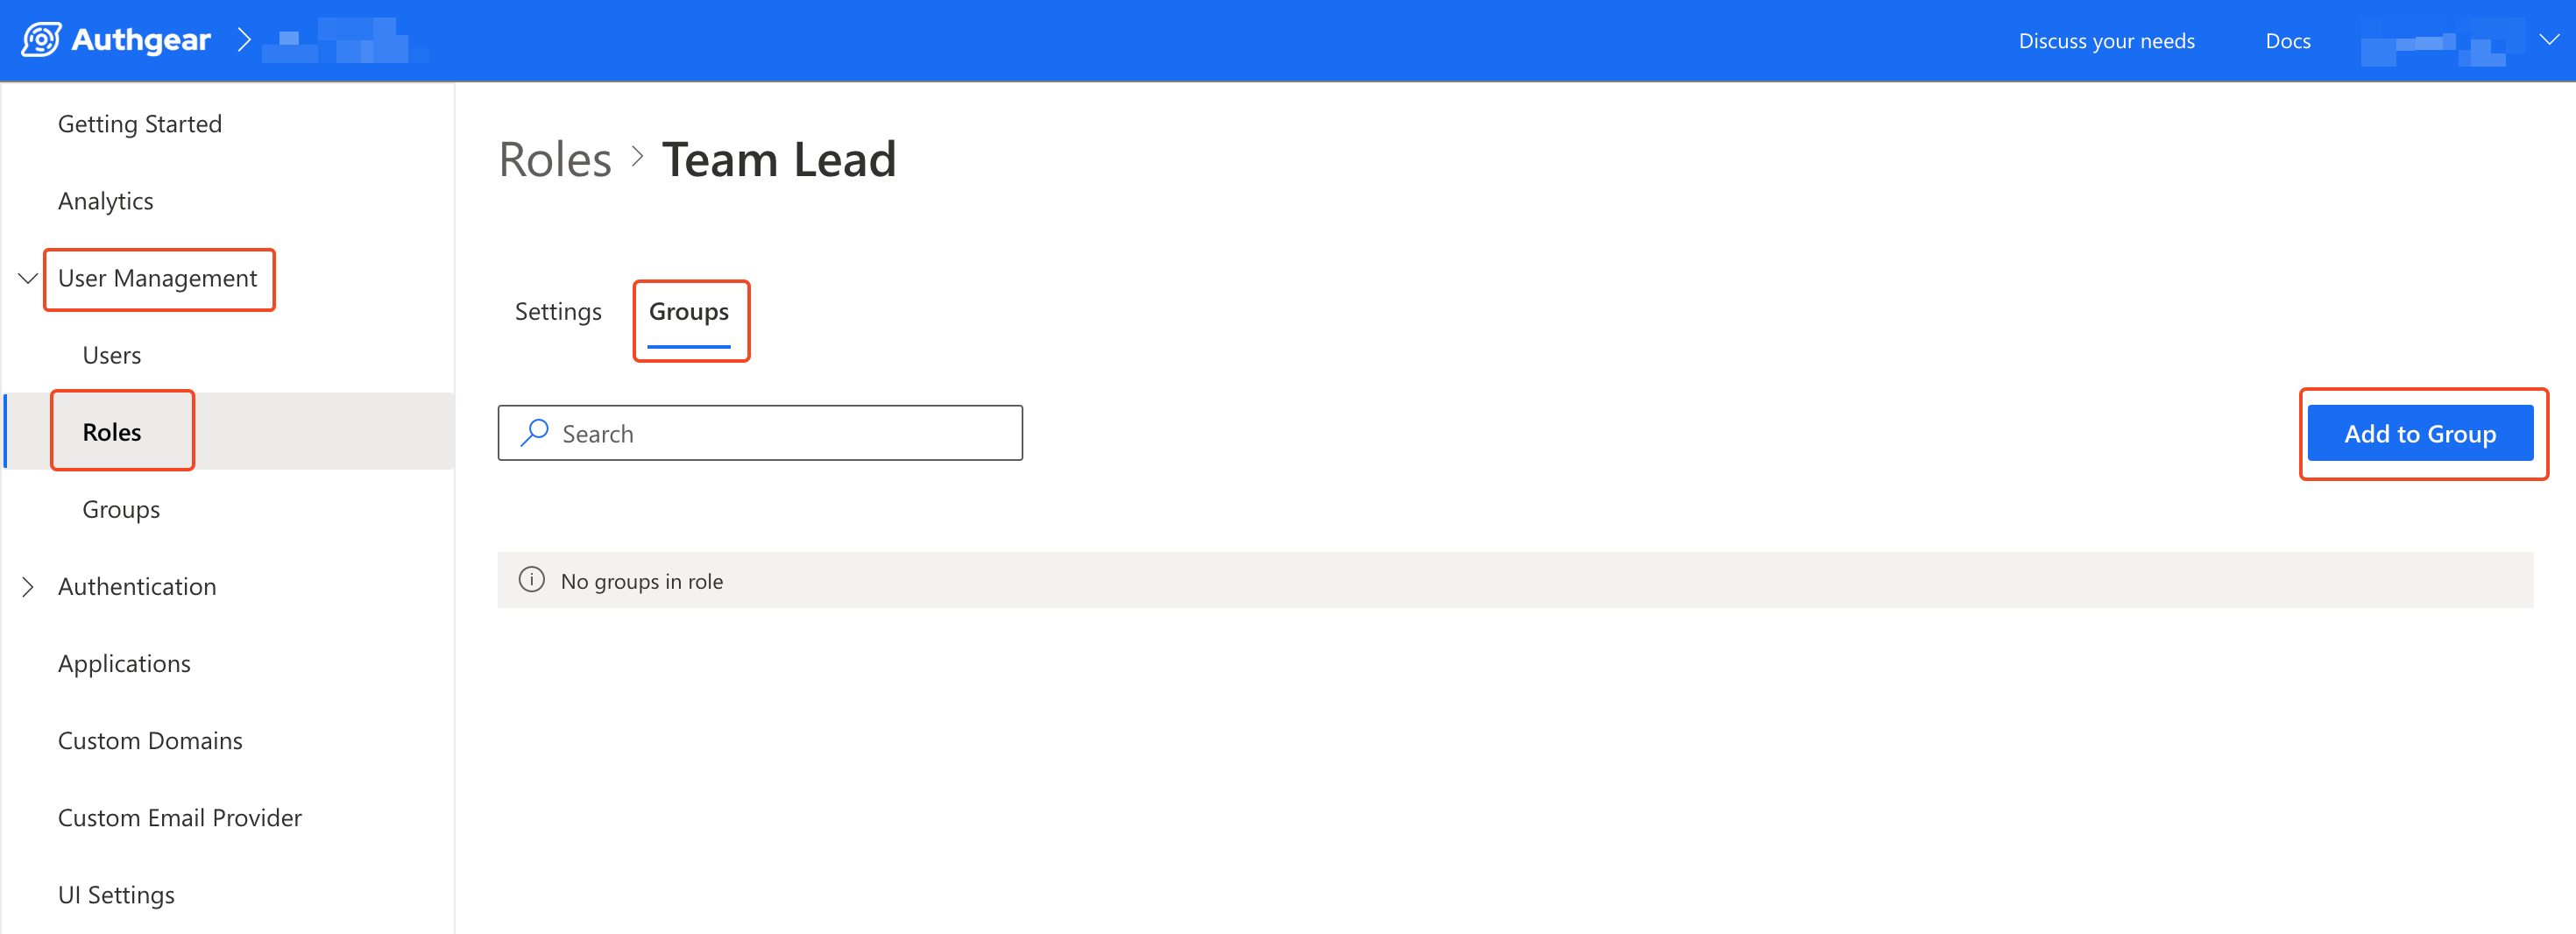
Next, in the details page for the selected role, go to the Groups tab, then click the Add to Group button. Select the group you wish to add from the drop-down then click Add. If there's no groups in the dropdown, try creating some new groups first.
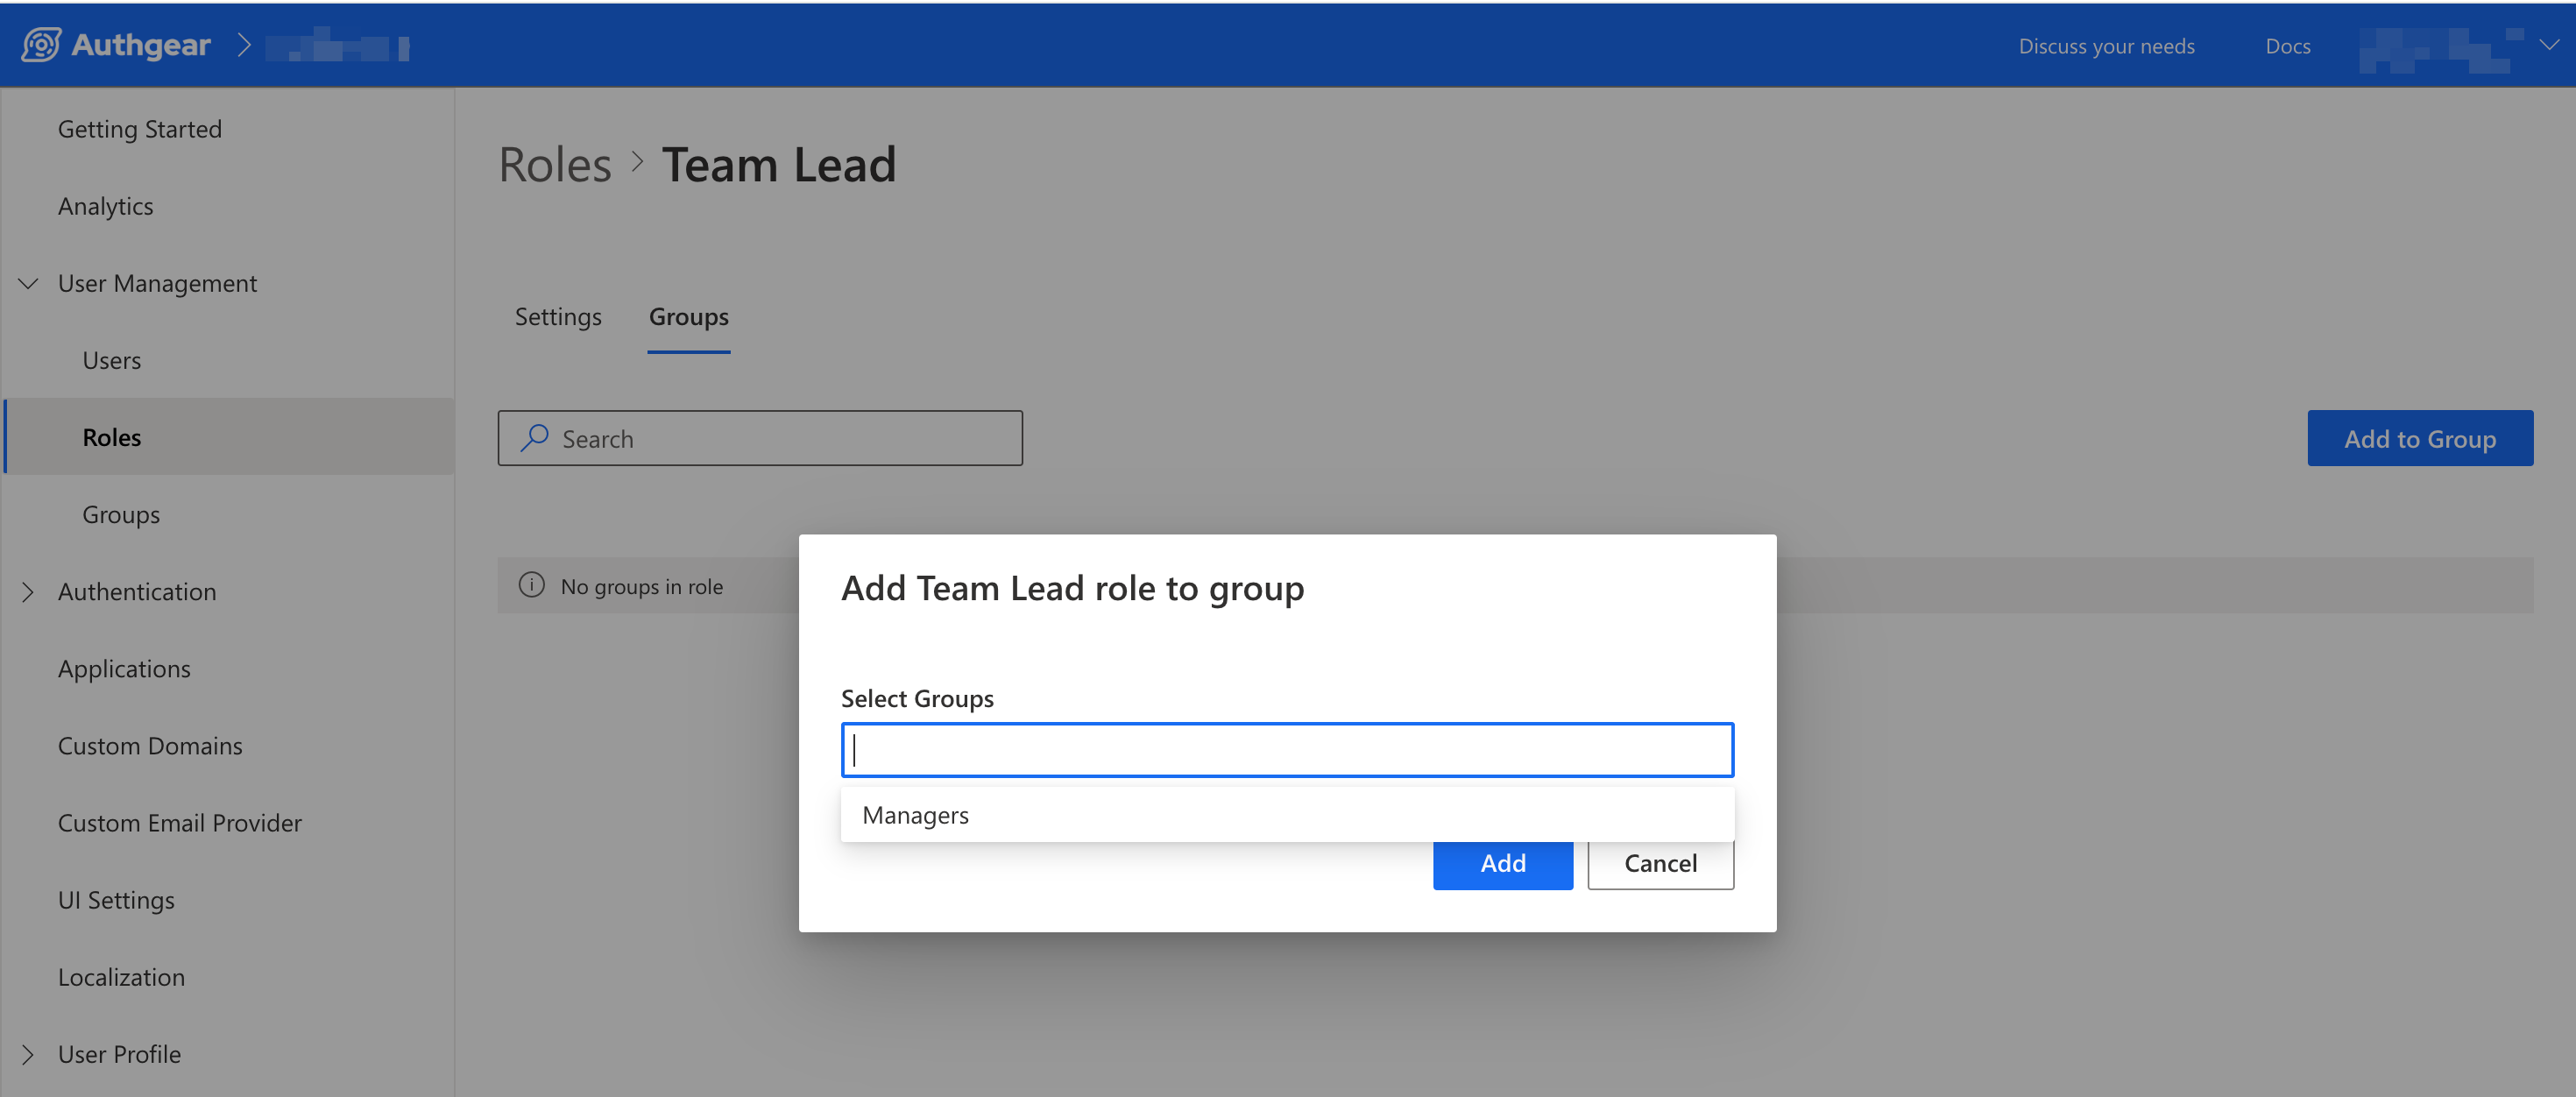
4.3 Update or Delete a Role
To update the properties of an existing role such as the name, description or key, navigate to User User Management > Roles in Authany Portal. Click on the role you wish to modify to open the Settings tab, then change the value for the property you wish to update in the form. Once you're done, click on the Save button.
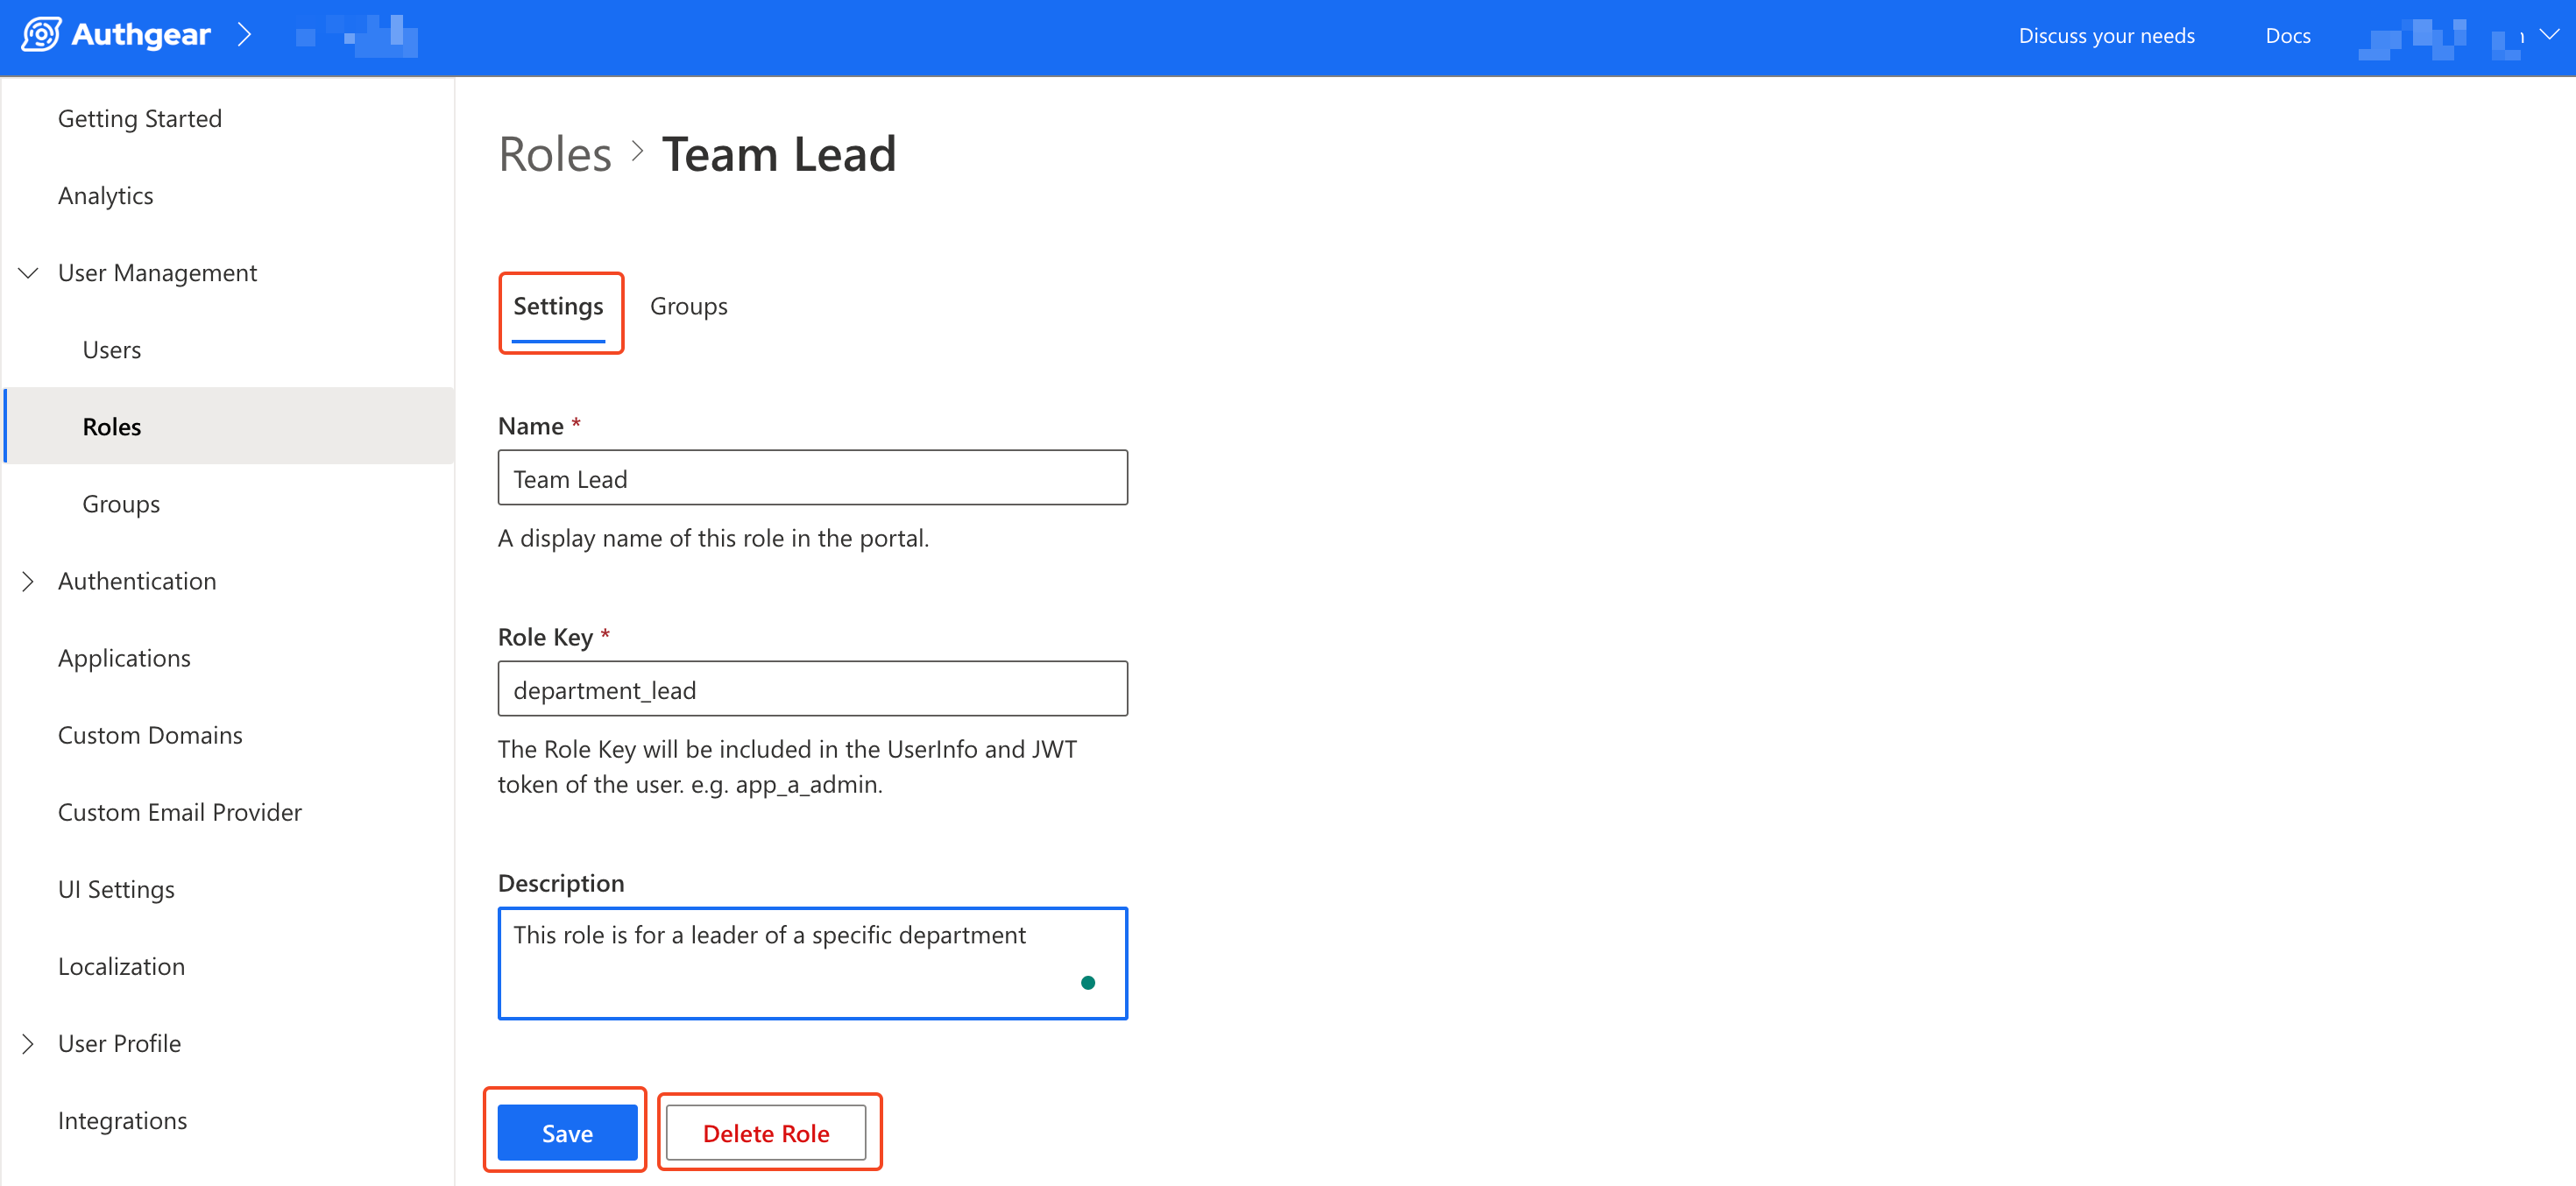
To delete a role, click on the Delete button once you open the role's Settings tab.
5.0 Managing Existing Rules
5.1 Add Group to User
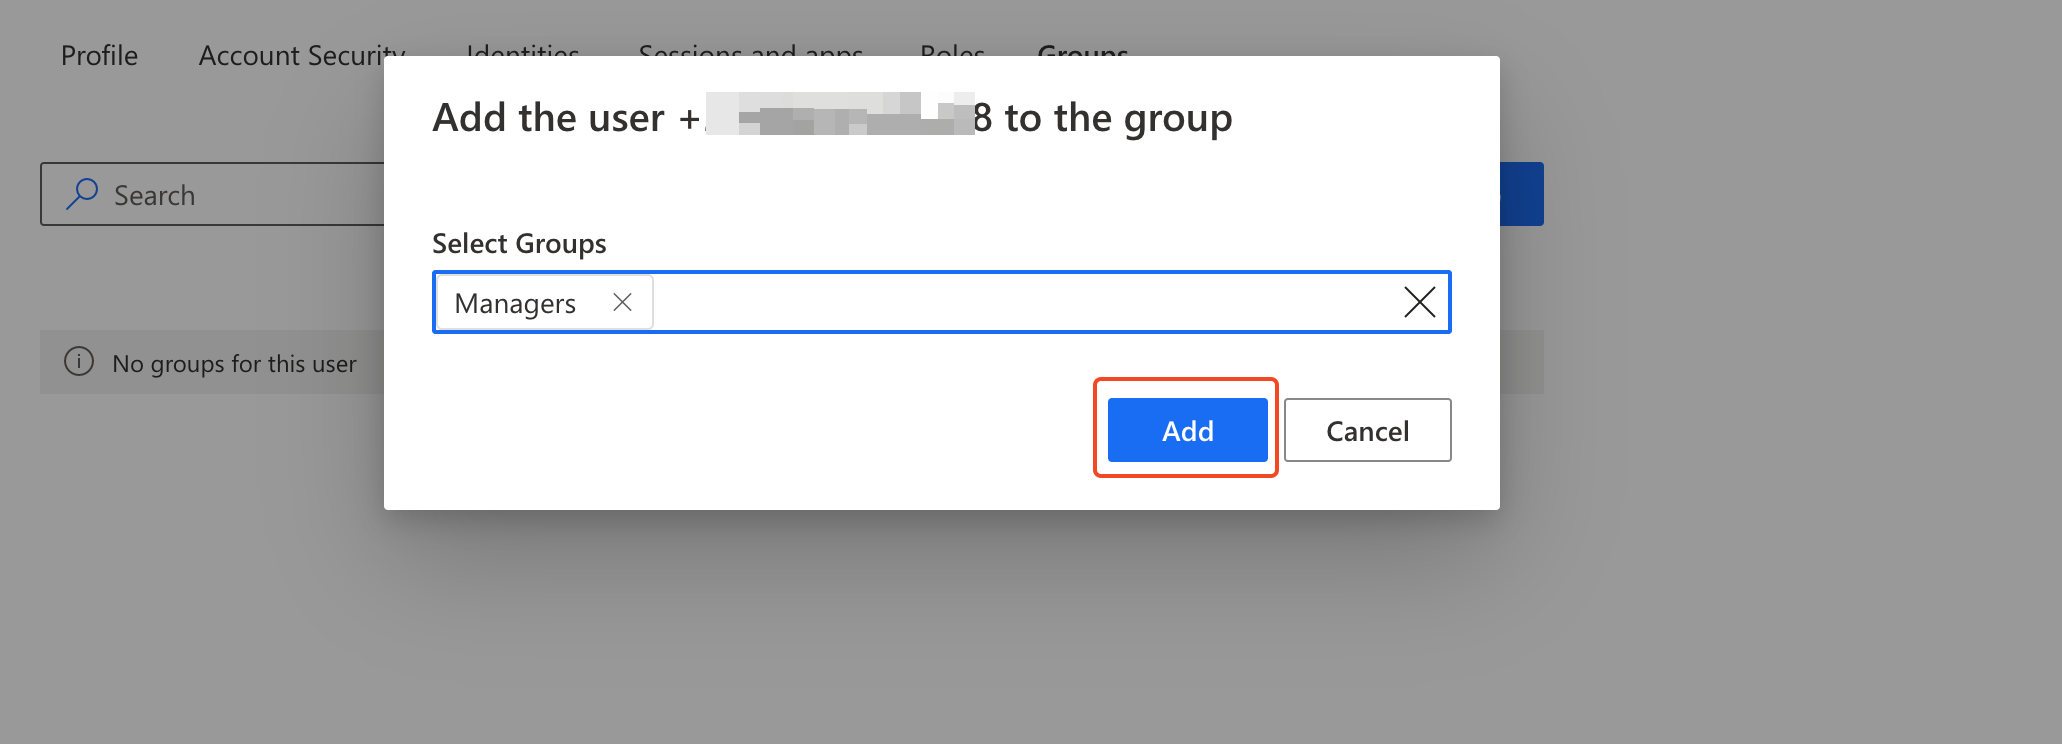
To add a group to a user's profile in the Portal, first navigate to User Management > Users and select a user.
In the User Details page, switch to the Groups tab then click on Add to Group.
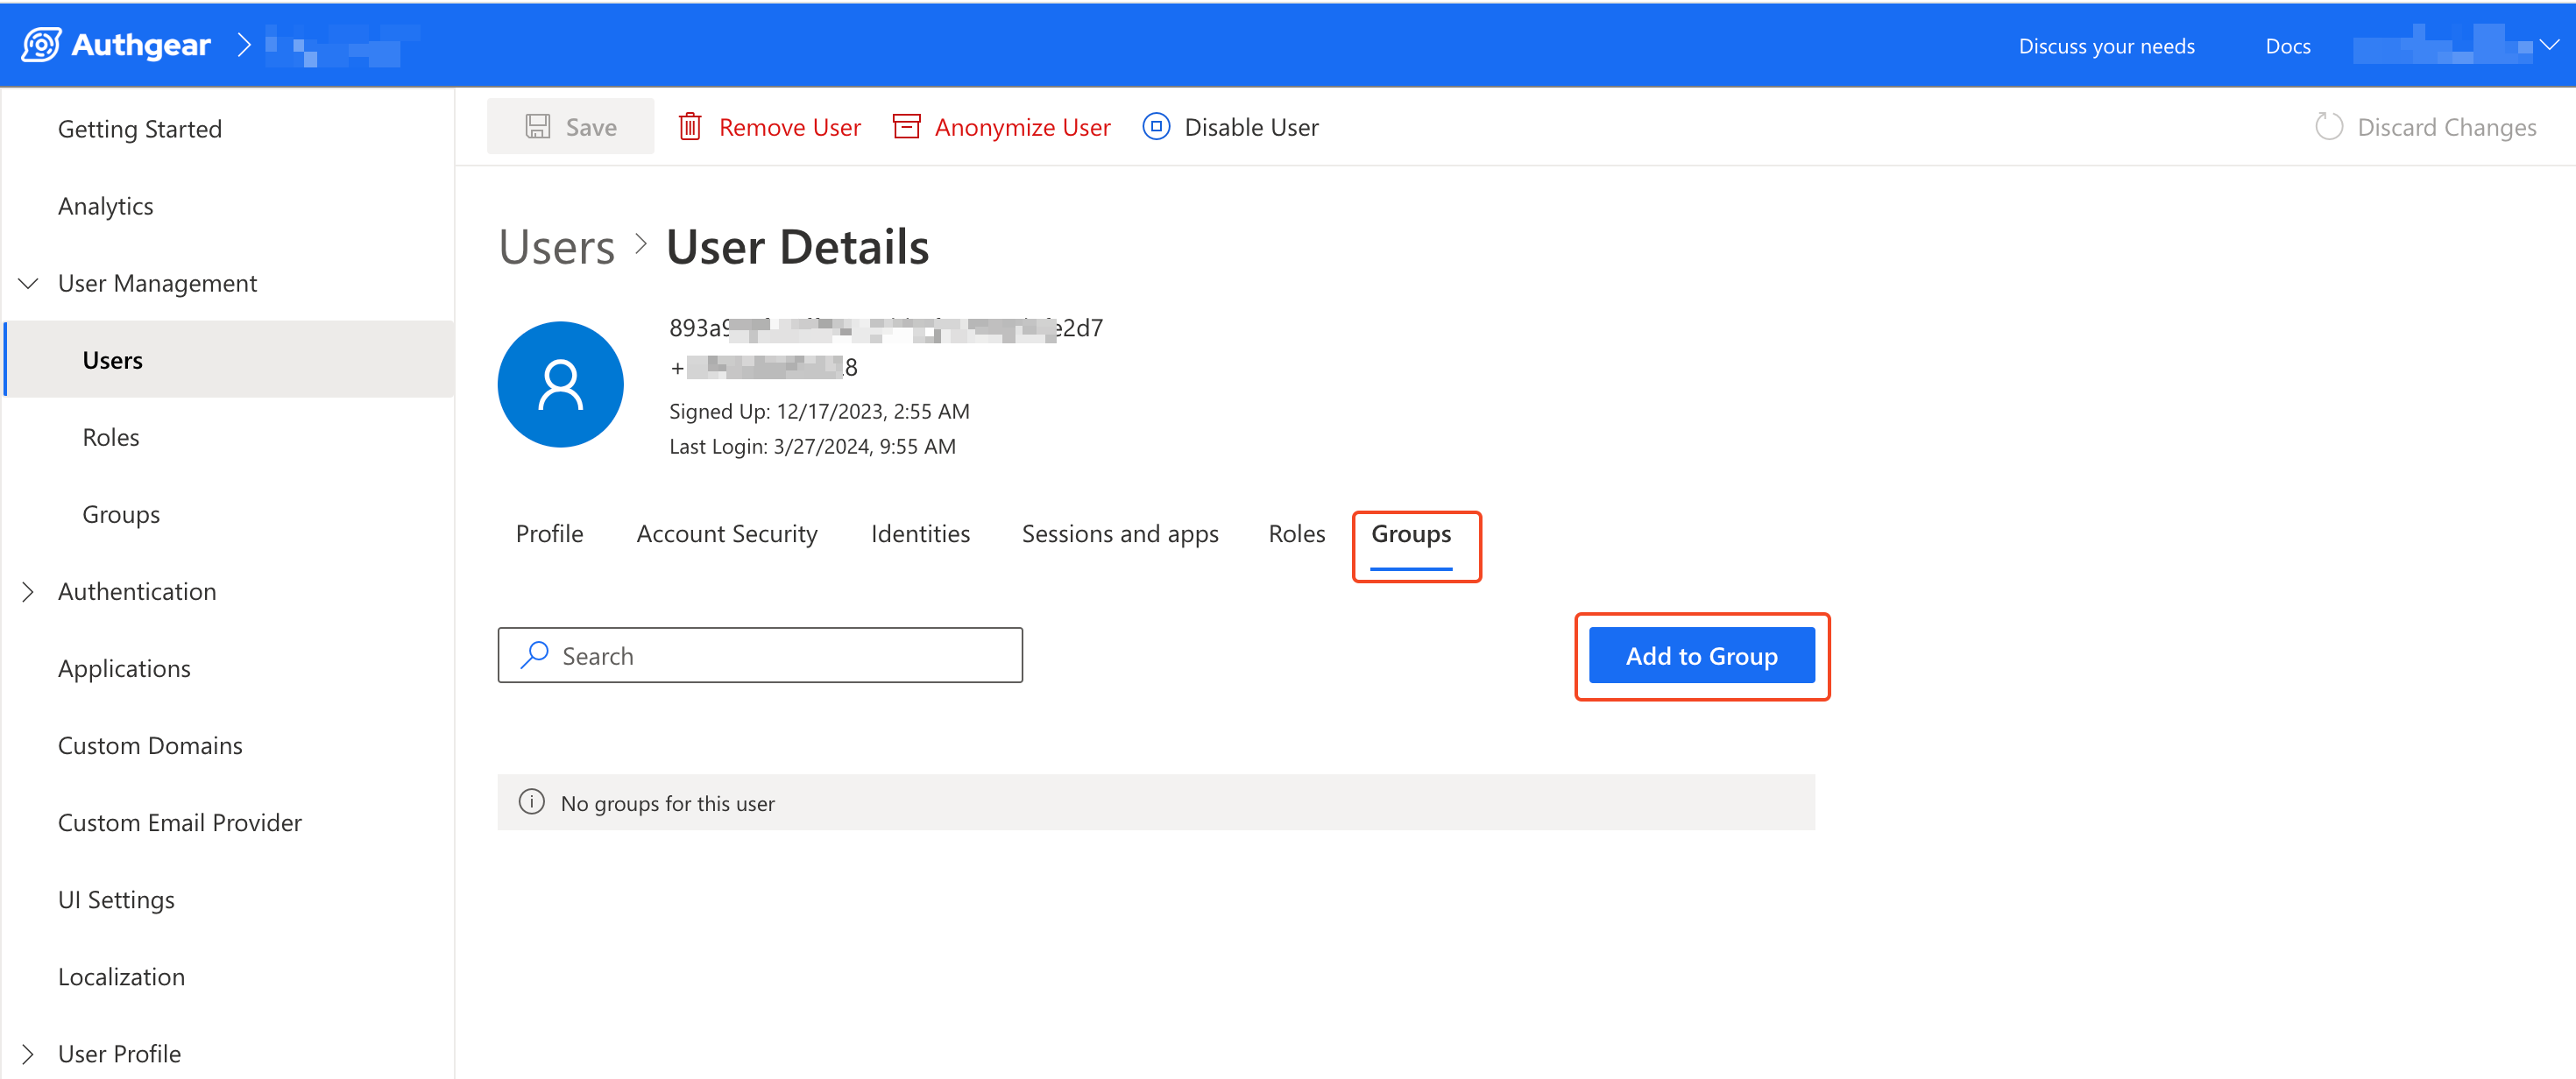
Select the group you wish to add the user to from the drop-down then click on Add.
5.2 Add Role to Group
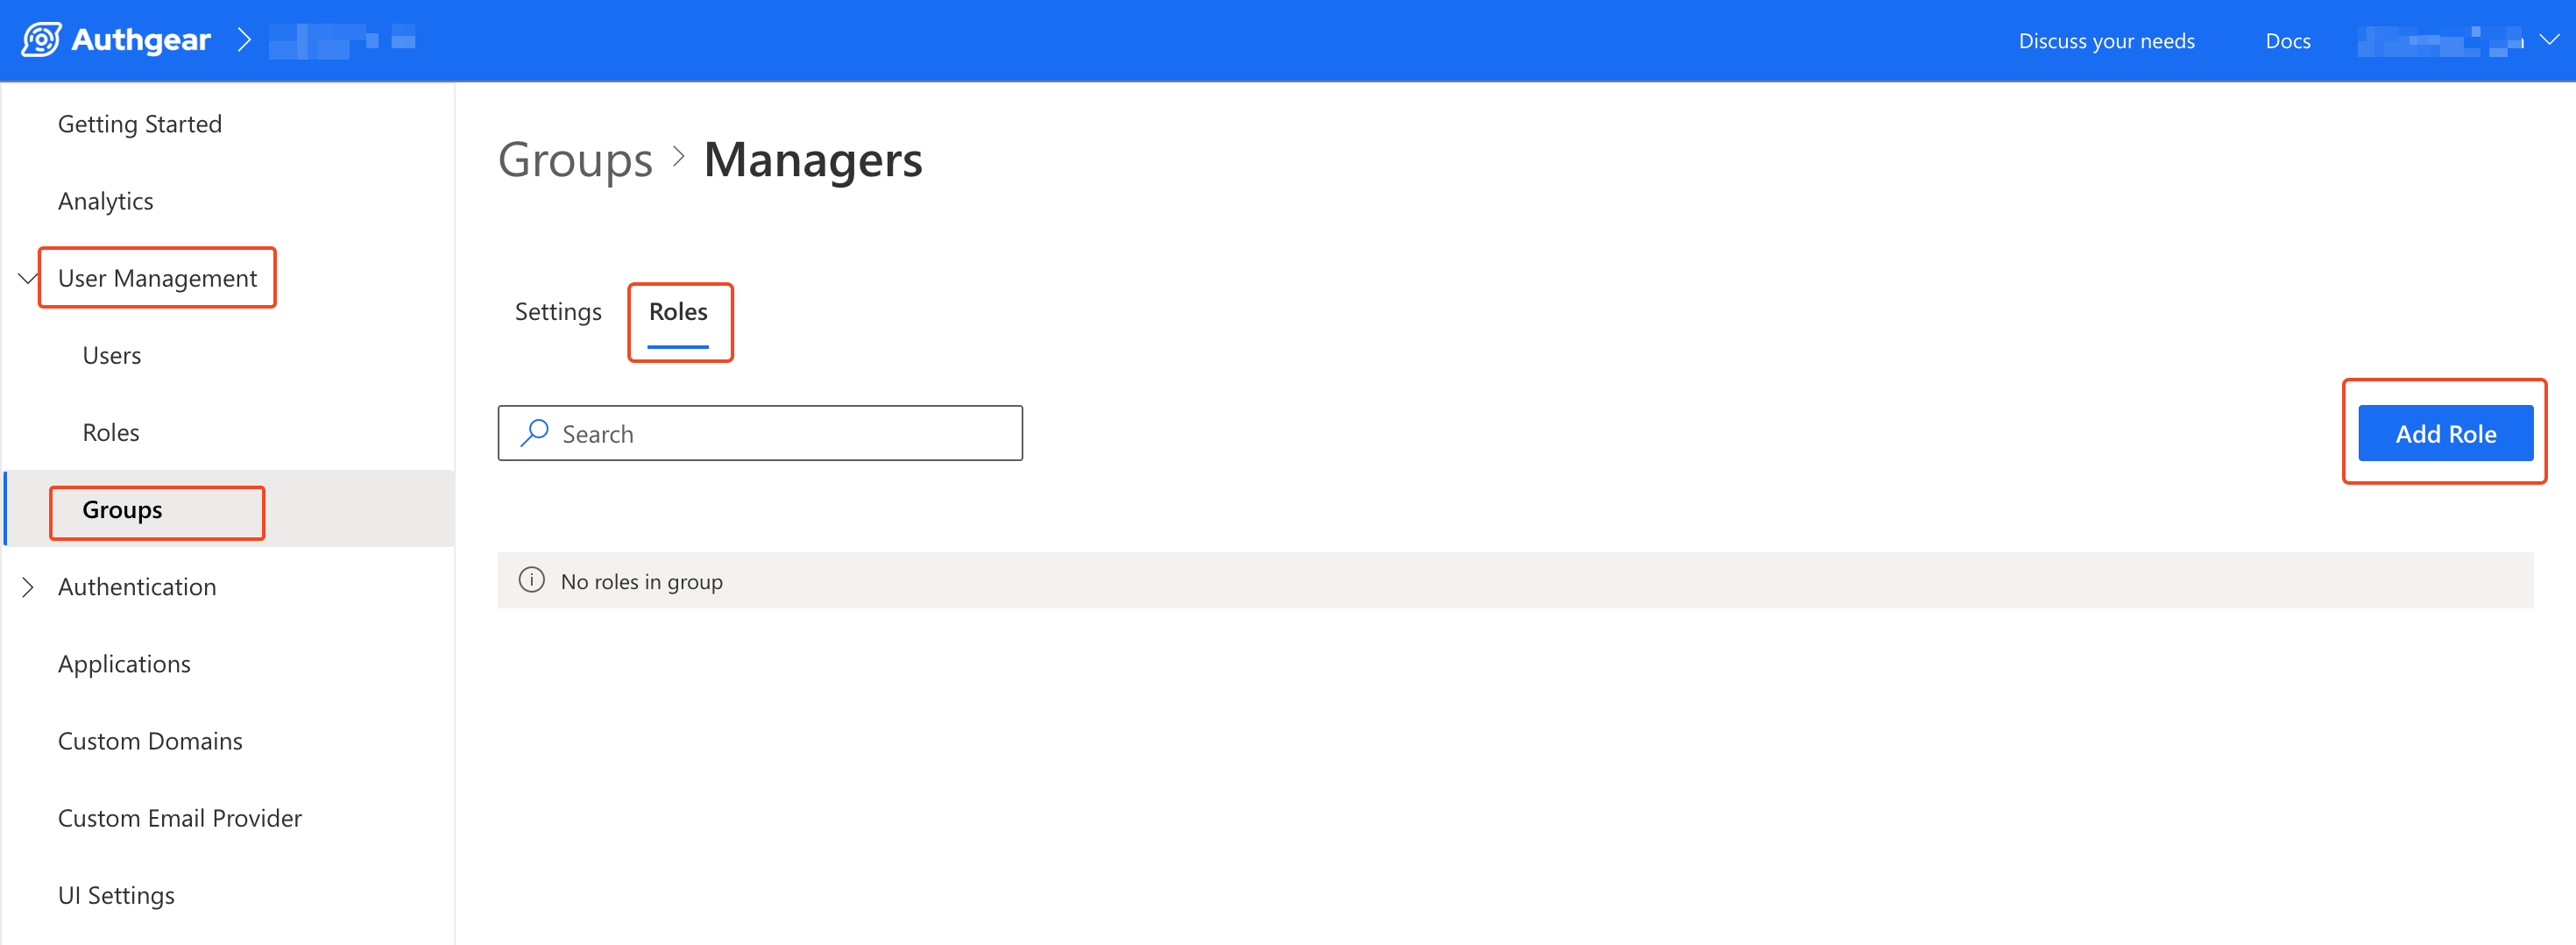
To add a role to a group, navigate to User Management > Groups then click on the group you wish to add roles to.
In the group details page, switch to the Roles tab, then click on the Add Role button.
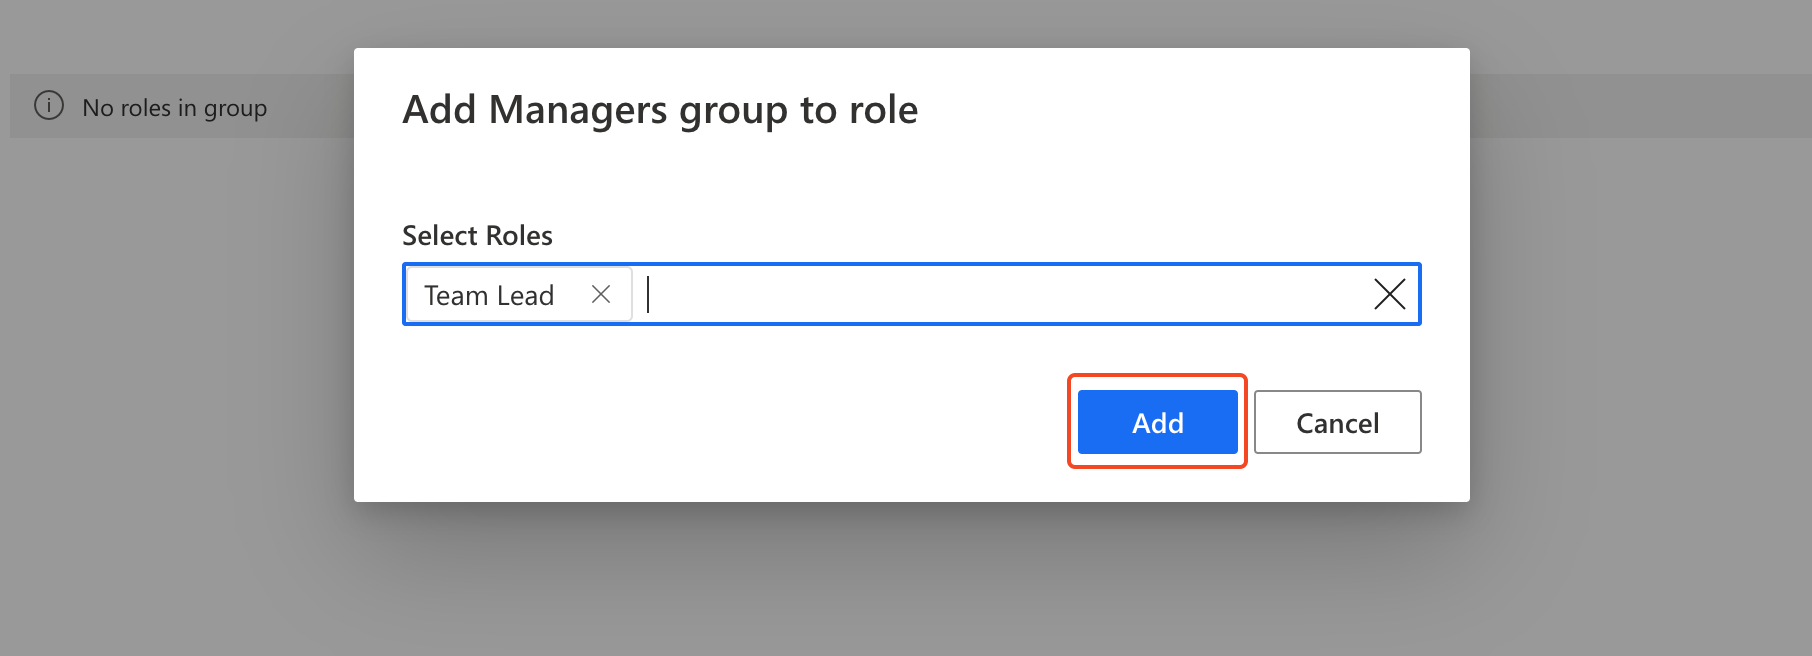
Select the roles you wish to add to the group from the drop-down then click on the Add button.
5.3 Update or Delete Group
To update an existing group, go to User Management > Groups and click on the group you wish to update. Modify the property you wish to update using the form in the group's Setting tab. Once you're done, click on Save to keep your changes.
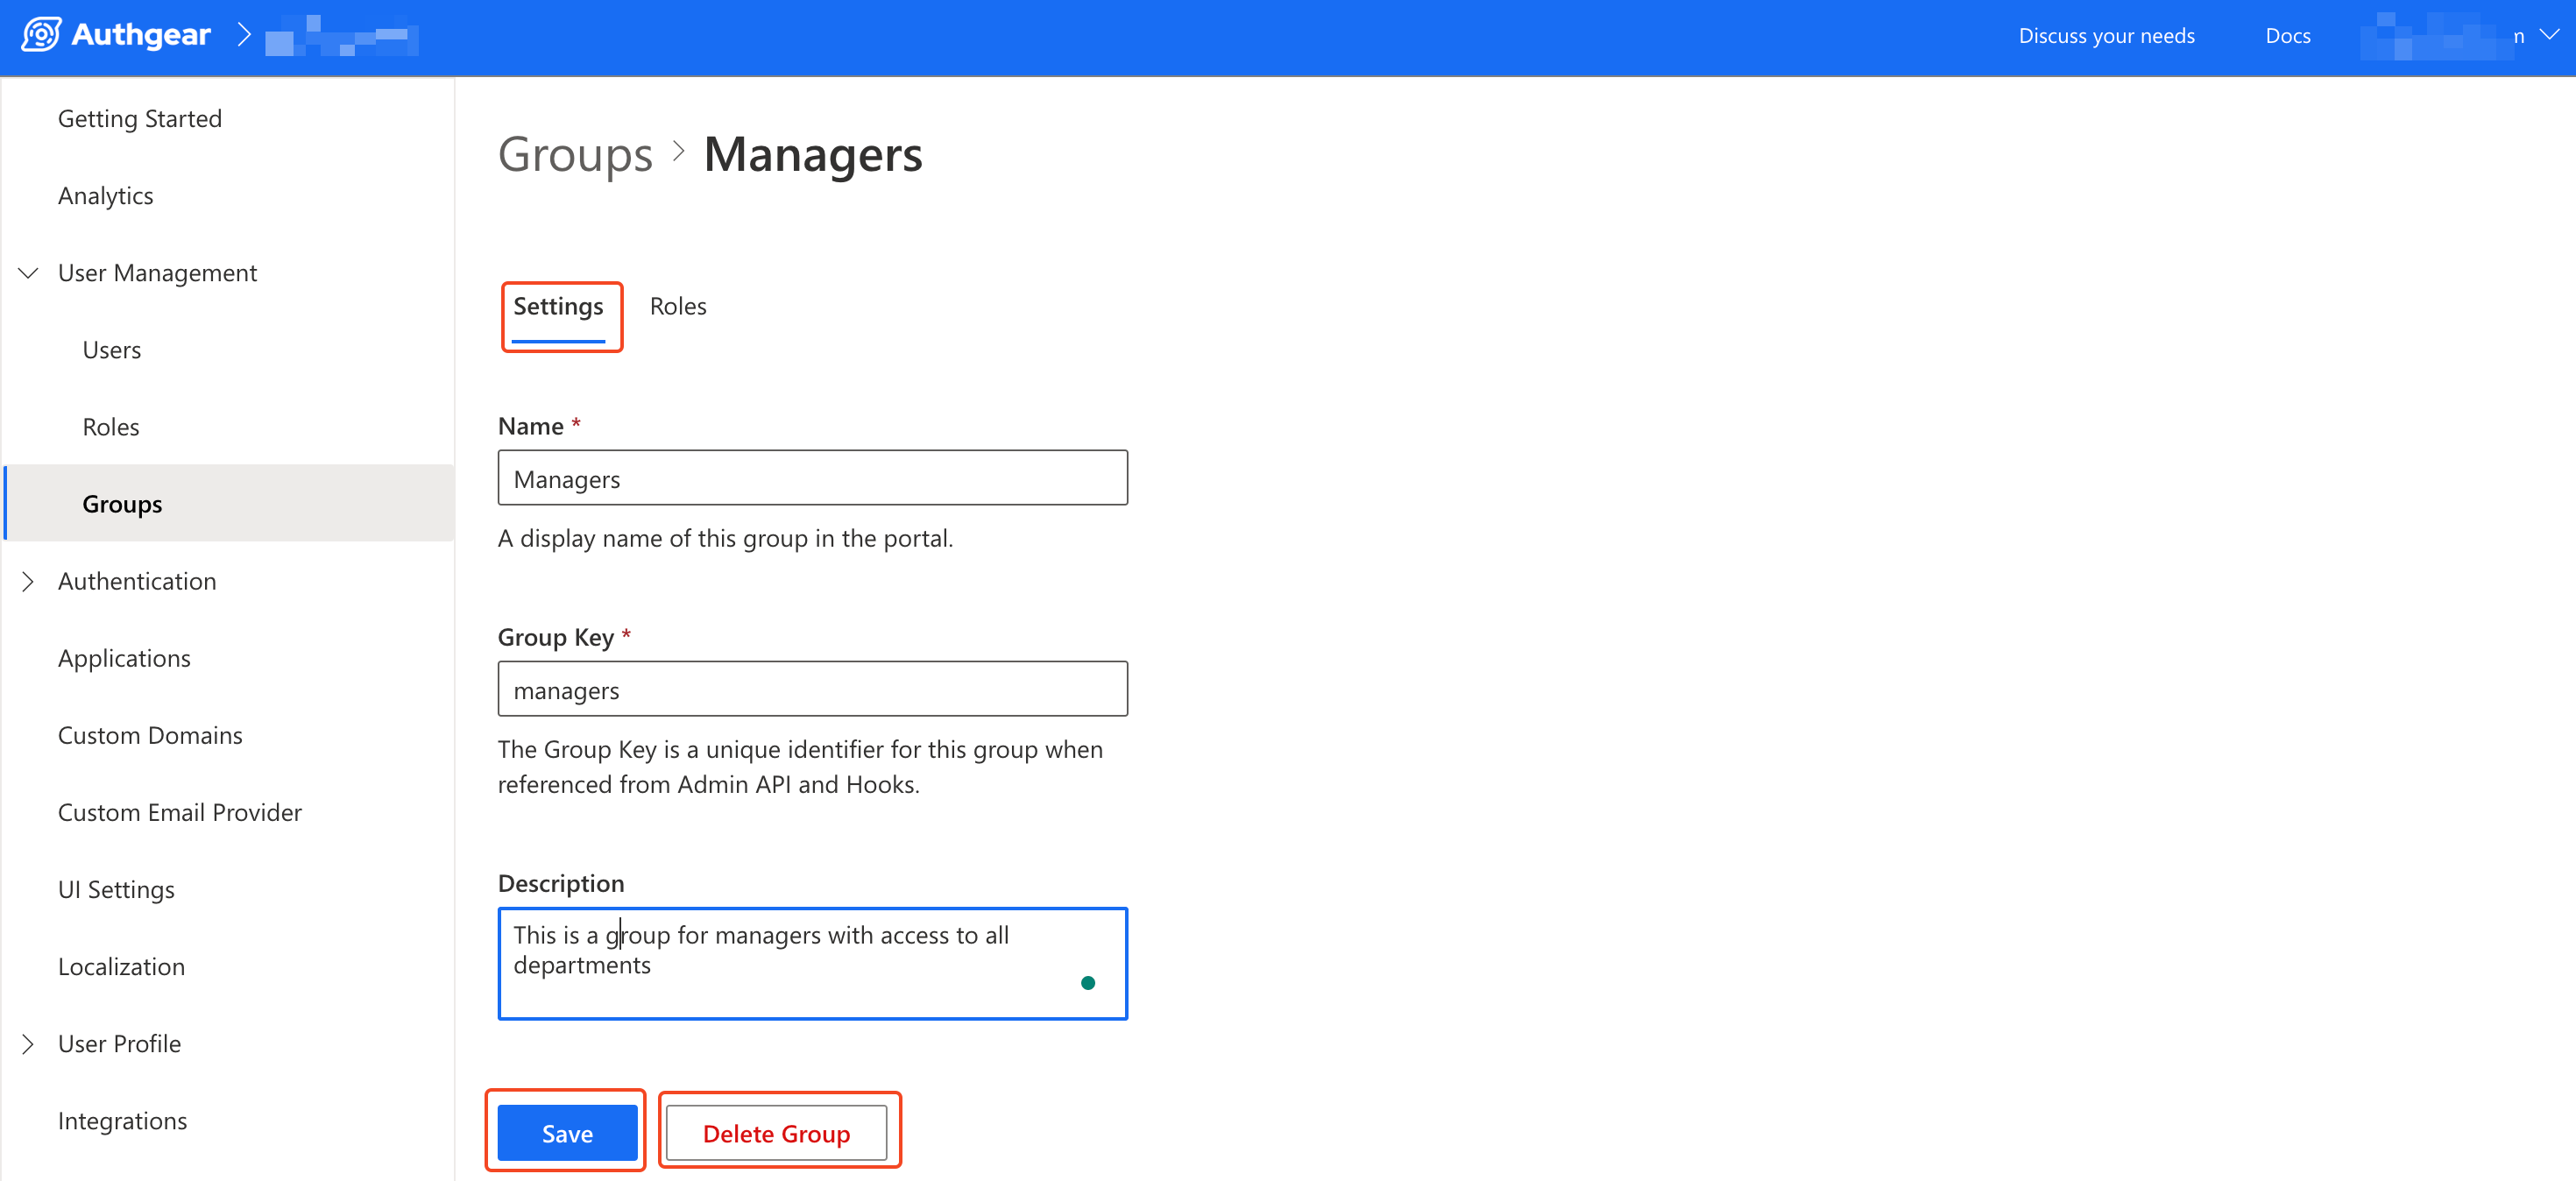
To delete an existing group, click on the Delete Group button once you're in the Settings tab for that group.